# spring-boot-demo-ureport2
> 本 demo 主要演示了 Spring Boot 项目如何快速集成 ureport2 实现任意复杂的中国式报表功能。
UReport2 是一款基于架构在 Spring 之上纯 Java 的高性能报表引擎,通过迭代单元格可以实现任意复杂的中国式报表。 在 UReport2 中,提供了全新的基于网页的报表设计器,可以在 Chrome、Firefox、Edge 等各种主流浏览器运行(IE 浏览器除外)。使用 UReport2,打开浏览器即可完成各种复杂报表的设计制作。
## 1. 主要代码
因为官方没有提供一个 starter 包,需要自己集成,这里使用 [pig](https://github.com/pig-mesh/pig) 作者 [冷冷同学](https://github.com/lltx) 开发的 starter 偷懒实现,这个 starter 不仅支持单机环境的配置,同时支持集群环境。
### 1.1. 单机使用
#### 1.1.1. `pom.xml` 新增依赖
```xml
com.pig4cloud.plugin
ureport-spring-boot-starter
0.0.1
```
#### 1.1.2. `application.yml` 修改配置文件
```yaml
server:
port: 8080
servlet:
context-path: /demo
spring:
datasource:
url: jdbc:mysql://127.0.0.1:3306/spring-boot-demo?useUnicode=true&characterEncoding=UTF-8&useSSL=false&autoReconnect=true&failOverReadOnly=false&serverTimezone=GMT%2B8
username: root
password: root
driver-class-name: com.mysql.cj.jdbc.Driver
ureport:
debug: false
disableFileProvider: false
disableHttpSessionReportCache: true
# 单机模式,本地路径需要提前创建
fileStoreDir: '/Users/yk.shen/Desktop/ureport2'
```
#### 1.1.3. 新增一个内部数据源
```java
@Component
public class InnerDatasource implements BuildinDatasource {
@Autowired
private DataSource datasource;
@Override
public String name() {
return "内部数据源";
}
@SneakyThrows
@Override
public Connection getConnection() {
return datasource.getConnection();
}
}
```
#### 1.1.4. 使用 `doc/sql/t_user_ureport2.sql` 初始化数据
```mysql
DROP TABLE IF EXISTS `t_user_ureport2`;
CREATE TABLE `t_user_ureport2` (
`id` bigint(13) unsigned NOT NULL AUTO_INCREMENT COMMENT '主键',
`name` varchar(255) COLLATE utf8mb4_bin NOT NULL COMMENT '姓名',
`create_time` timestamp NOT NULL DEFAULT CURRENT_TIMESTAMP ON UPDATE CURRENT_TIMESTAMP COMMENT '创建时间',
`status` tinyint(4) NOT NULL COMMENT '是否禁用',
PRIMARY KEY (`id`)
) ENGINE=InnoDB AUTO_INCREMENT=5 DEFAULT CHARSET=utf8mb4 COLLATE=utf8mb4_bin;
BEGIN;
INSERT INTO `t_user_ureport2` VALUES (1, '测试人员 1', '2020-10-22 09:01:58', 1);
INSERT INTO `t_user_ureport2` VALUES (2, '测试人员 2', '2020-10-22 09:02:00', 0);
INSERT INTO `t_user_ureport2` VALUES (3, '测试人员 3', '2020-10-23 03:02:00', 1);
INSERT INTO `t_user_ureport2` VALUES (4, '测试人员 4', '2020-10-23 23:02:00', 1);
INSERT INTO `t_user_ureport2` VALUES (5, '测试人员 5', '2020-10-23 23:02:00', 1);
INSERT INTO `t_user_ureport2` VALUES (6, '测试人员 6', '2020-10-24 11:02:00', 0);
INSERT INTO `t_user_ureport2` VALUES (7, '测试人员 7', '2020-10-24 20:02:00', 0);
INSERT INTO `t_user_ureport2` VALUES (8, '测试人员 8', '2020-10-25 08:02:00', 1);
INSERT INTO `t_user_ureport2` VALUES (9, '测试人员 9', '2020-10-25 09:02:00', 1);
INSERT INTO `t_user_ureport2` VALUES (10, '测试人员 10', '2020-10-25 13:02:00', 1);
INSERT INTO `t_user_ureport2` VALUES (11, '测试人员 11', '2020-10-26 21:02:00', 0);
INSERT INTO `t_user_ureport2` VALUES (12, '测试人员 12', '2020-10-26 23:02:00', 1);
INSERT INTO `t_user_ureport2` VALUES (13, '测试人员 13', '2020-10-26 23:02:00', 1);
COMMIT;
```
#### 1.1.5. 访问报表设计器
http://127.0.0.1:8080/demo/ureport/designer

#### 1.1.6. 开始设计
##### 1.1.6.1. 选择数据源
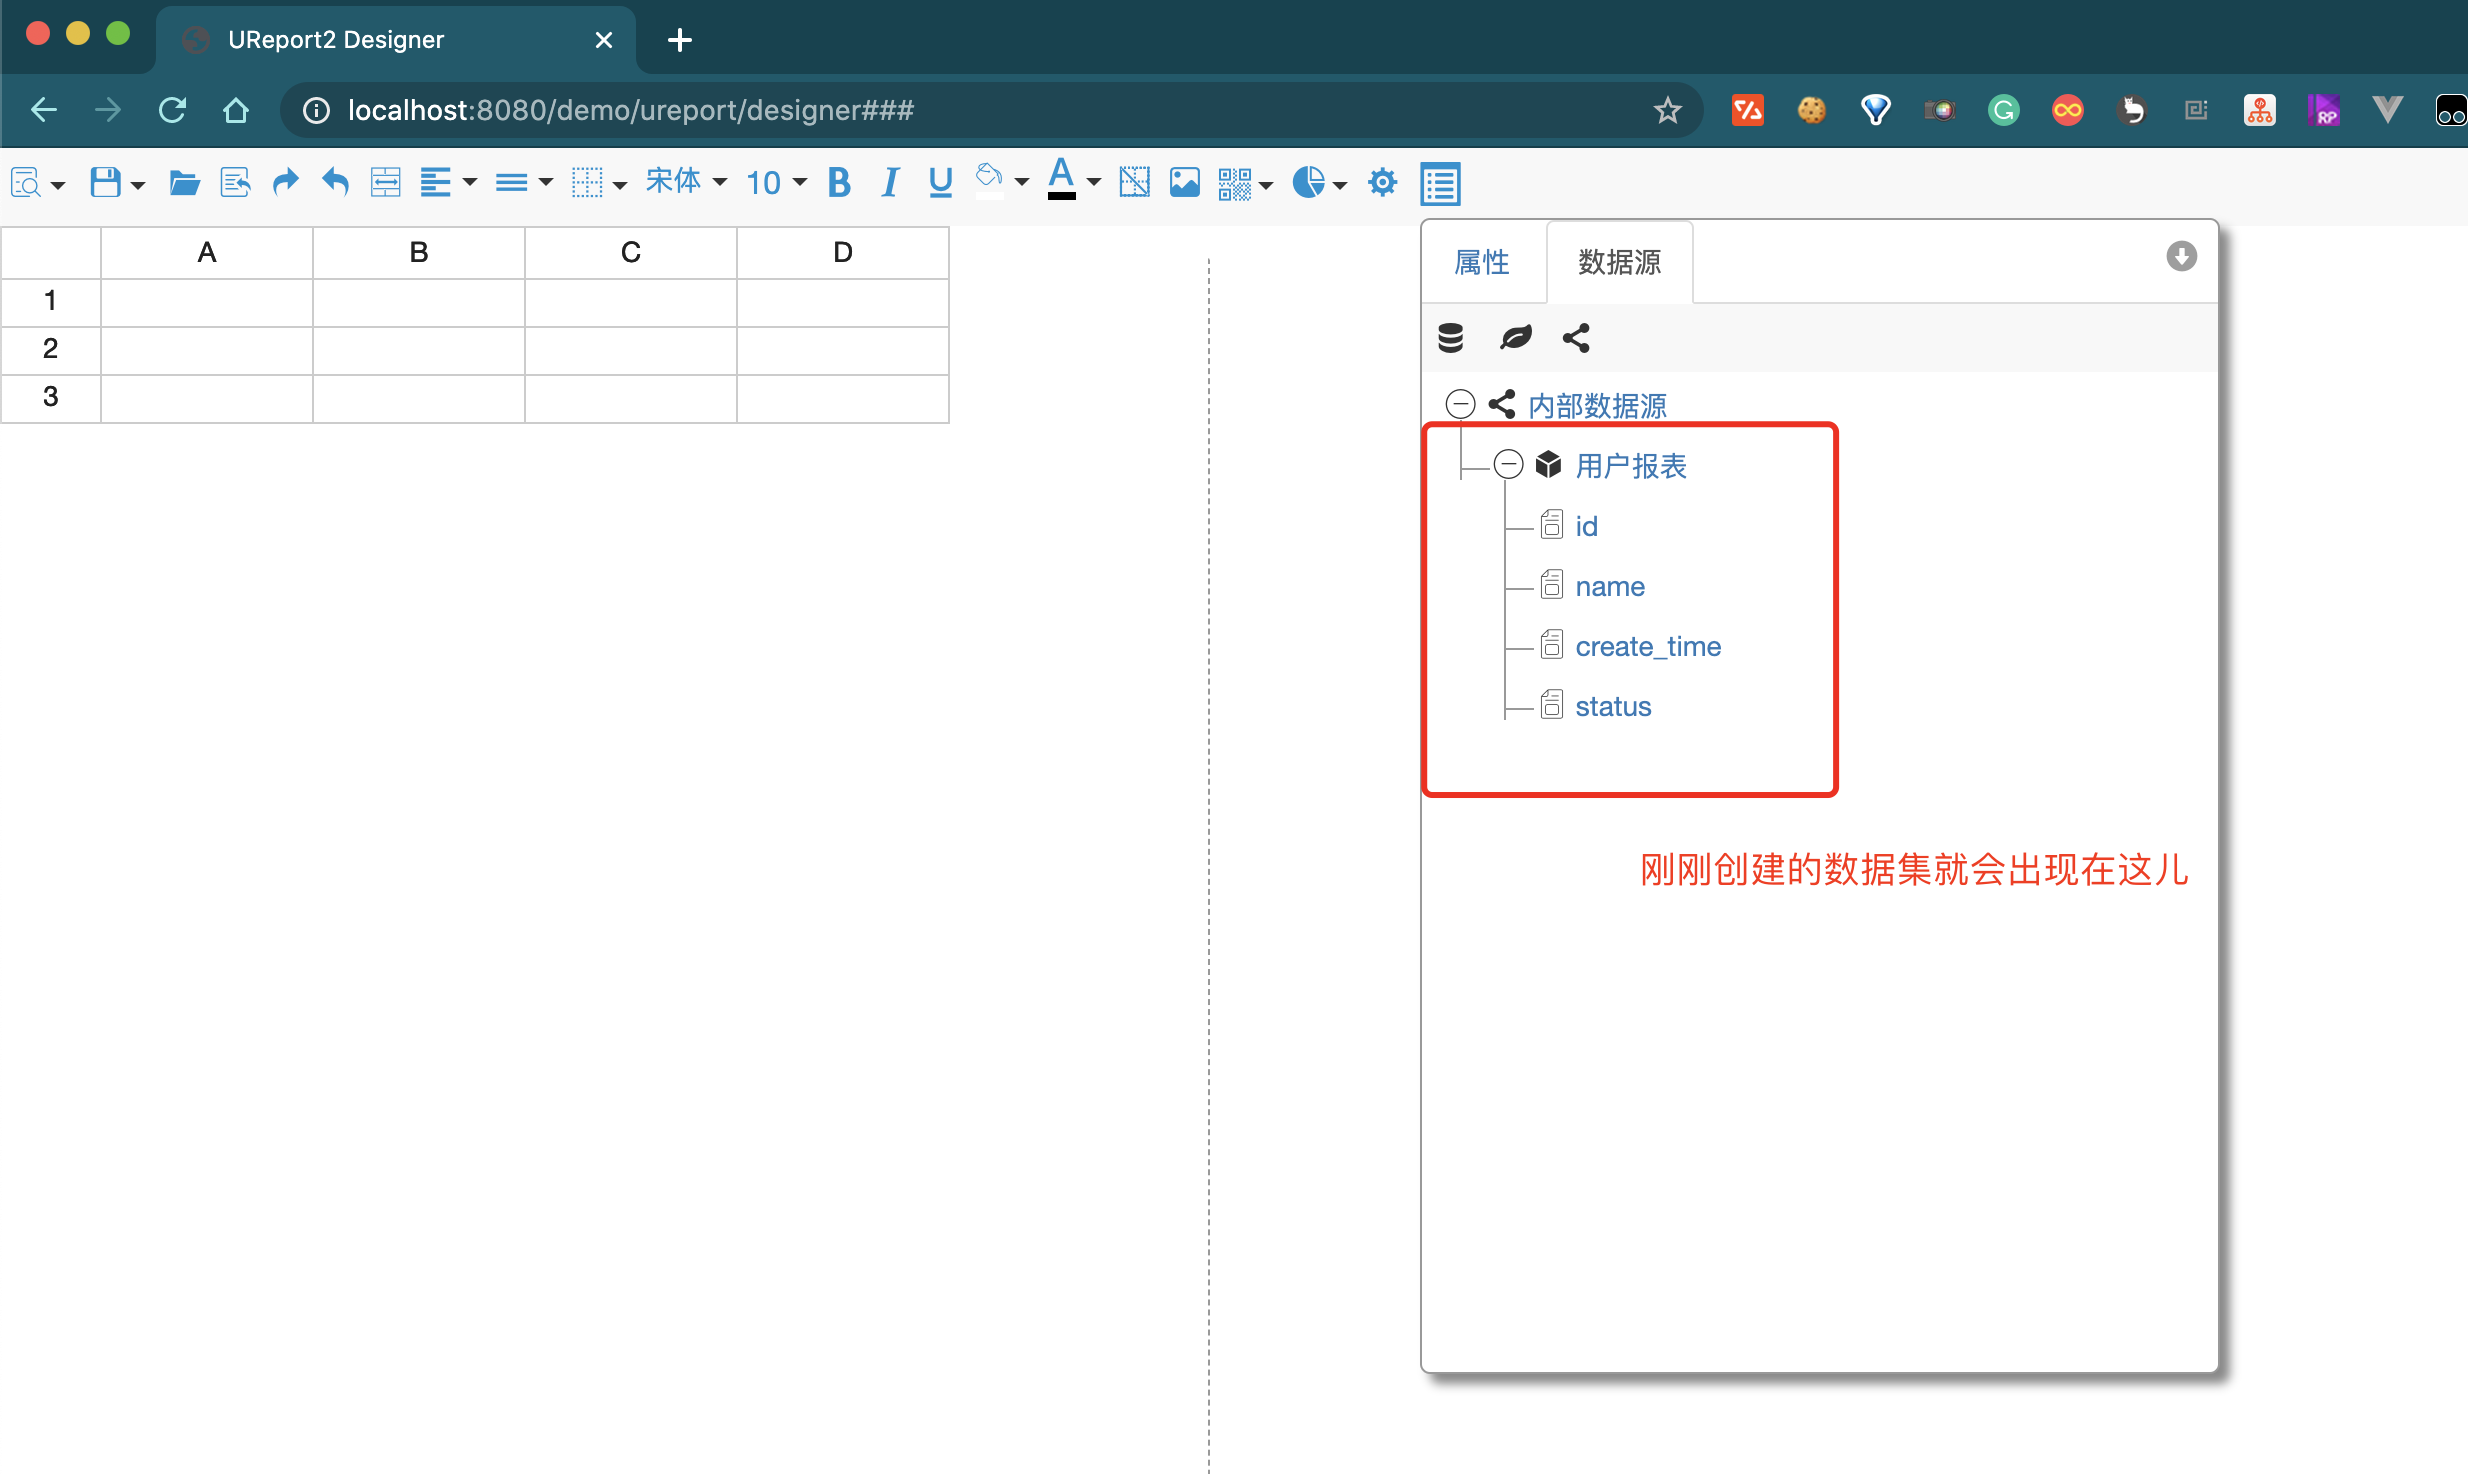
这里就需要使用到上面步骤 1.1.3 创建的内部数据源如图

选择数据源
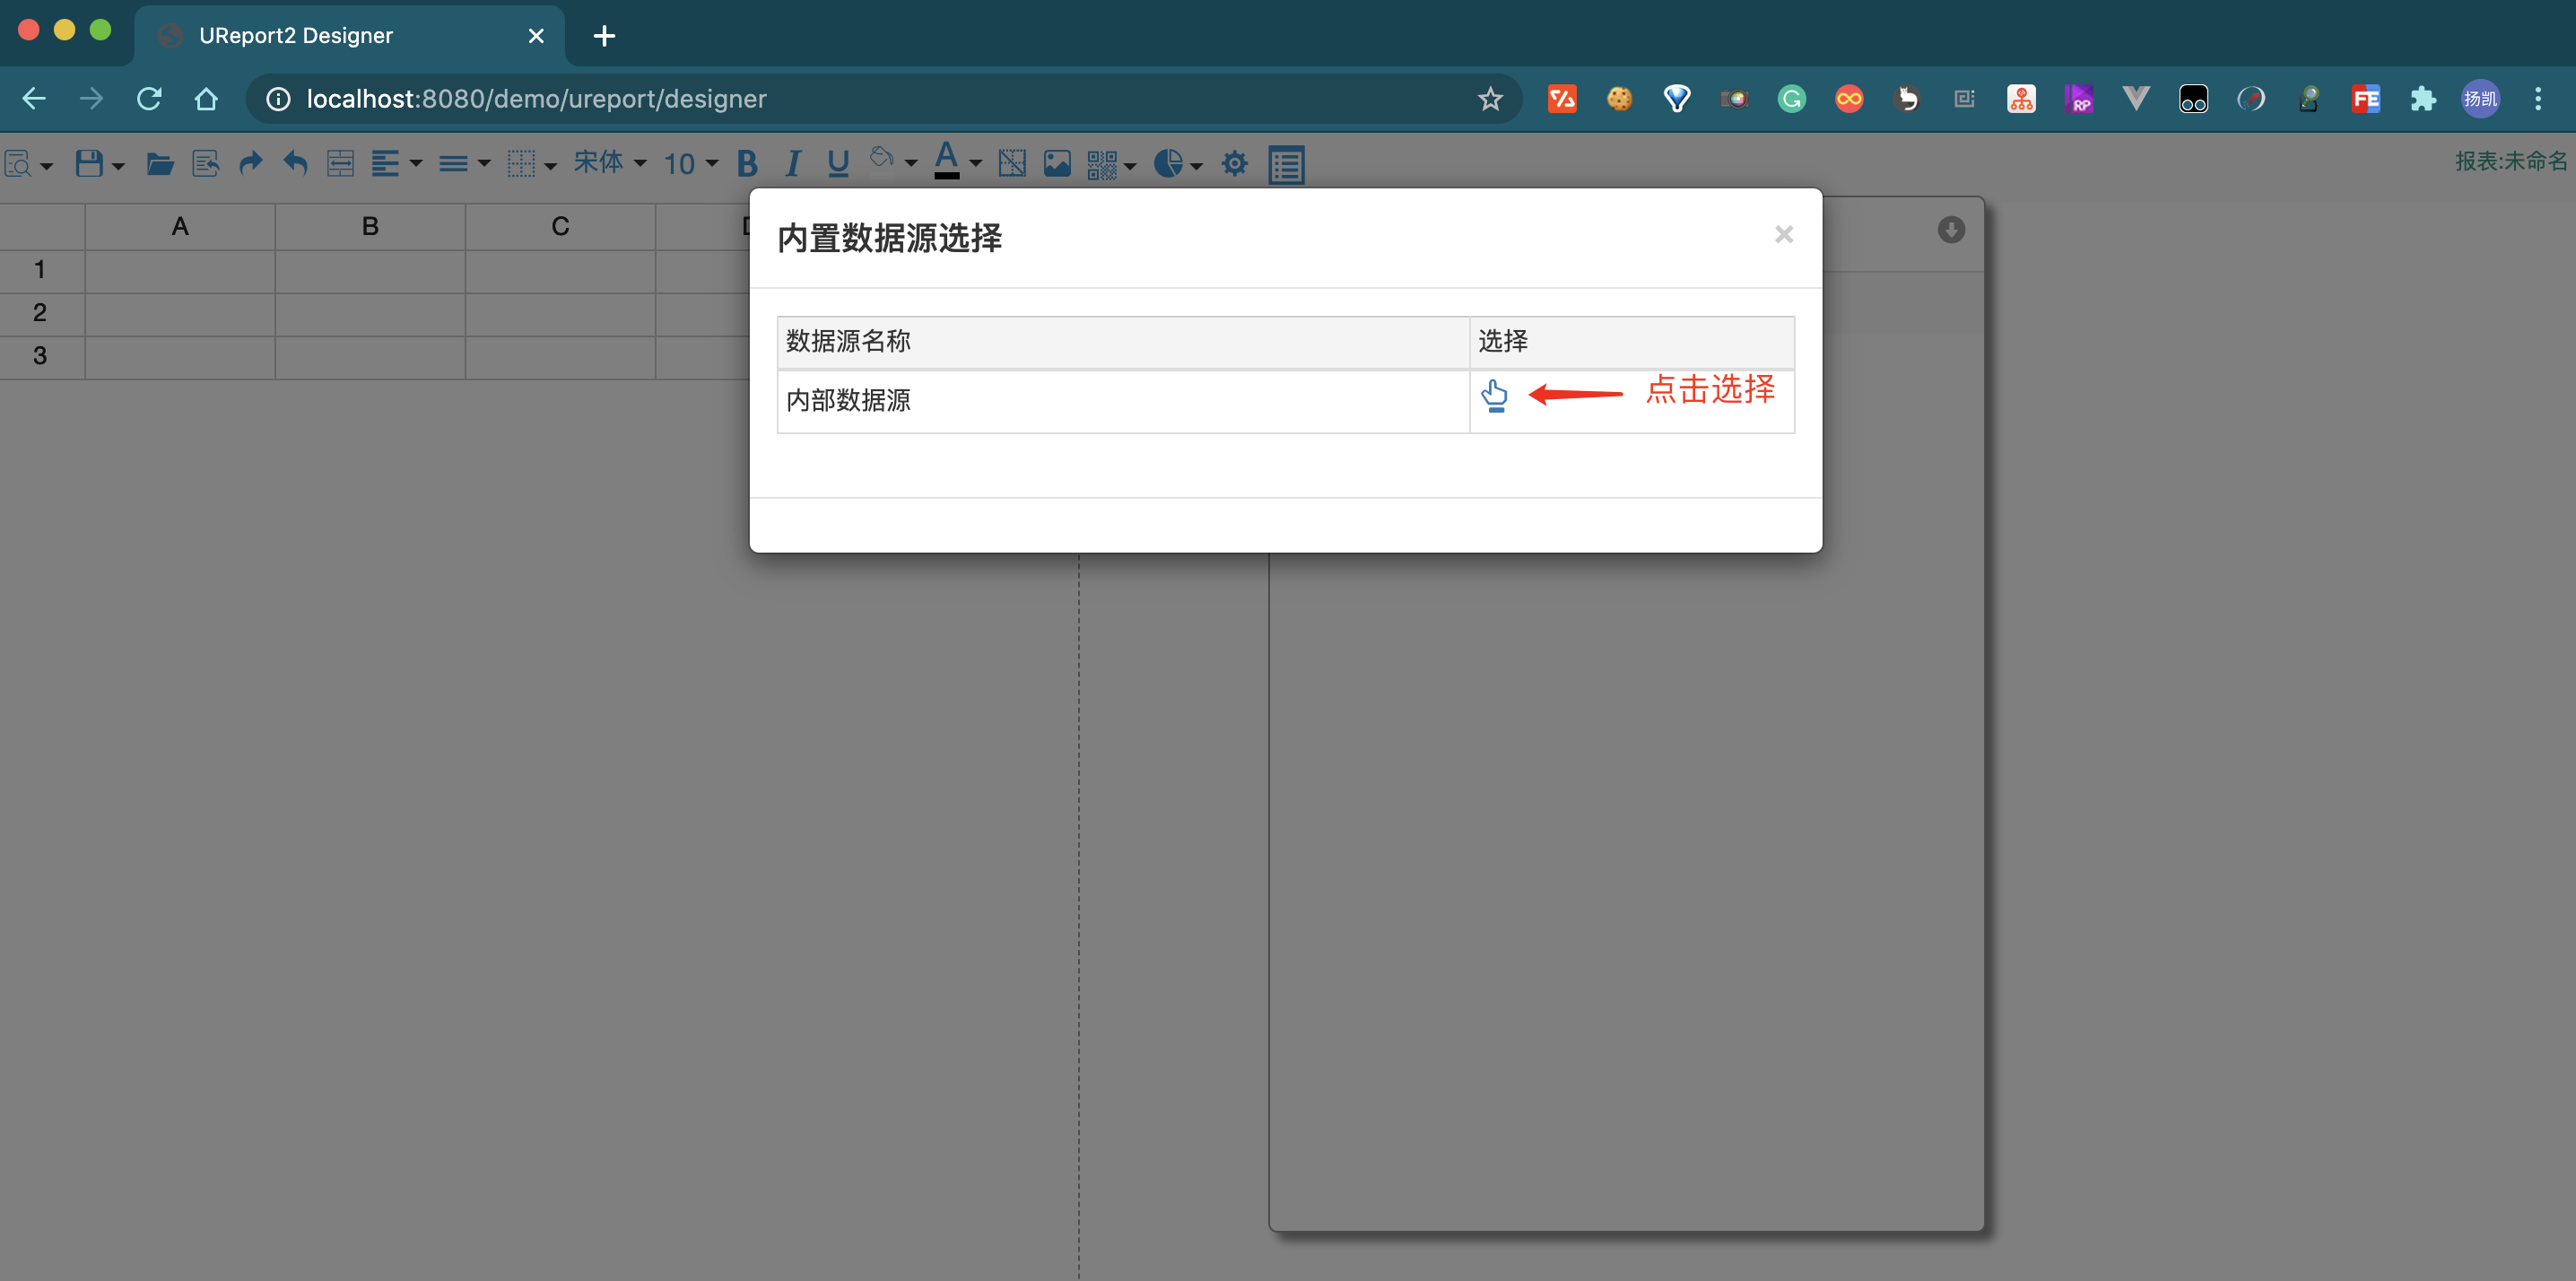
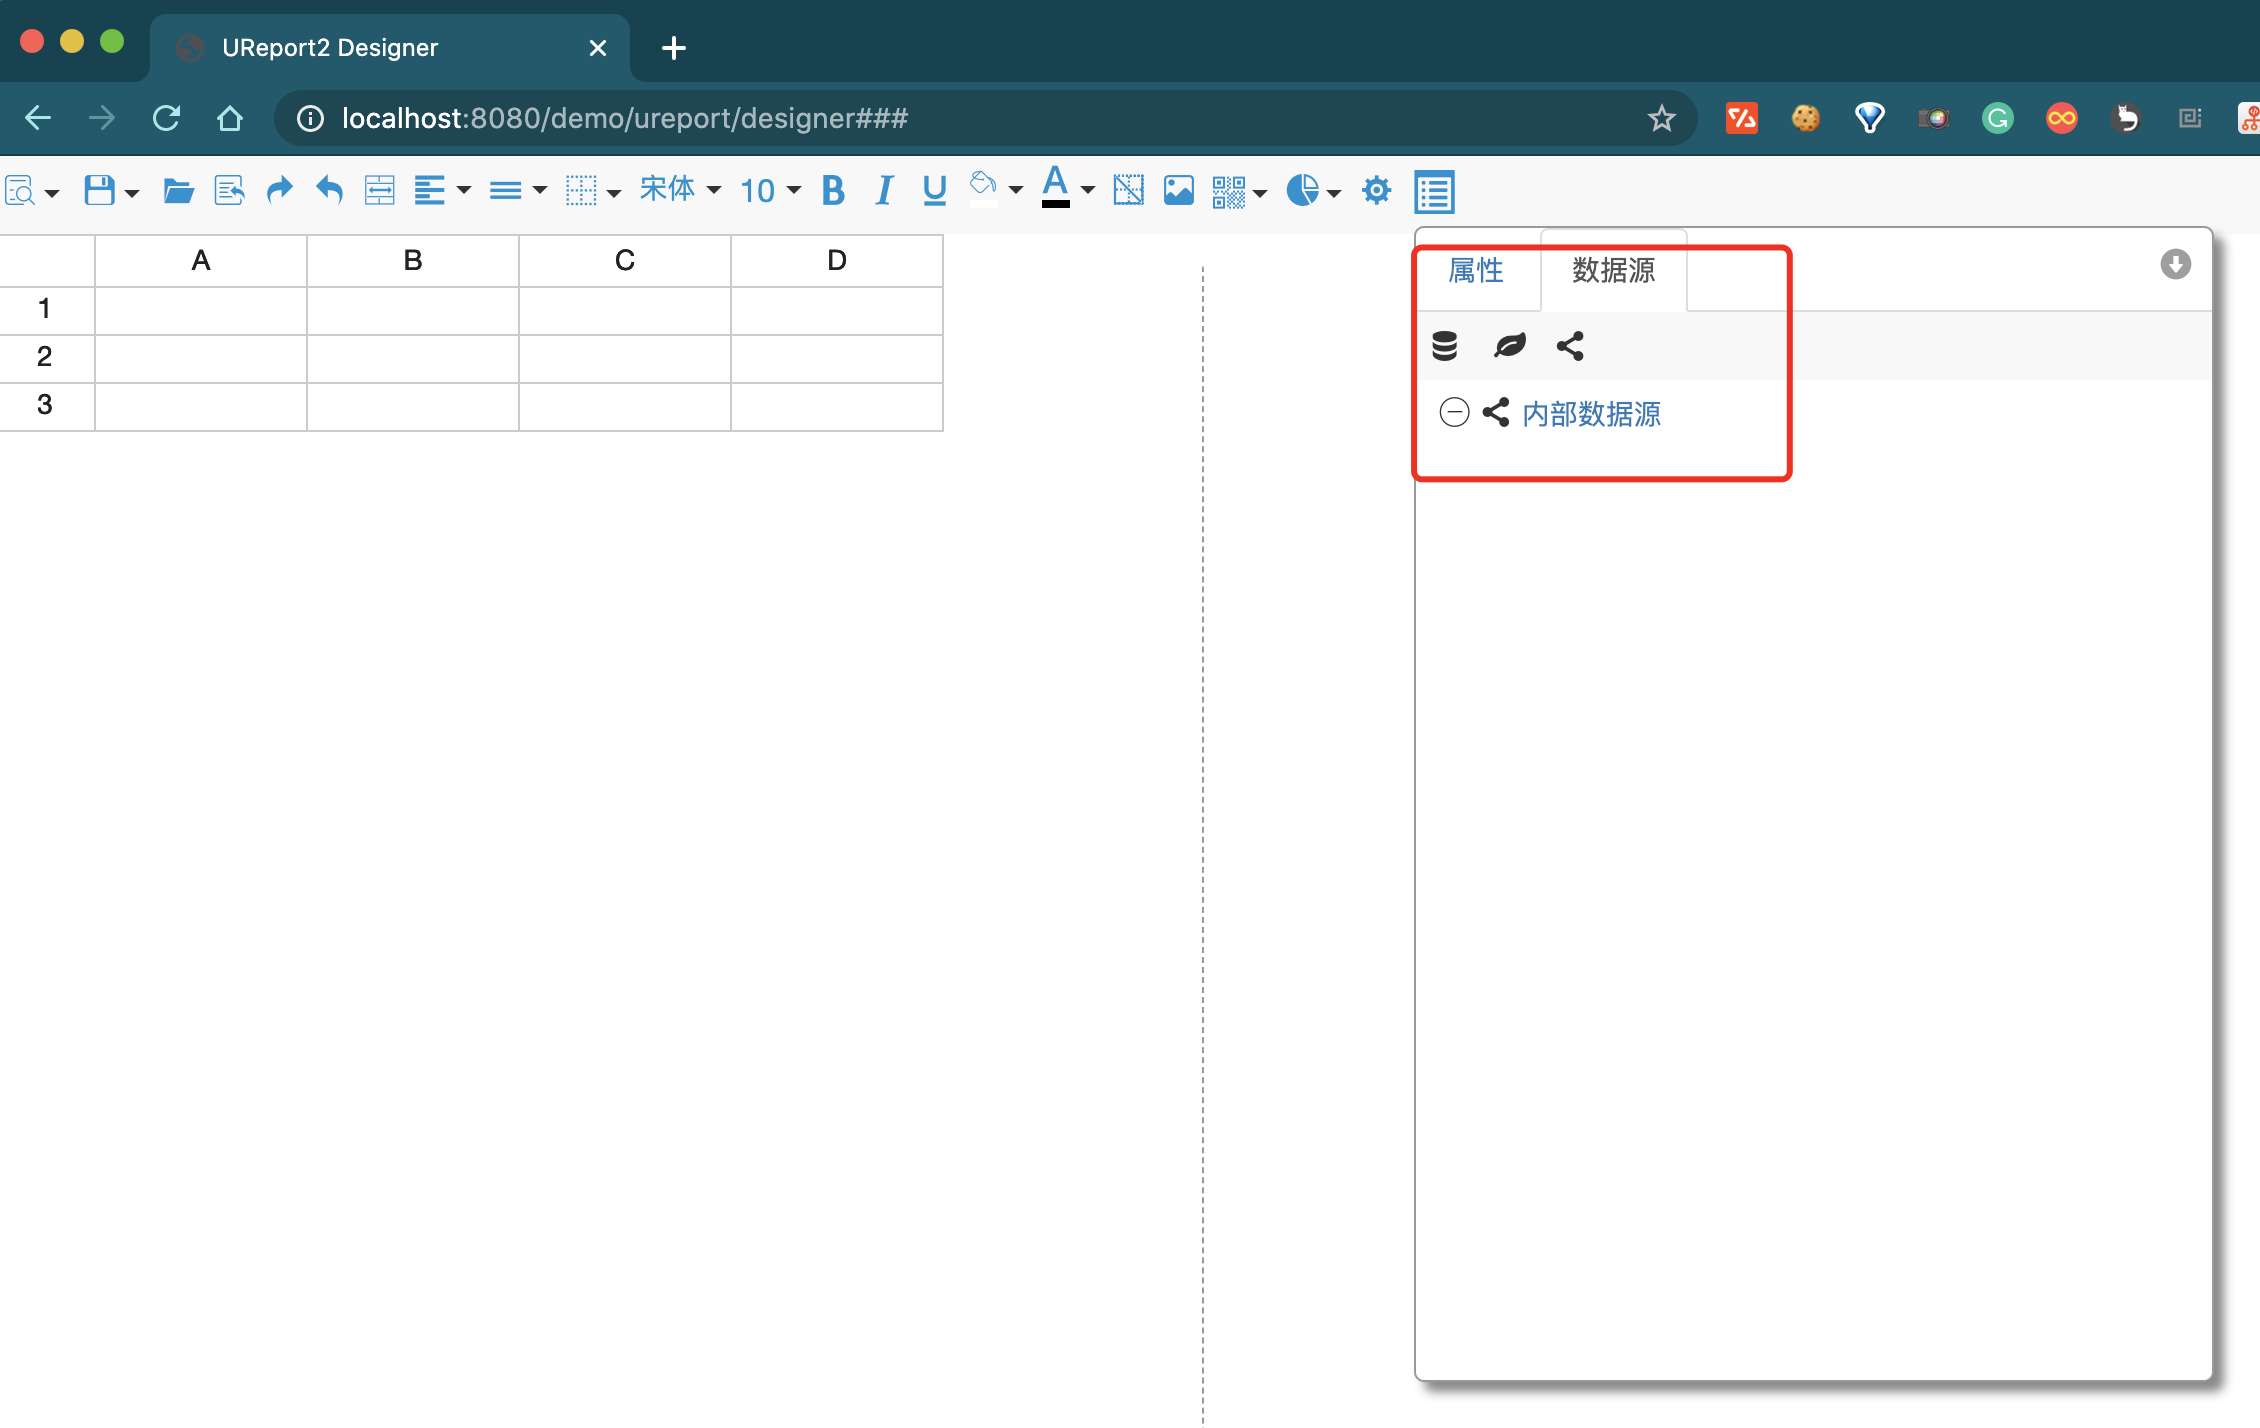
此时列表里就会出现数据源
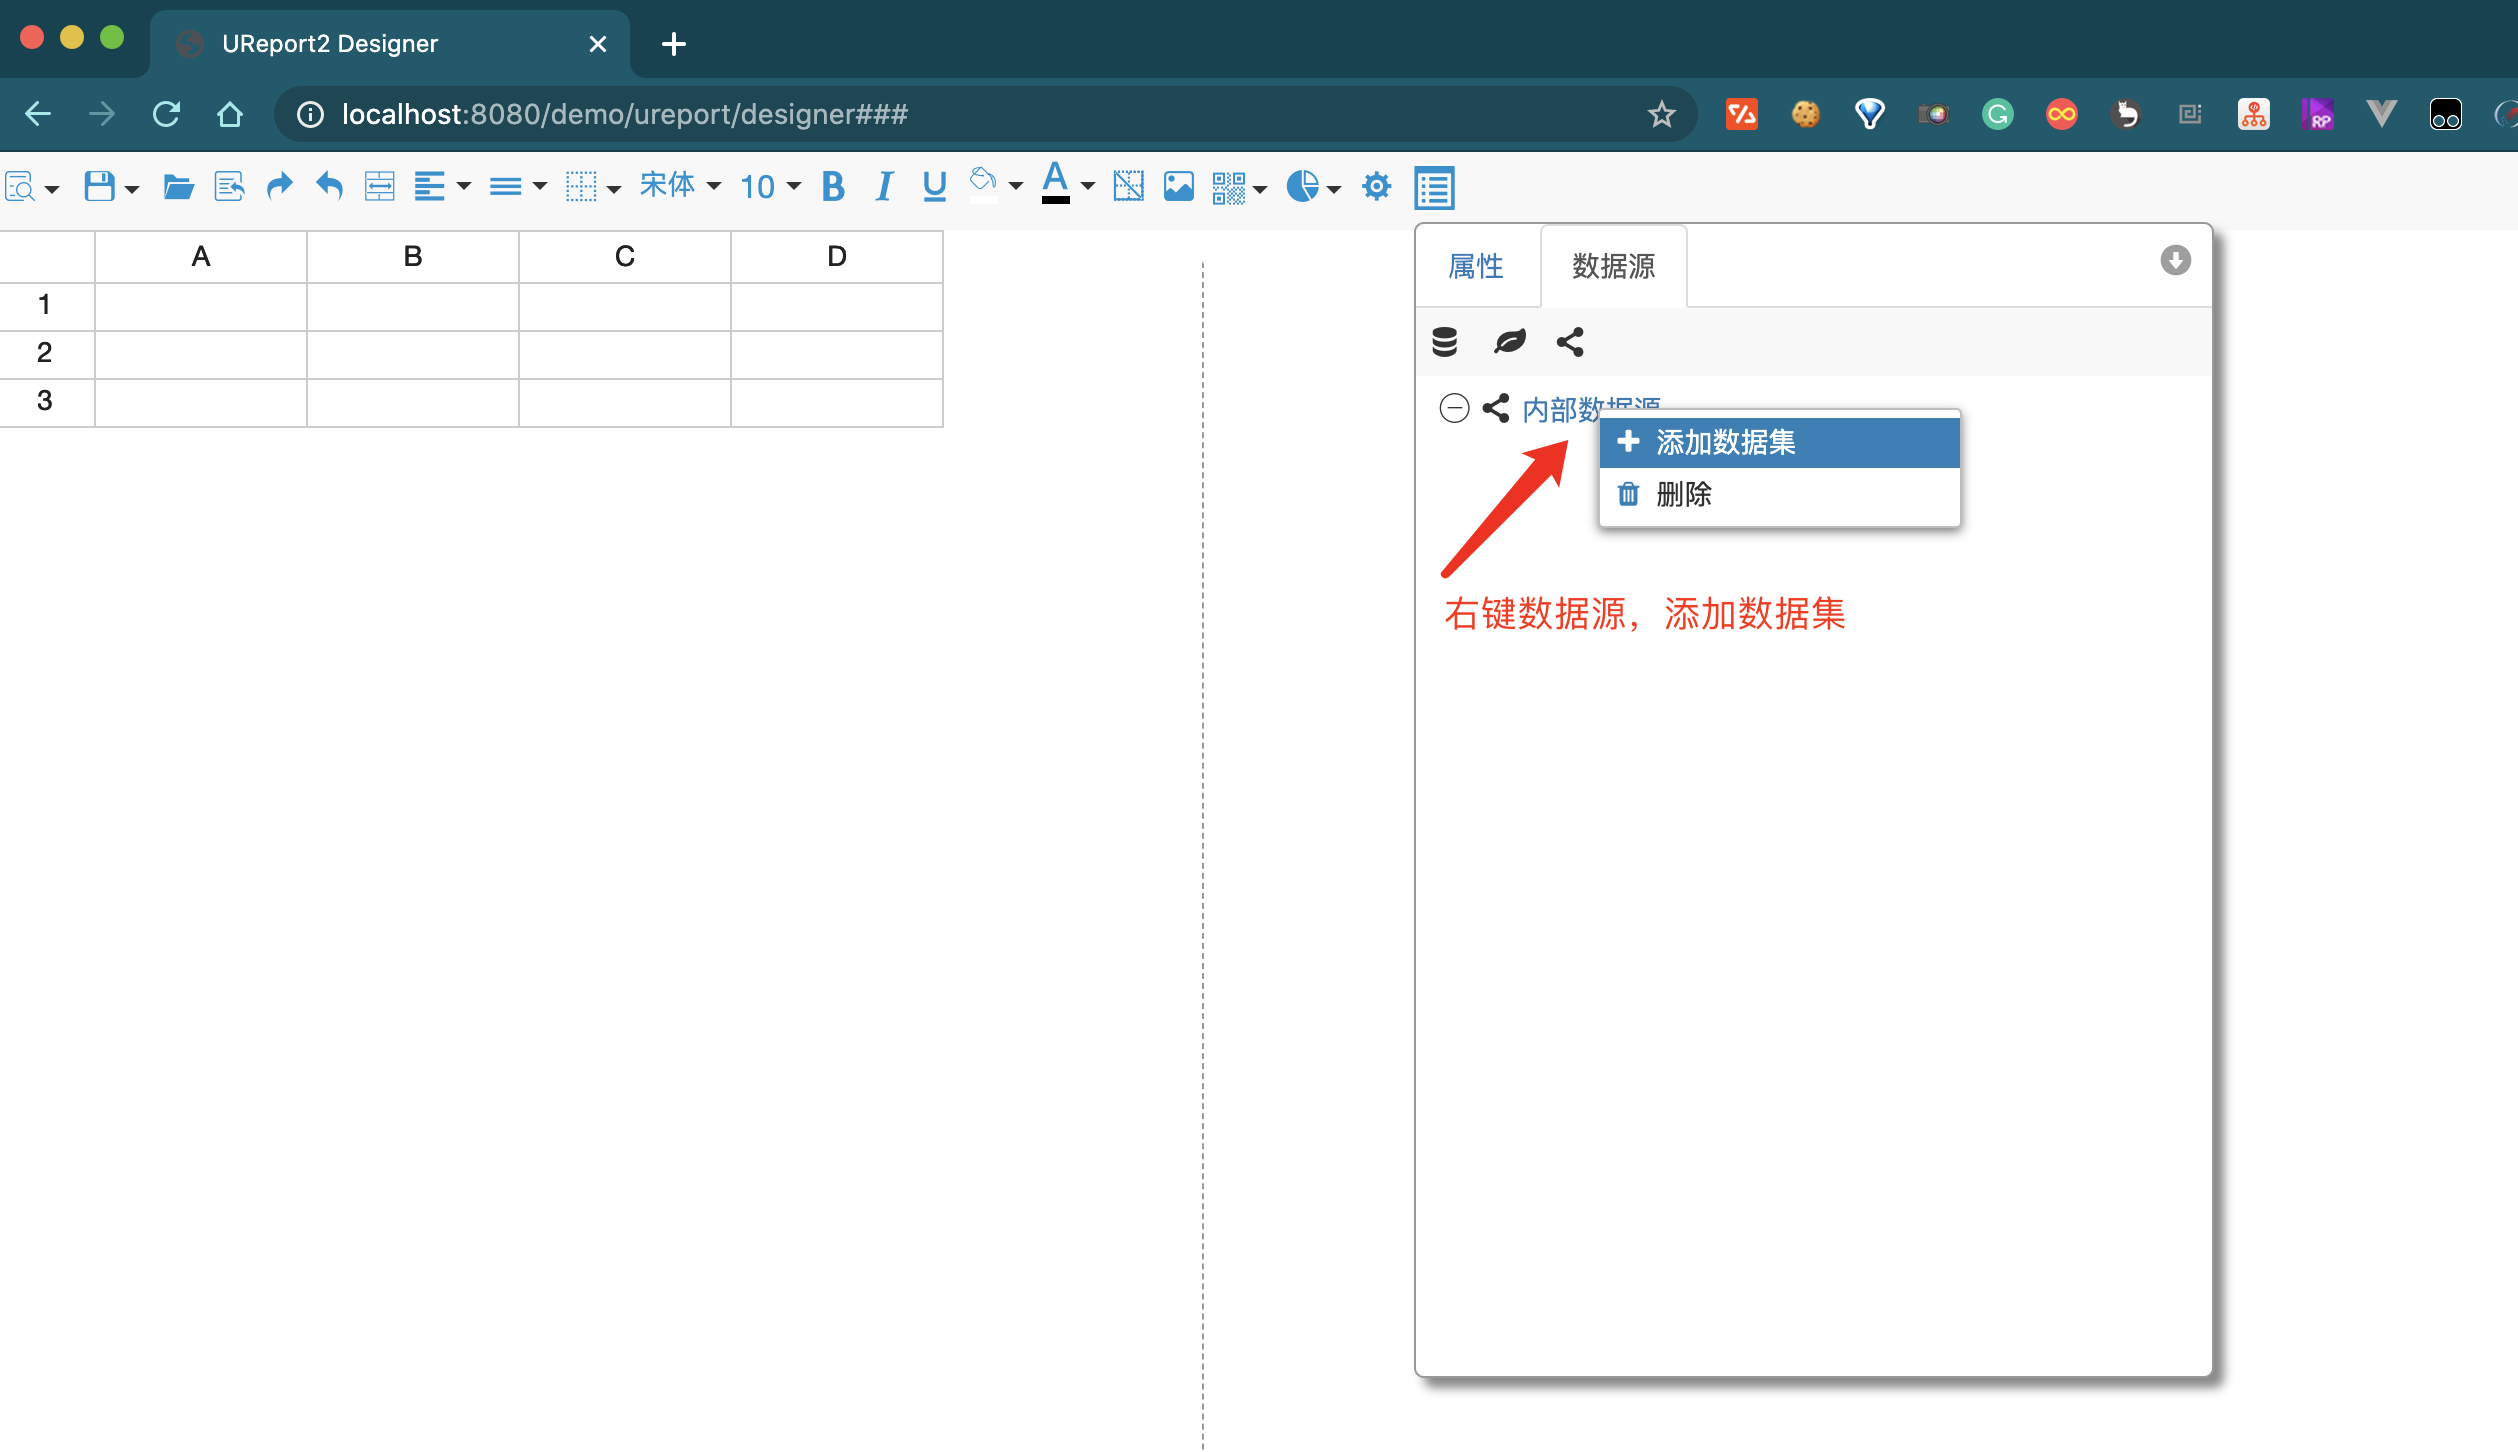
##### 1.1.6.2. 选择数据集
在刚才选中的数据源右键,选择添加数据集
这里选择上面步骤 1.1.4 中初始化的用户表

预览数据看一下
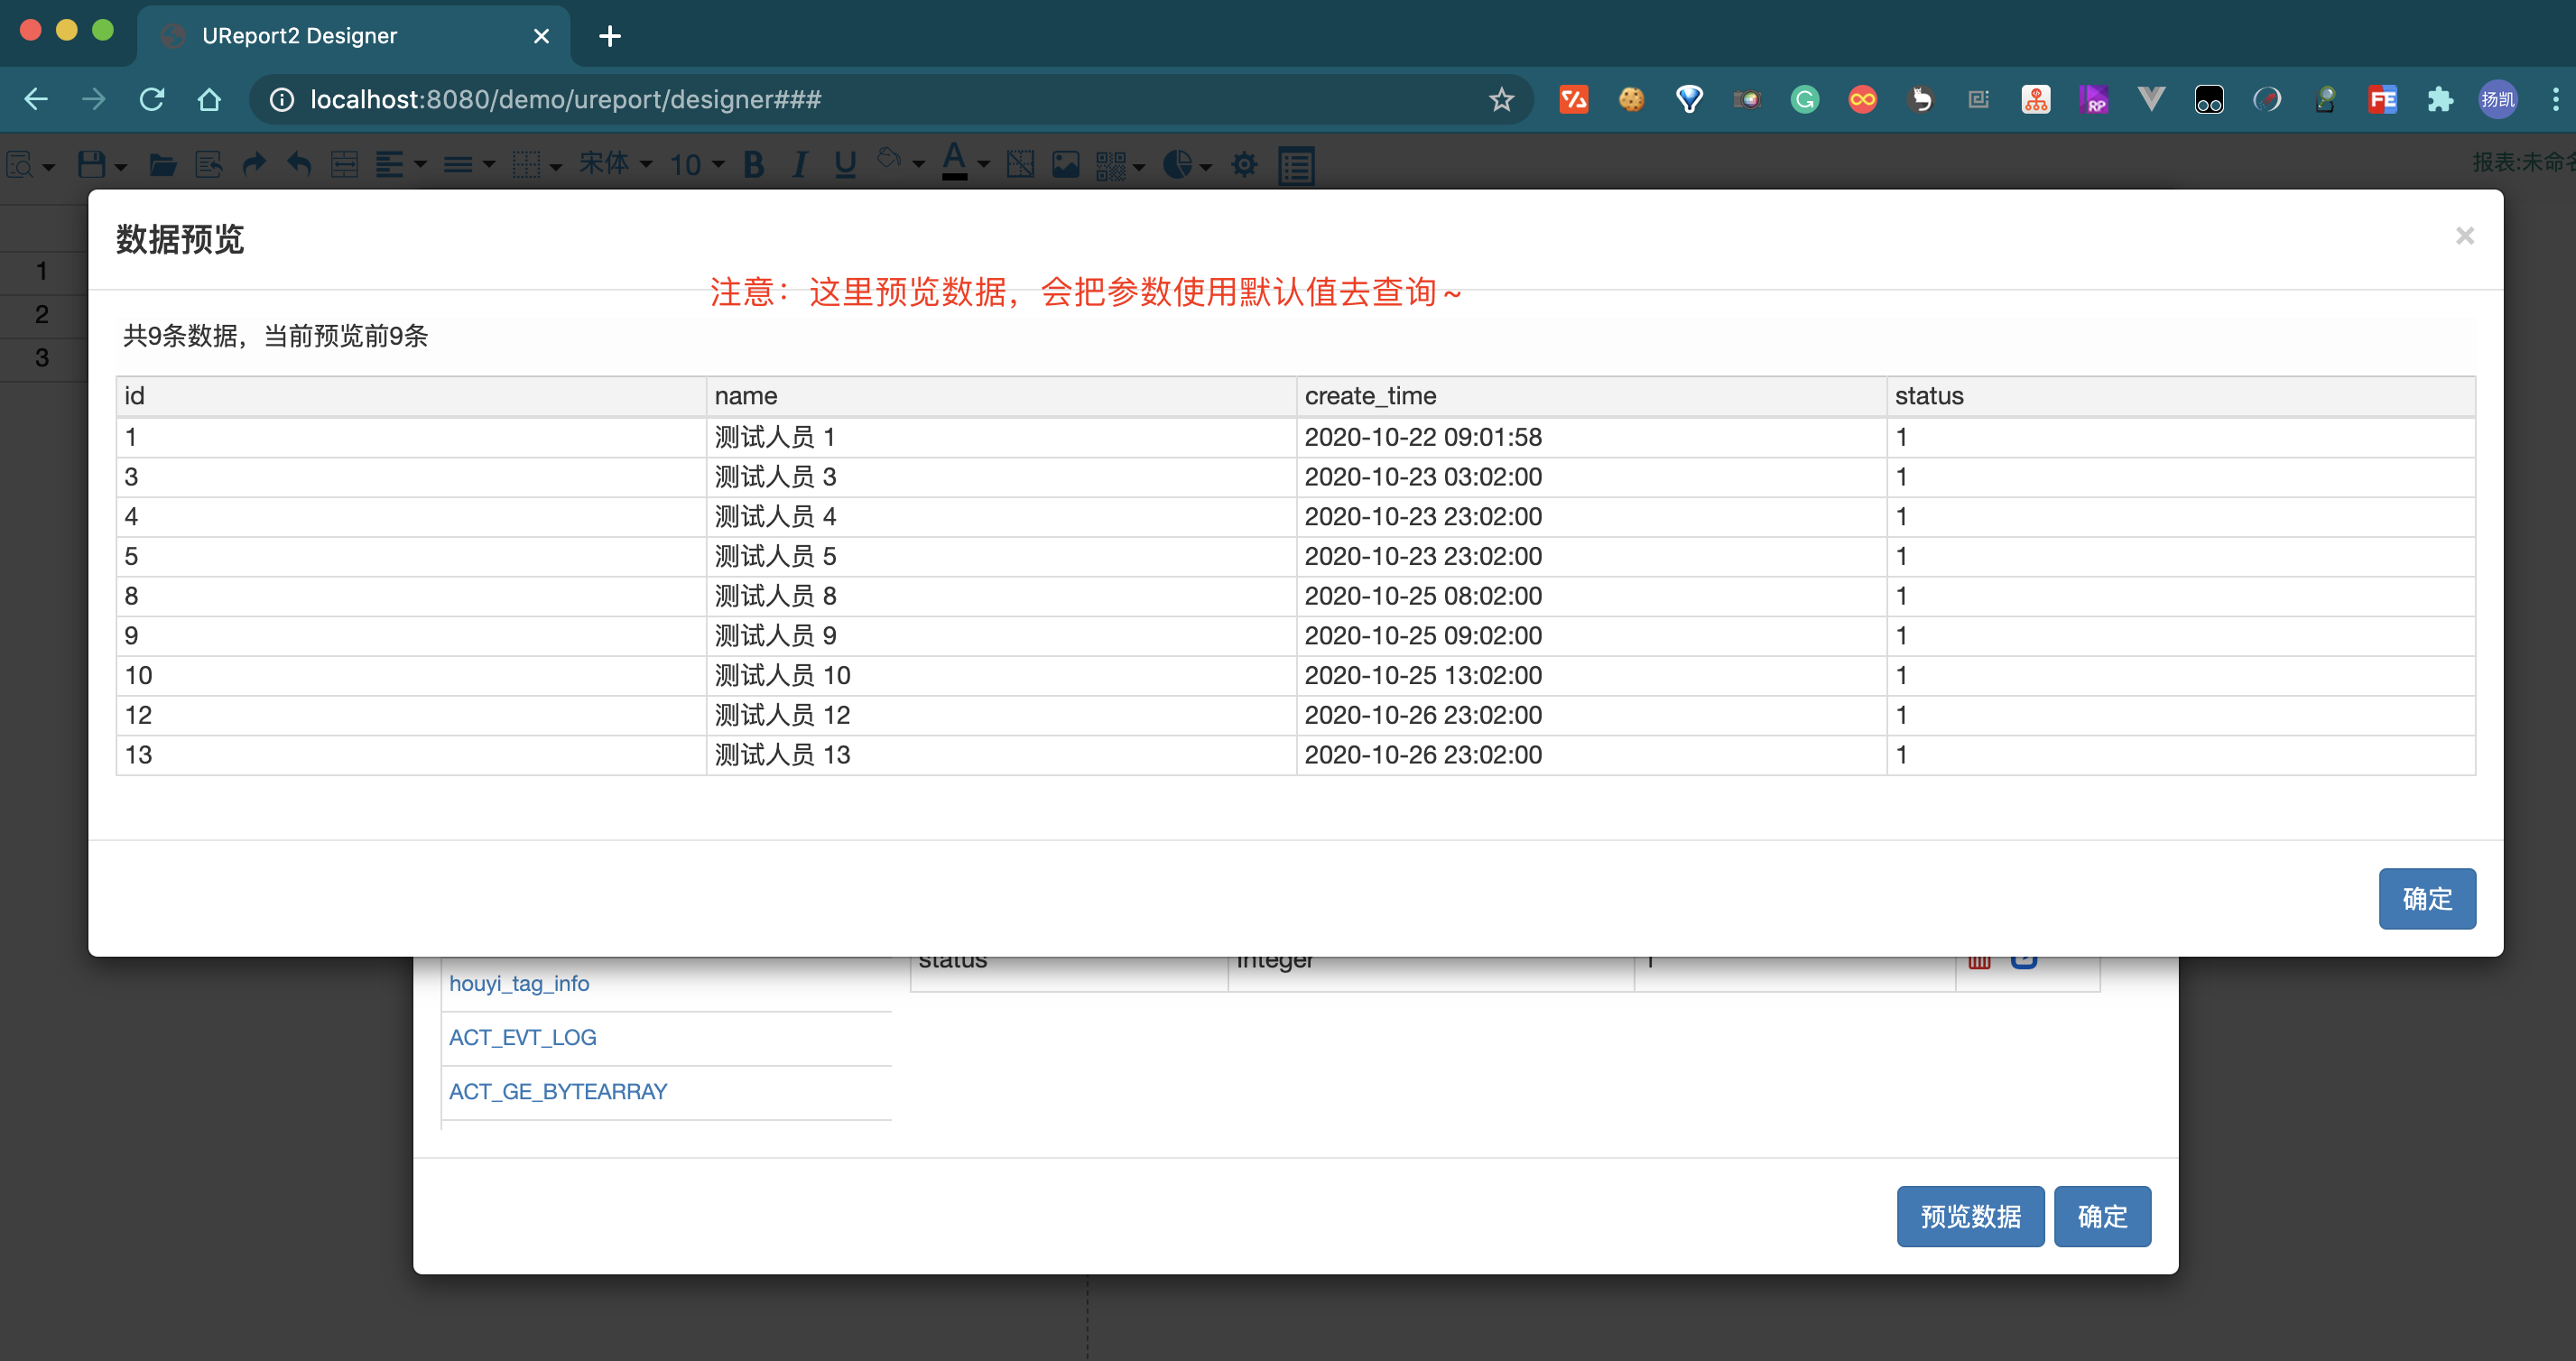
点击确定,保存数据集
##### 1.1.6.3. 报表设计
创建报表表头的位置
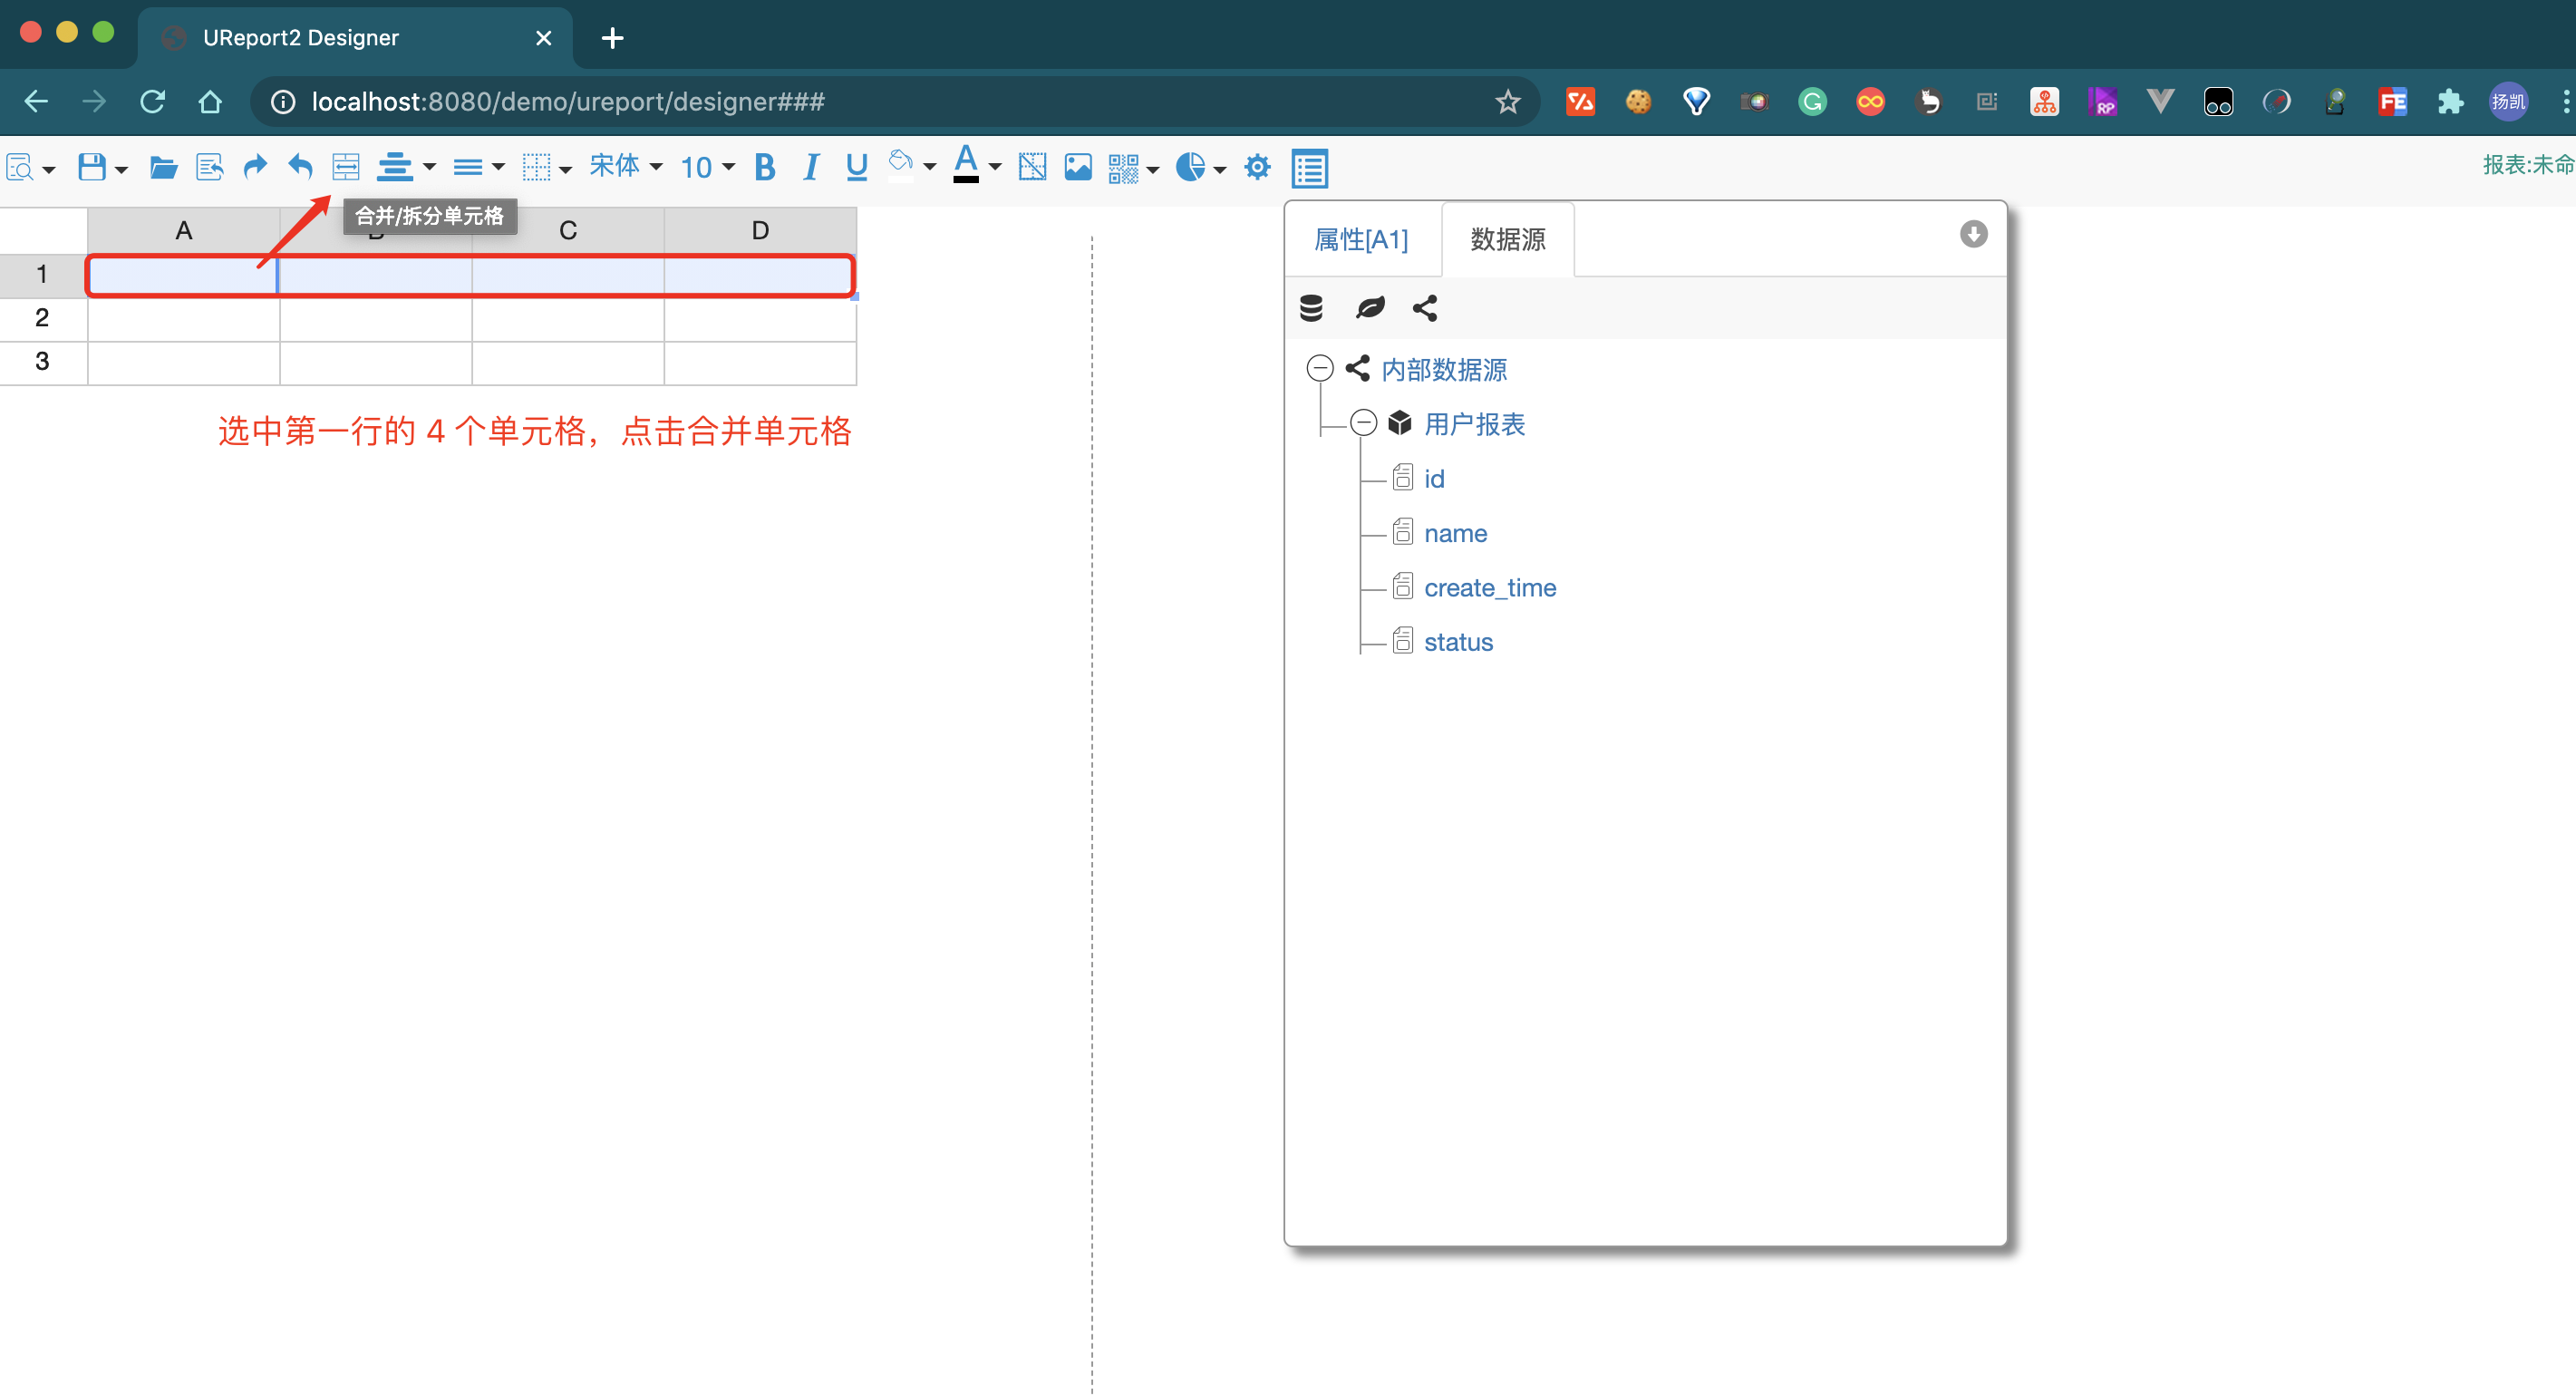
表头内容

操作完成之后,长这样~

然后设置数据的标题行,跟表头设置一样,效果如下图
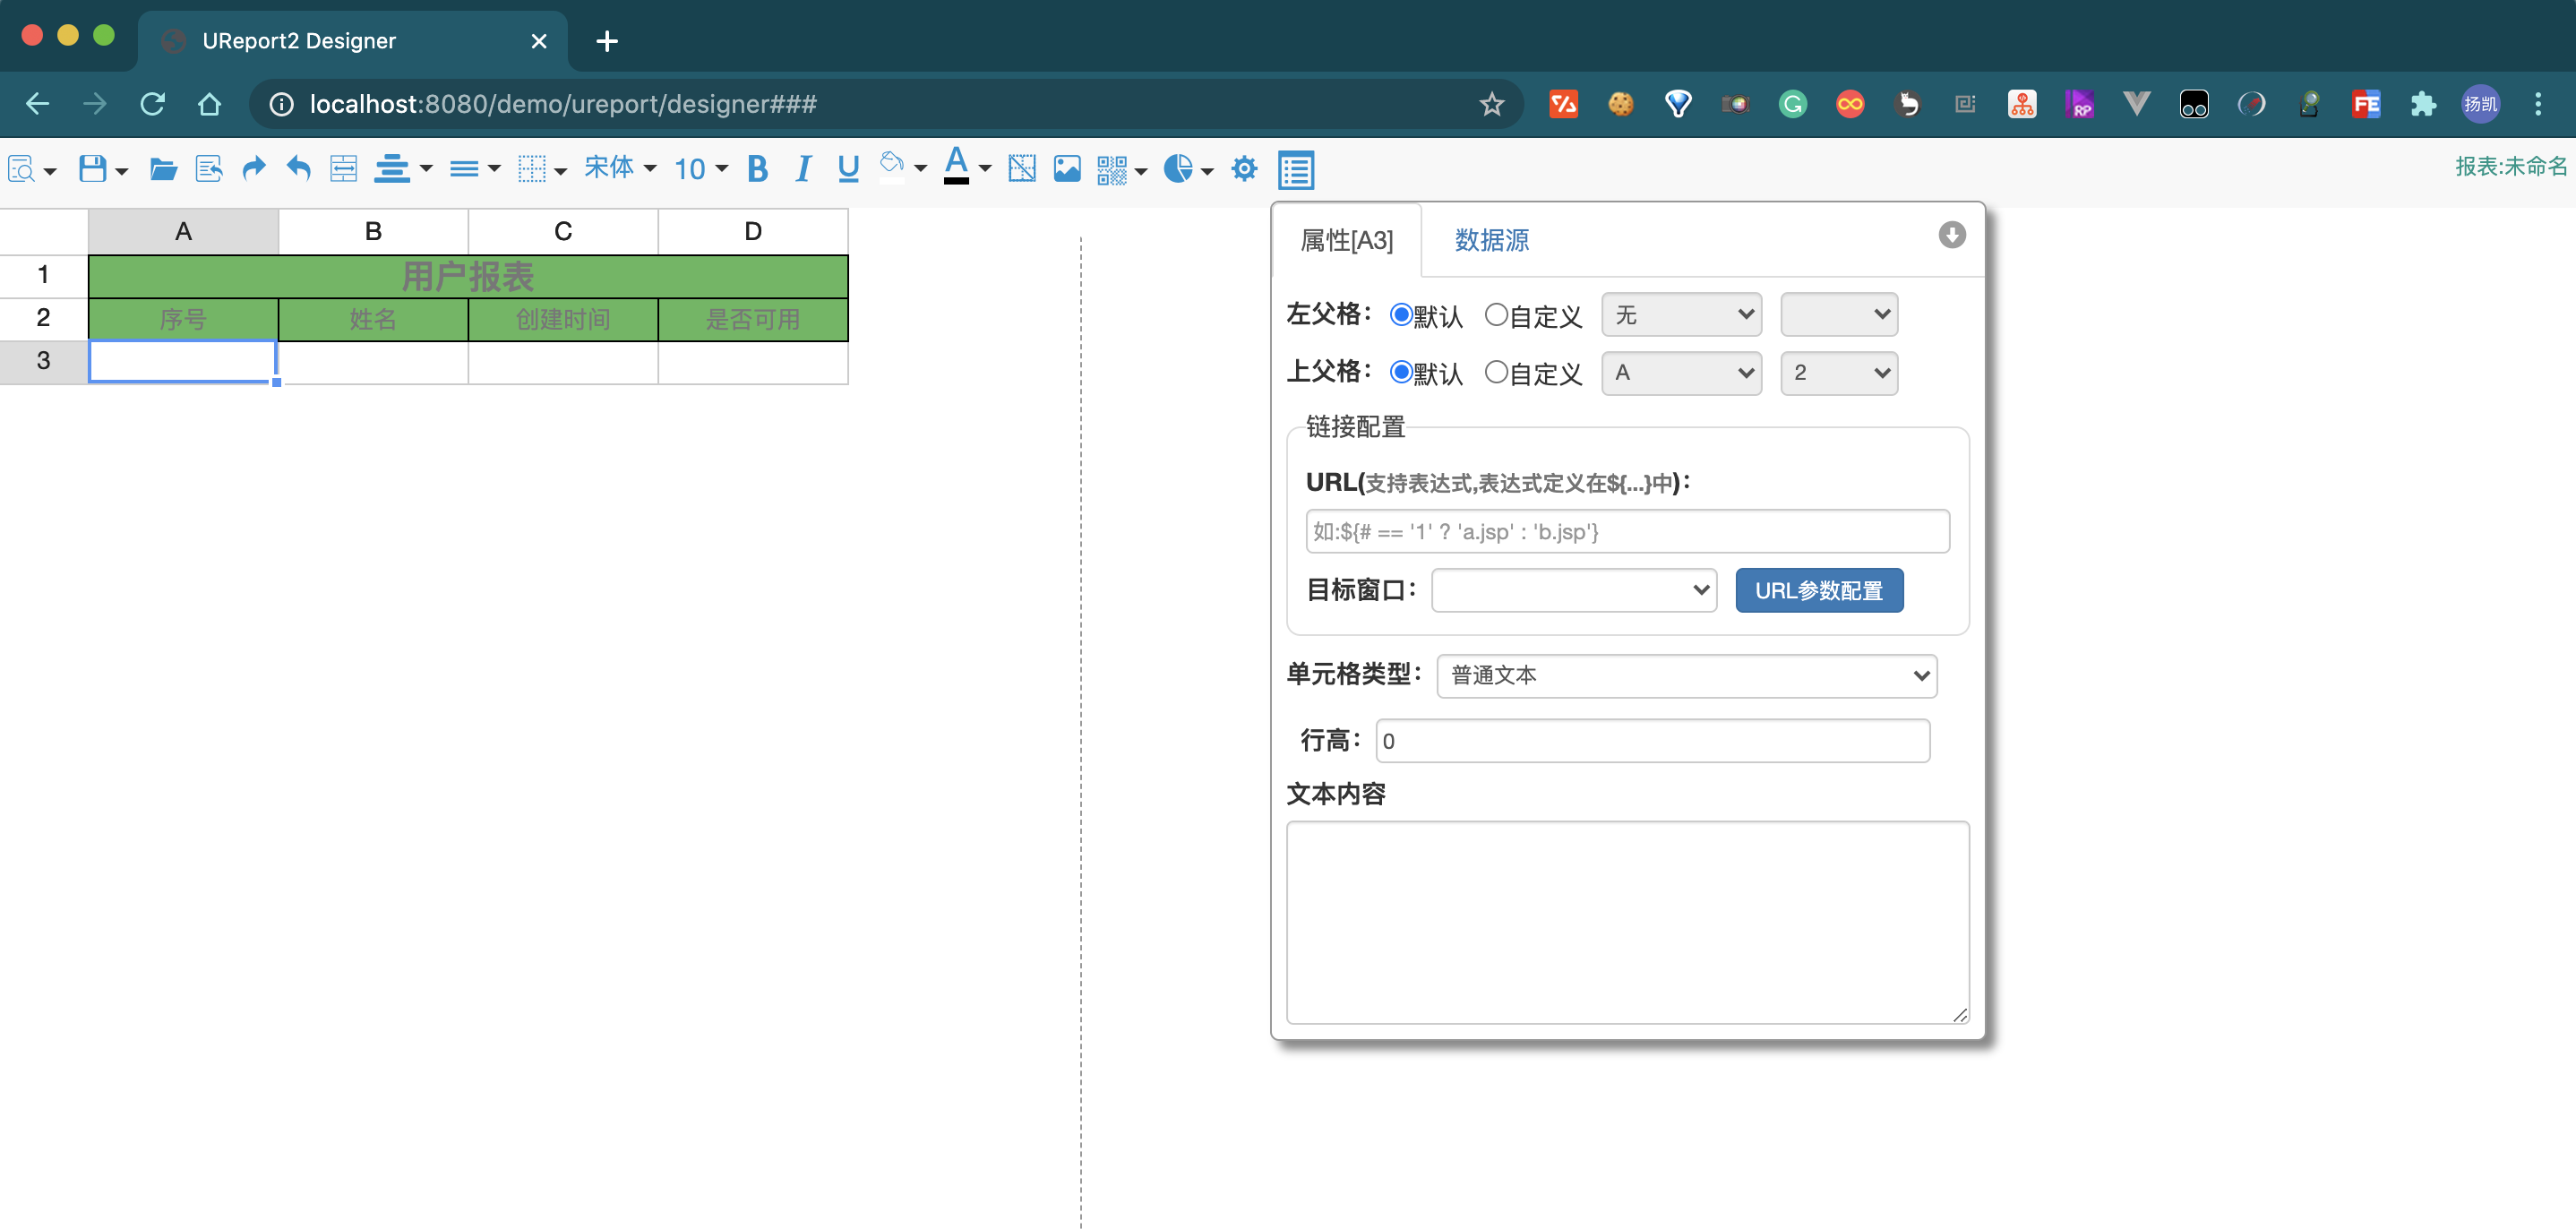
接下来设置数据
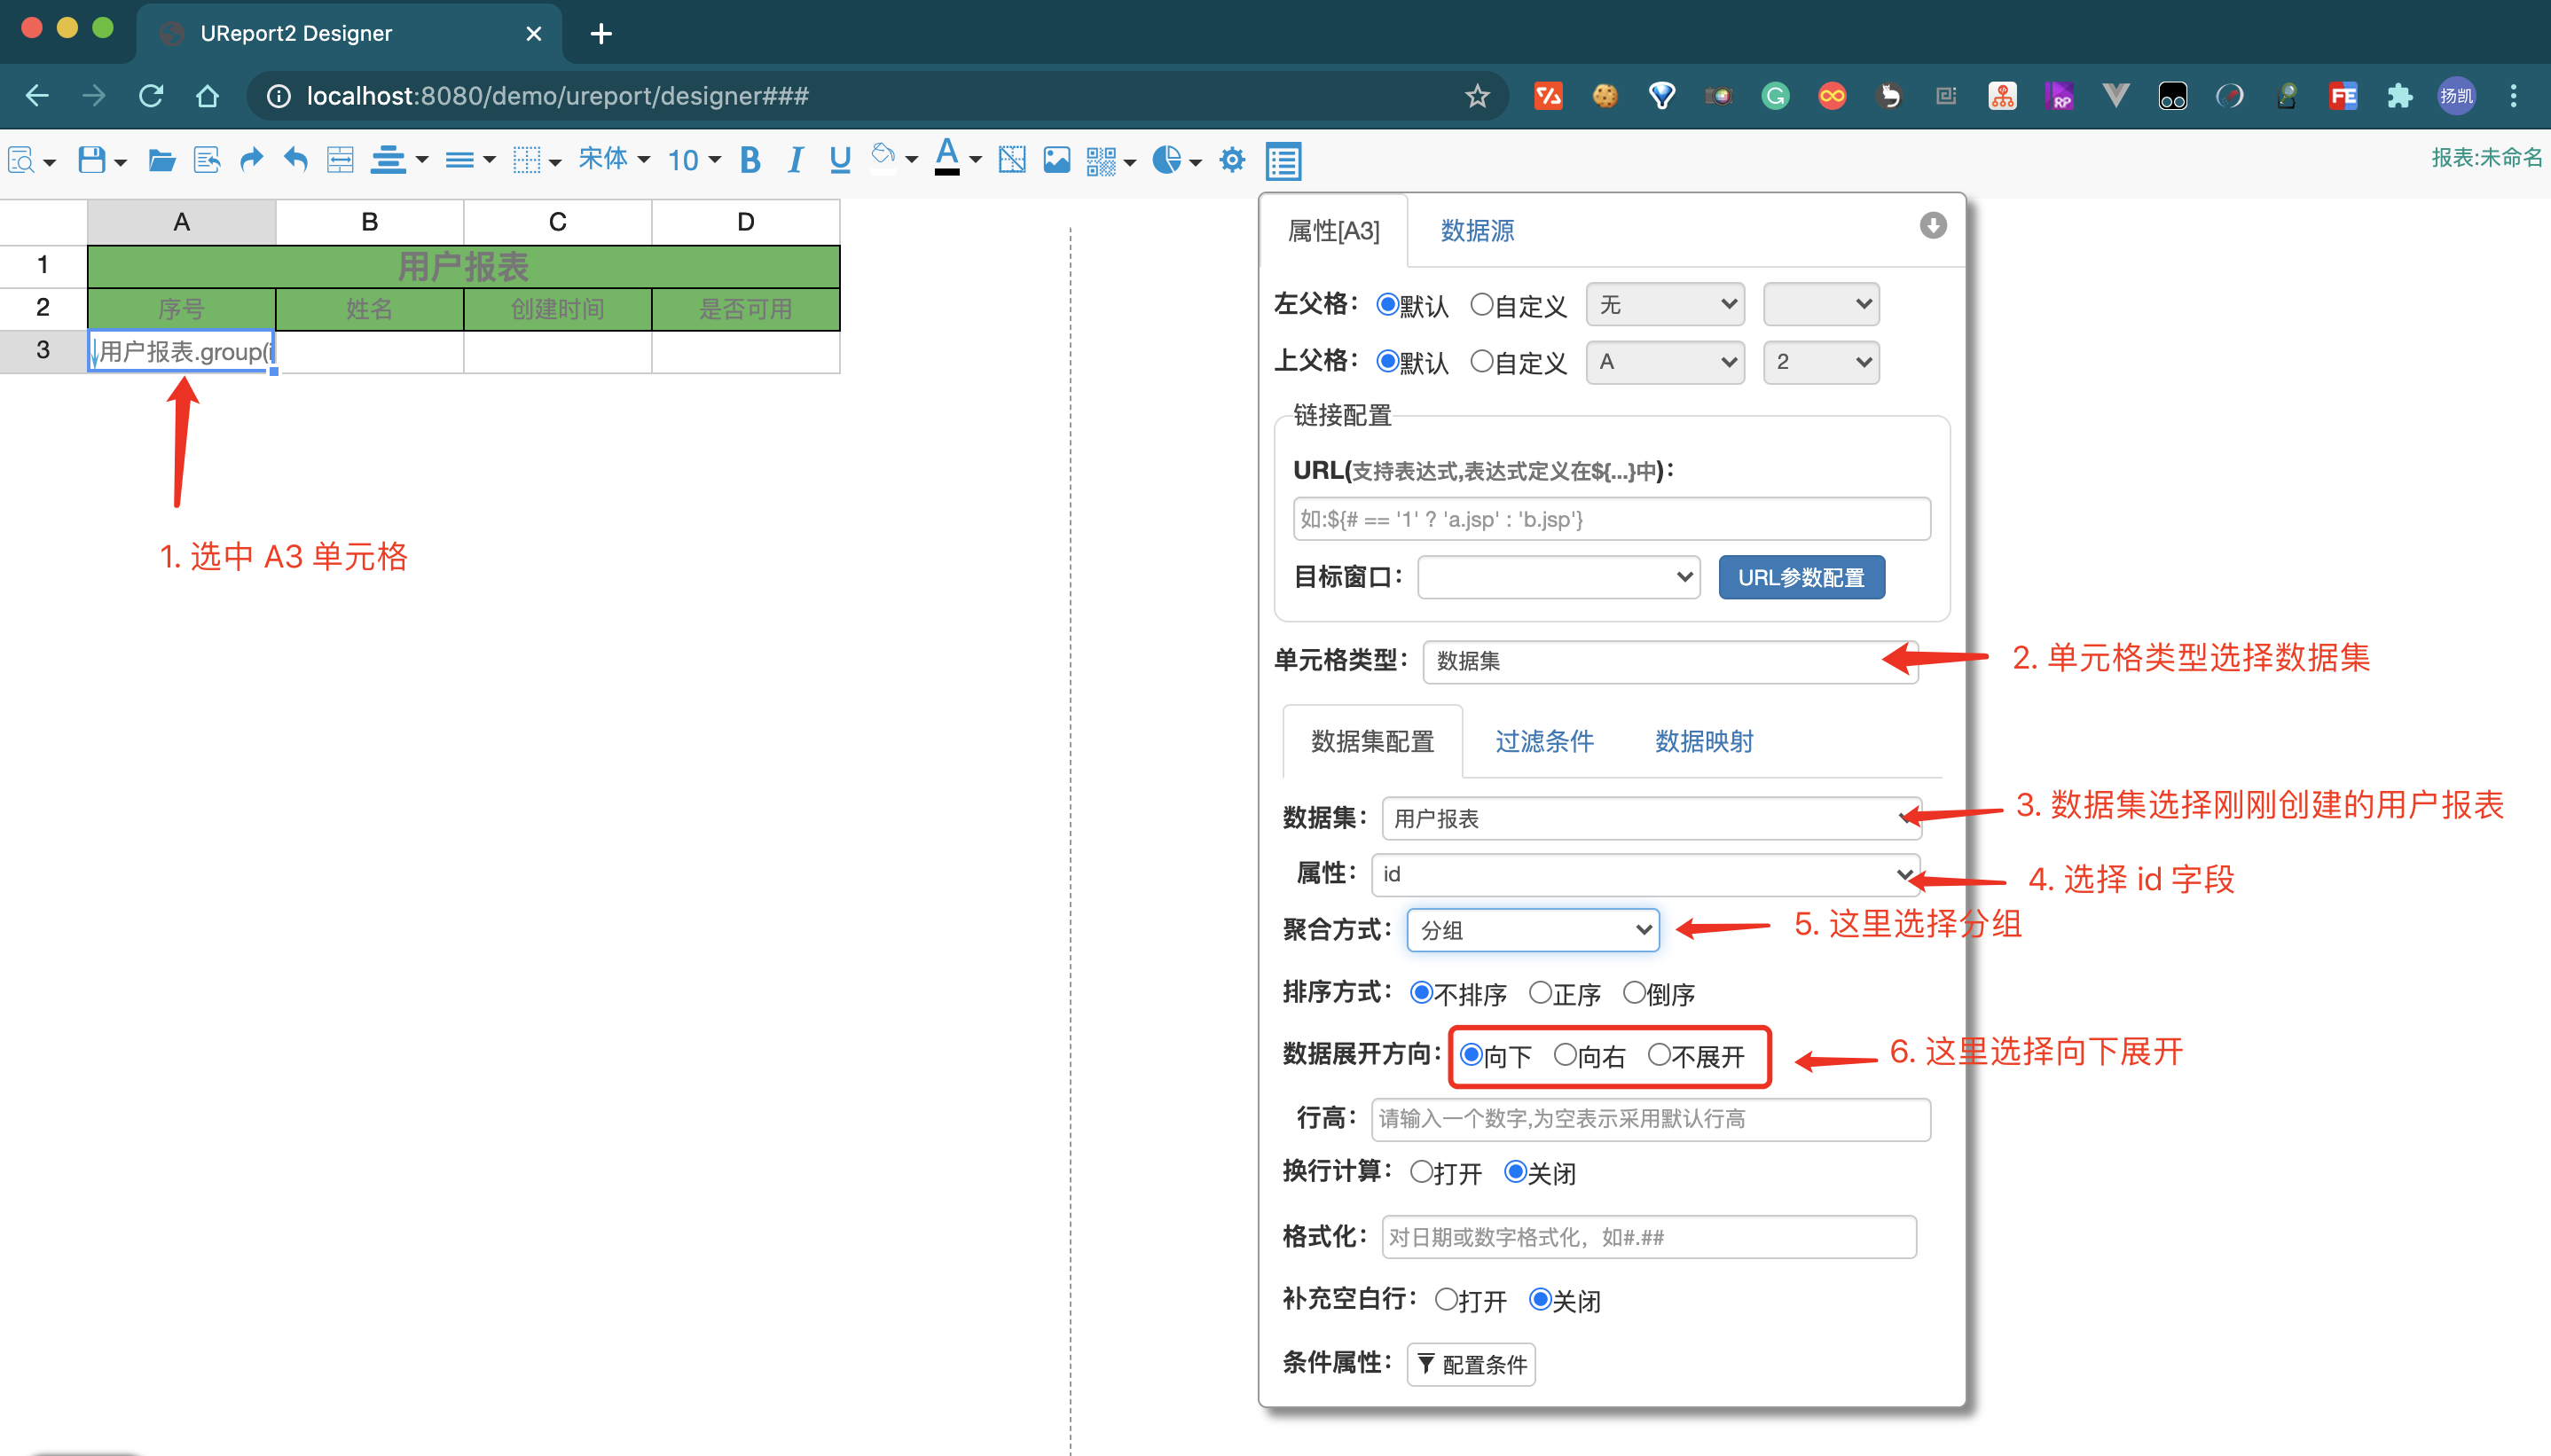
其他字段同理,完成之后如下

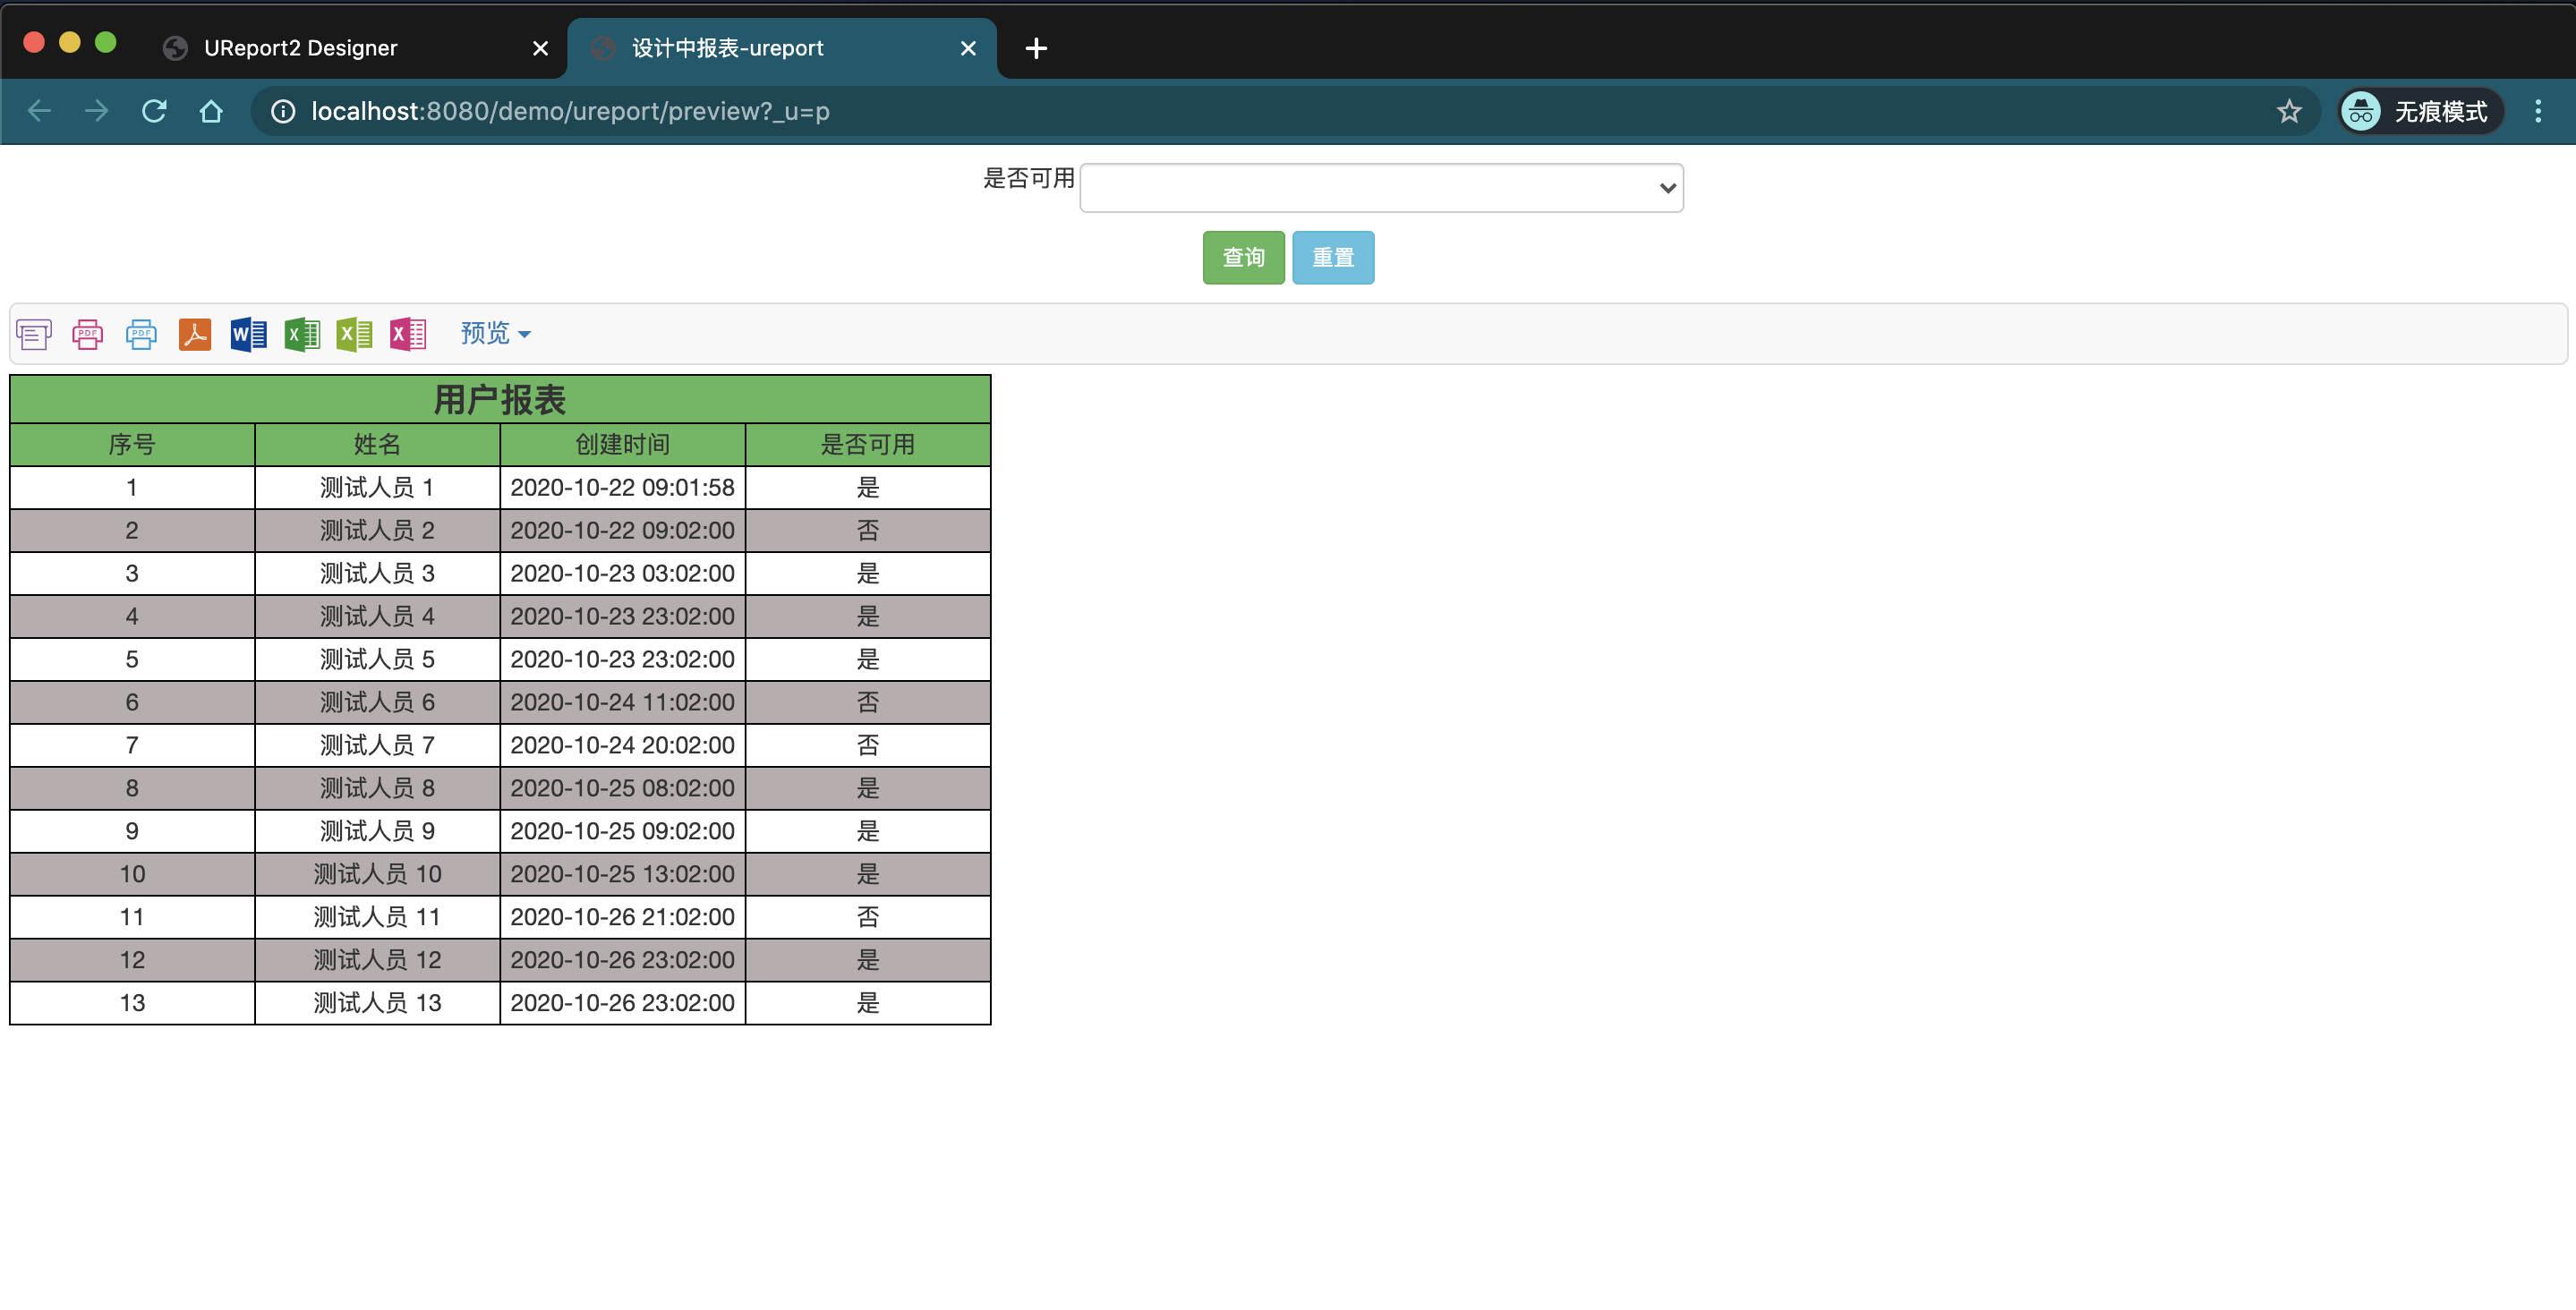
此时你可以尝试预览一下数据了
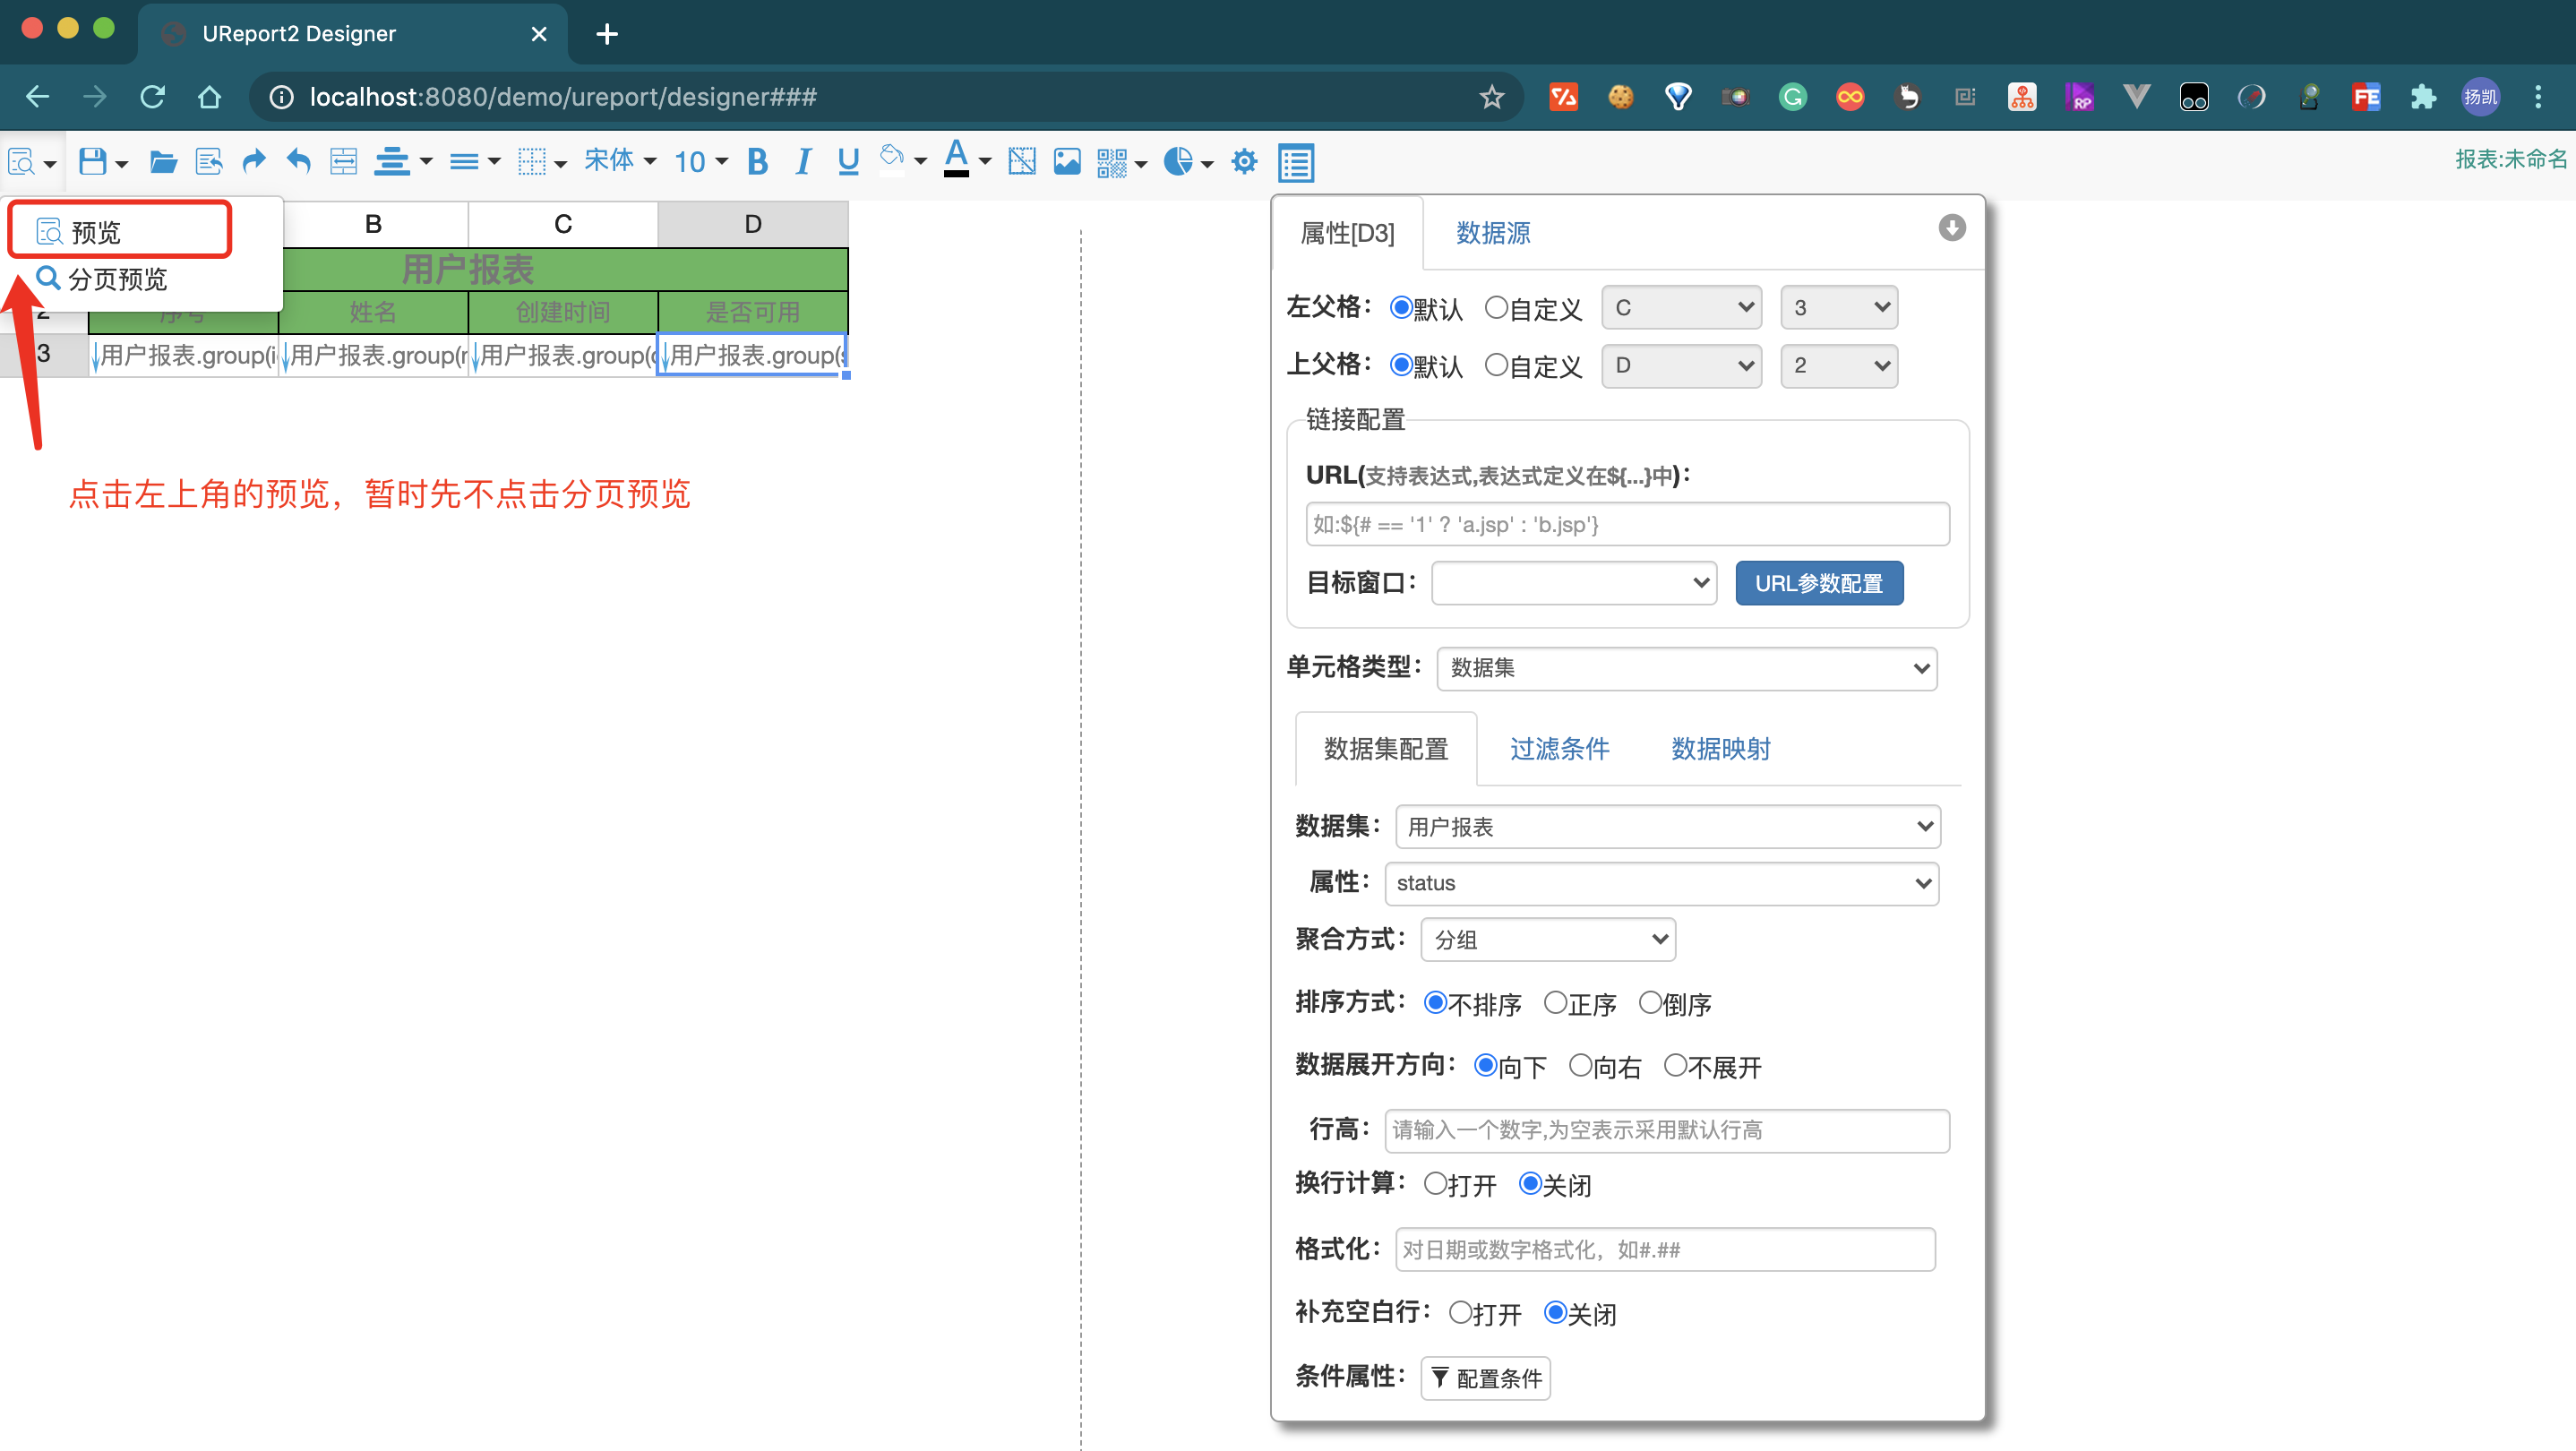
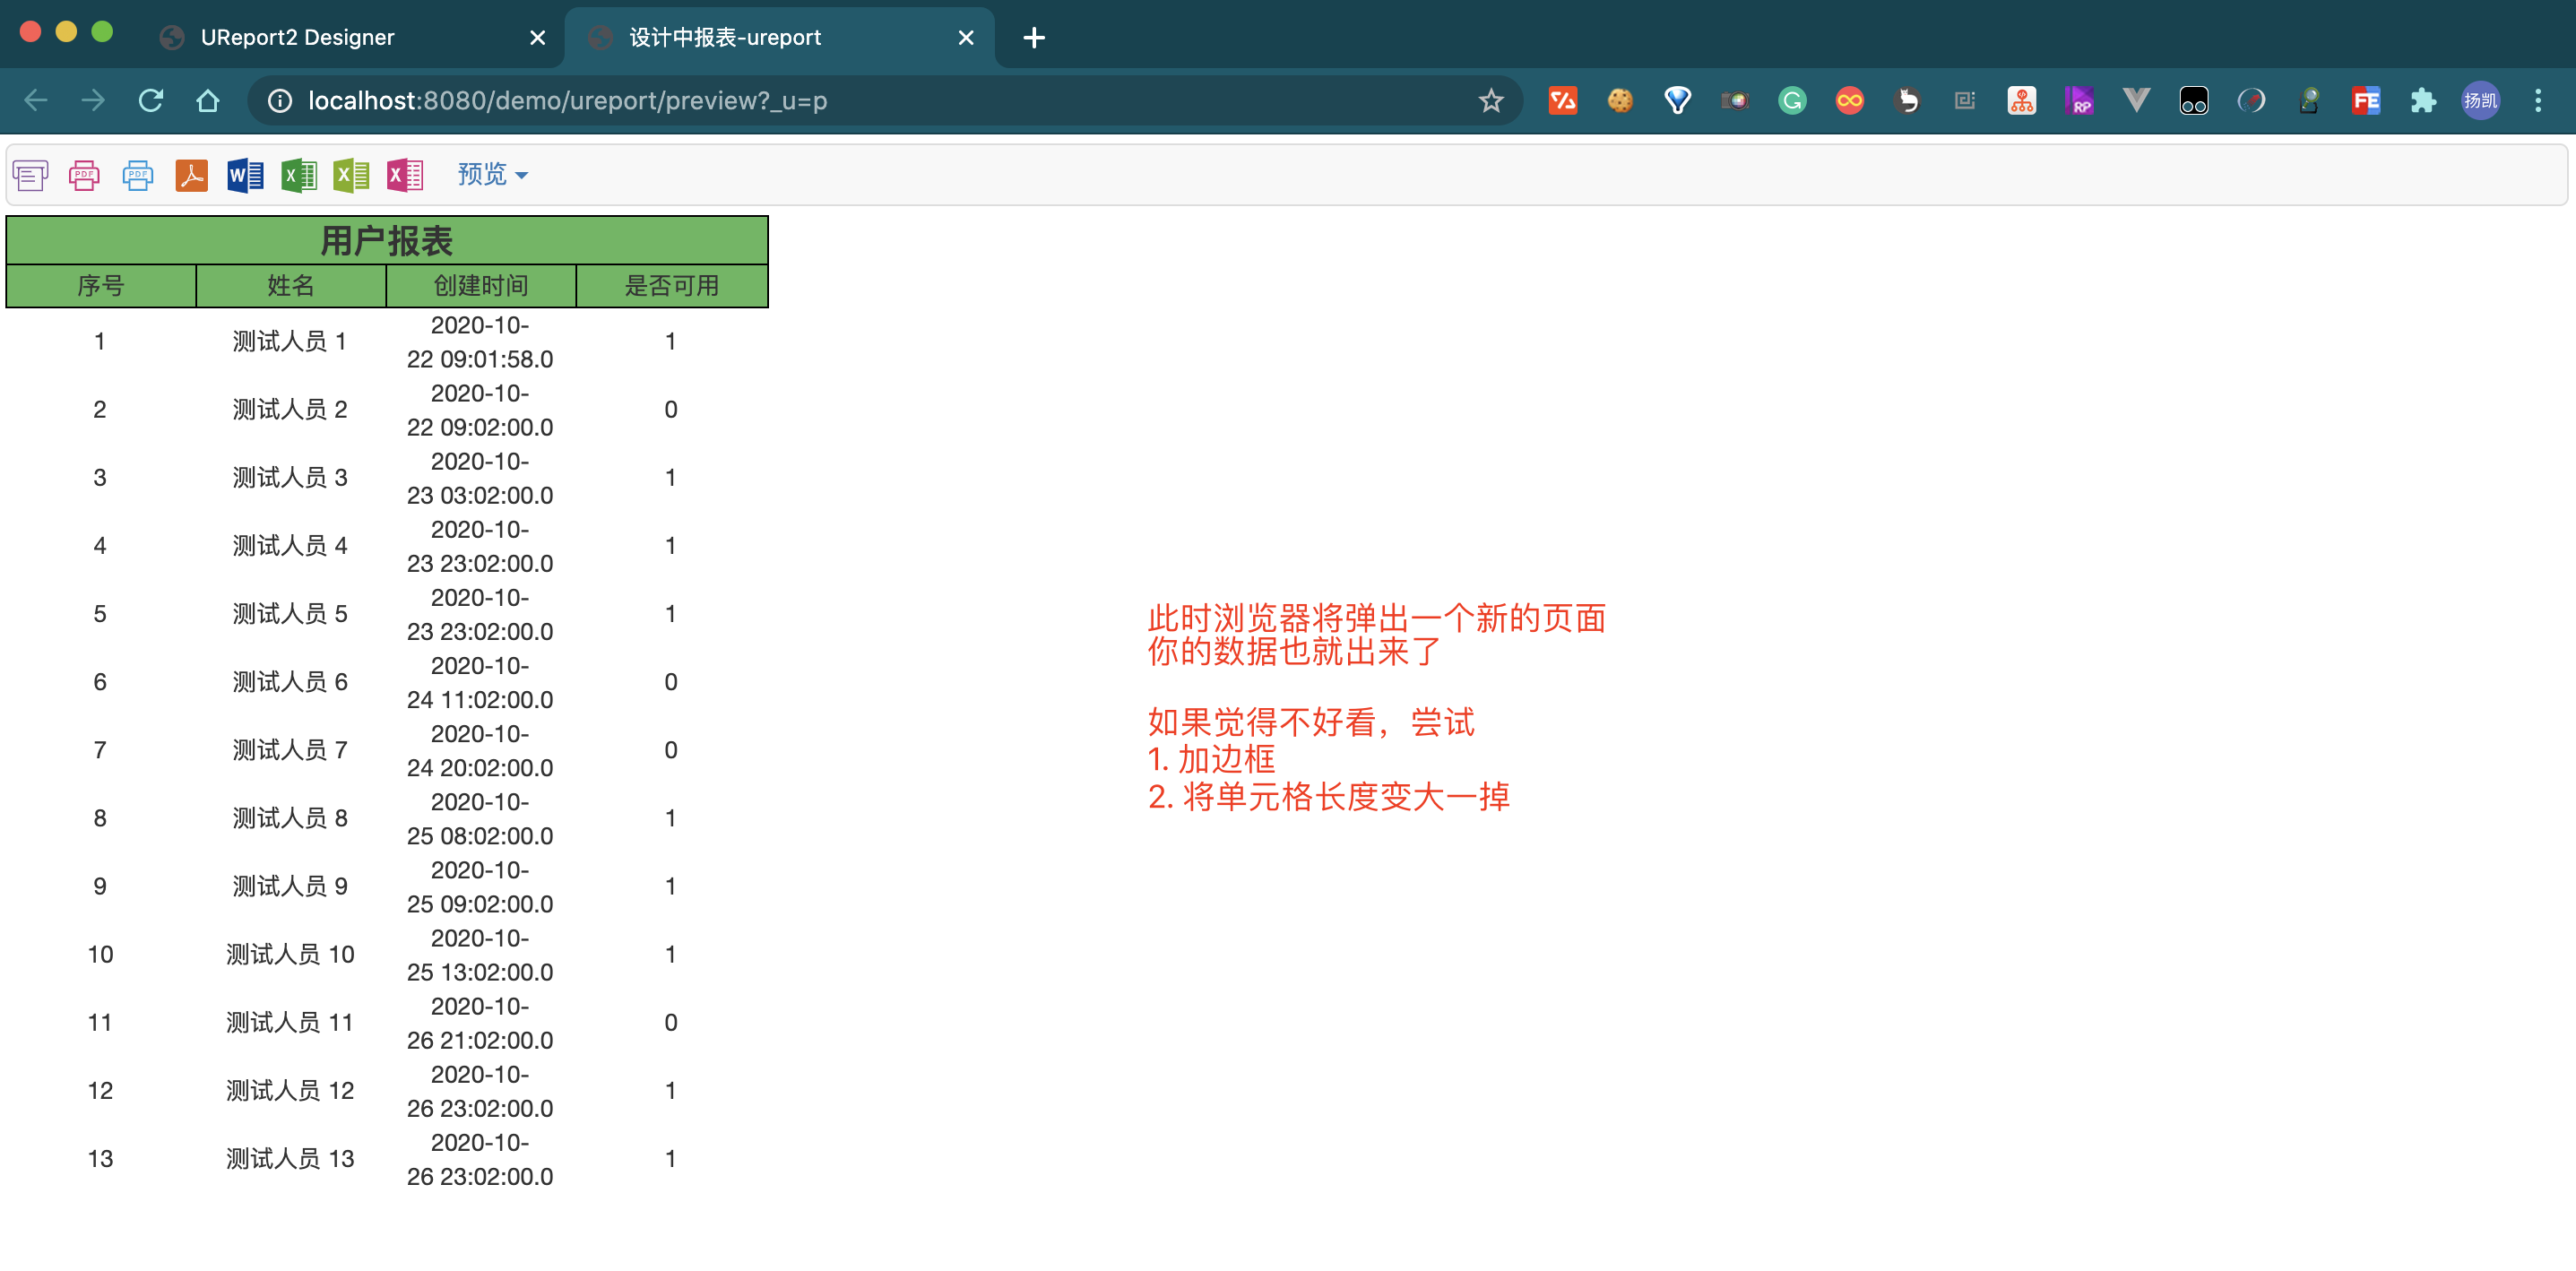
关掉,稍微美化一下

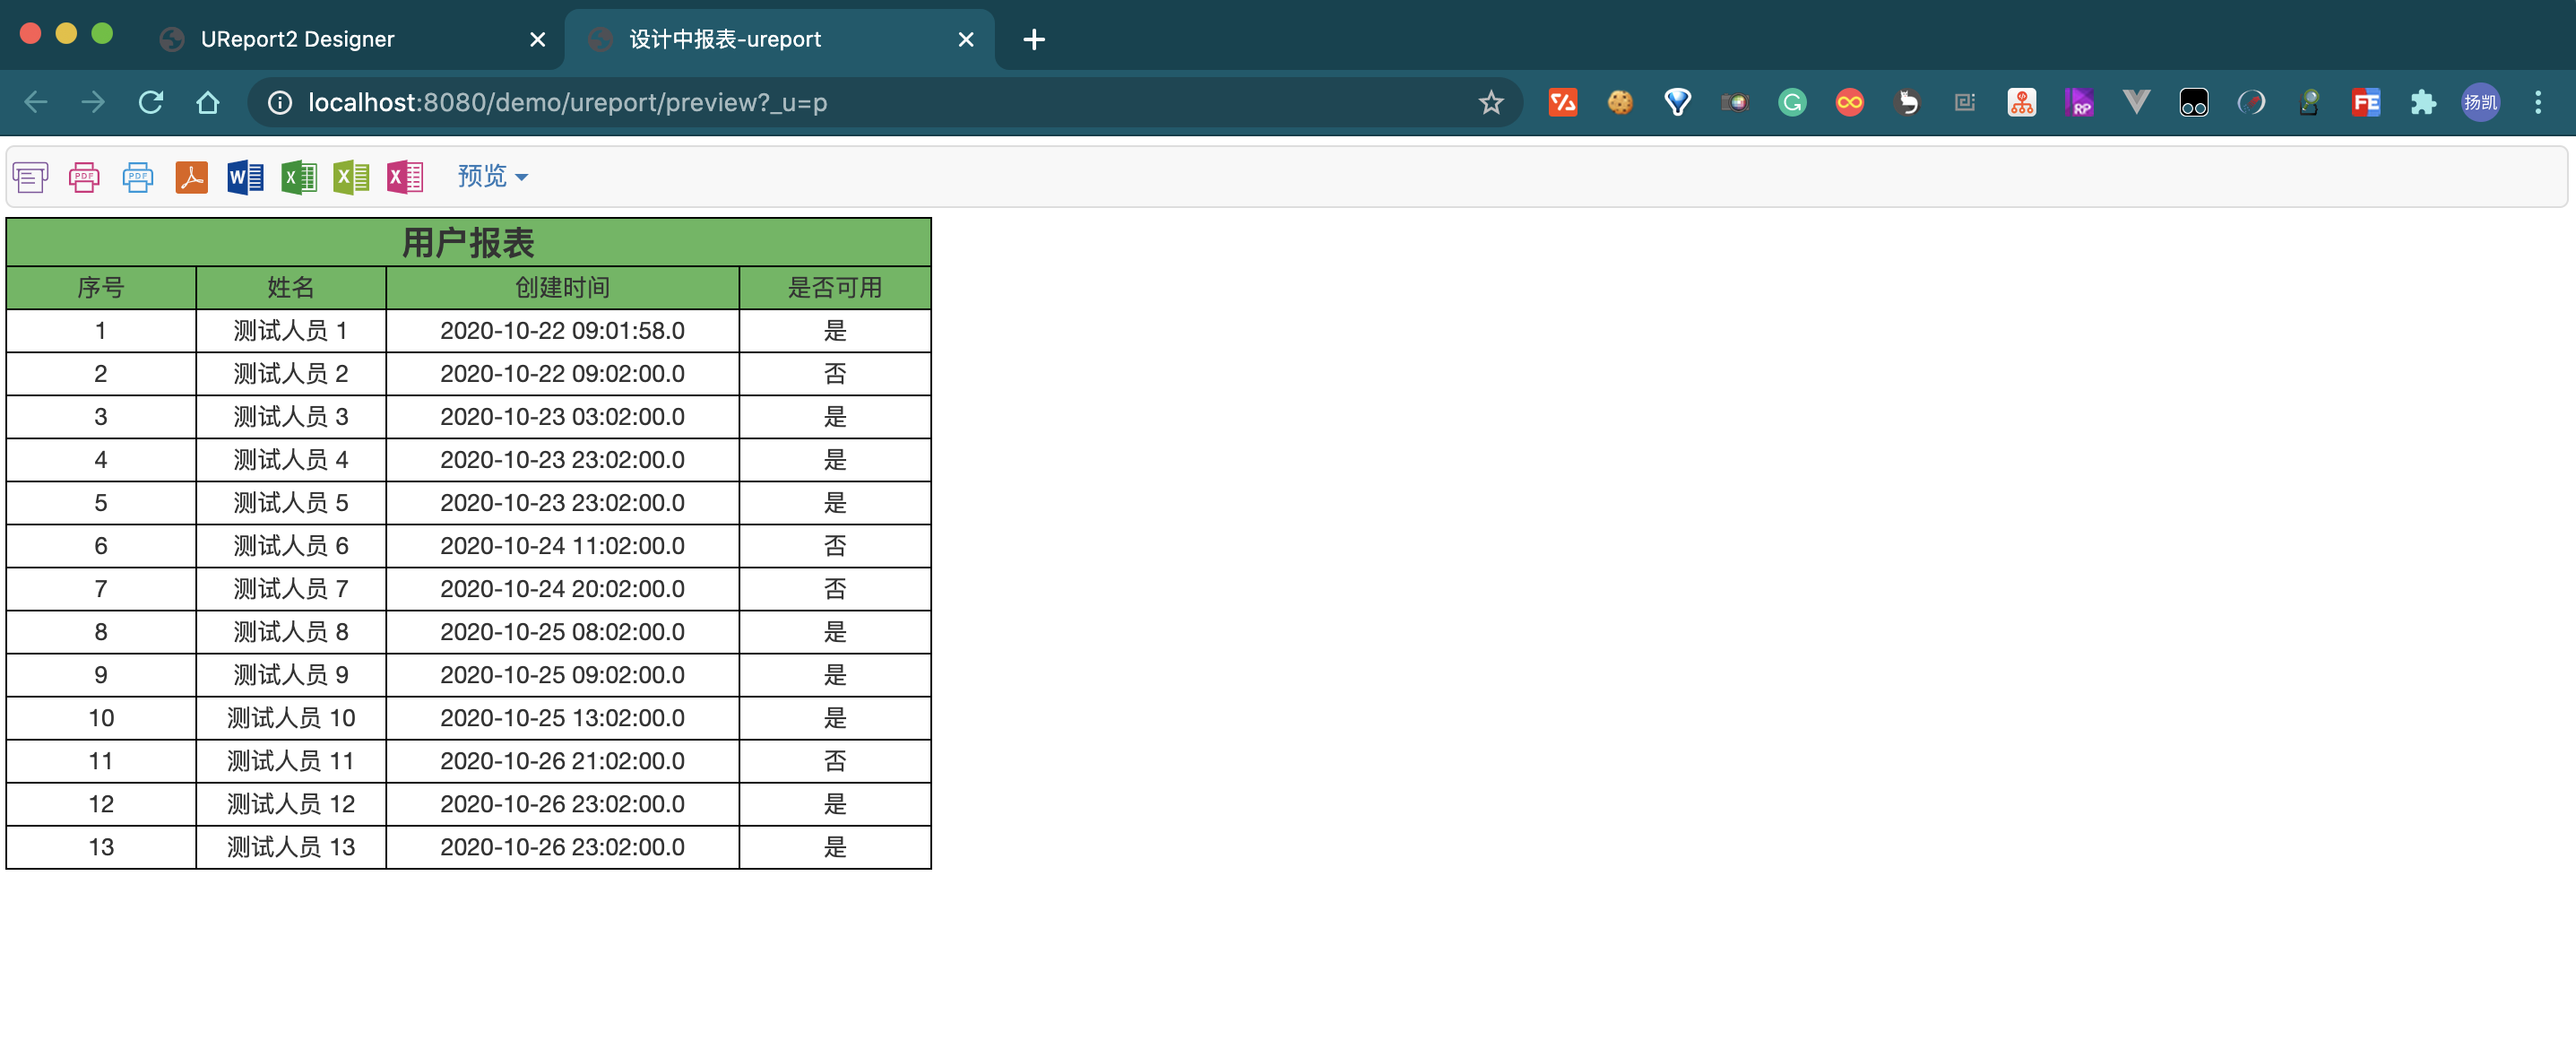
此时数据虽然正常显示了,但是「是否可用」这一列显示0/1 是否可以支持自定义呢?

再次预览一下
顺带再把创建时间的数据格式也改一下
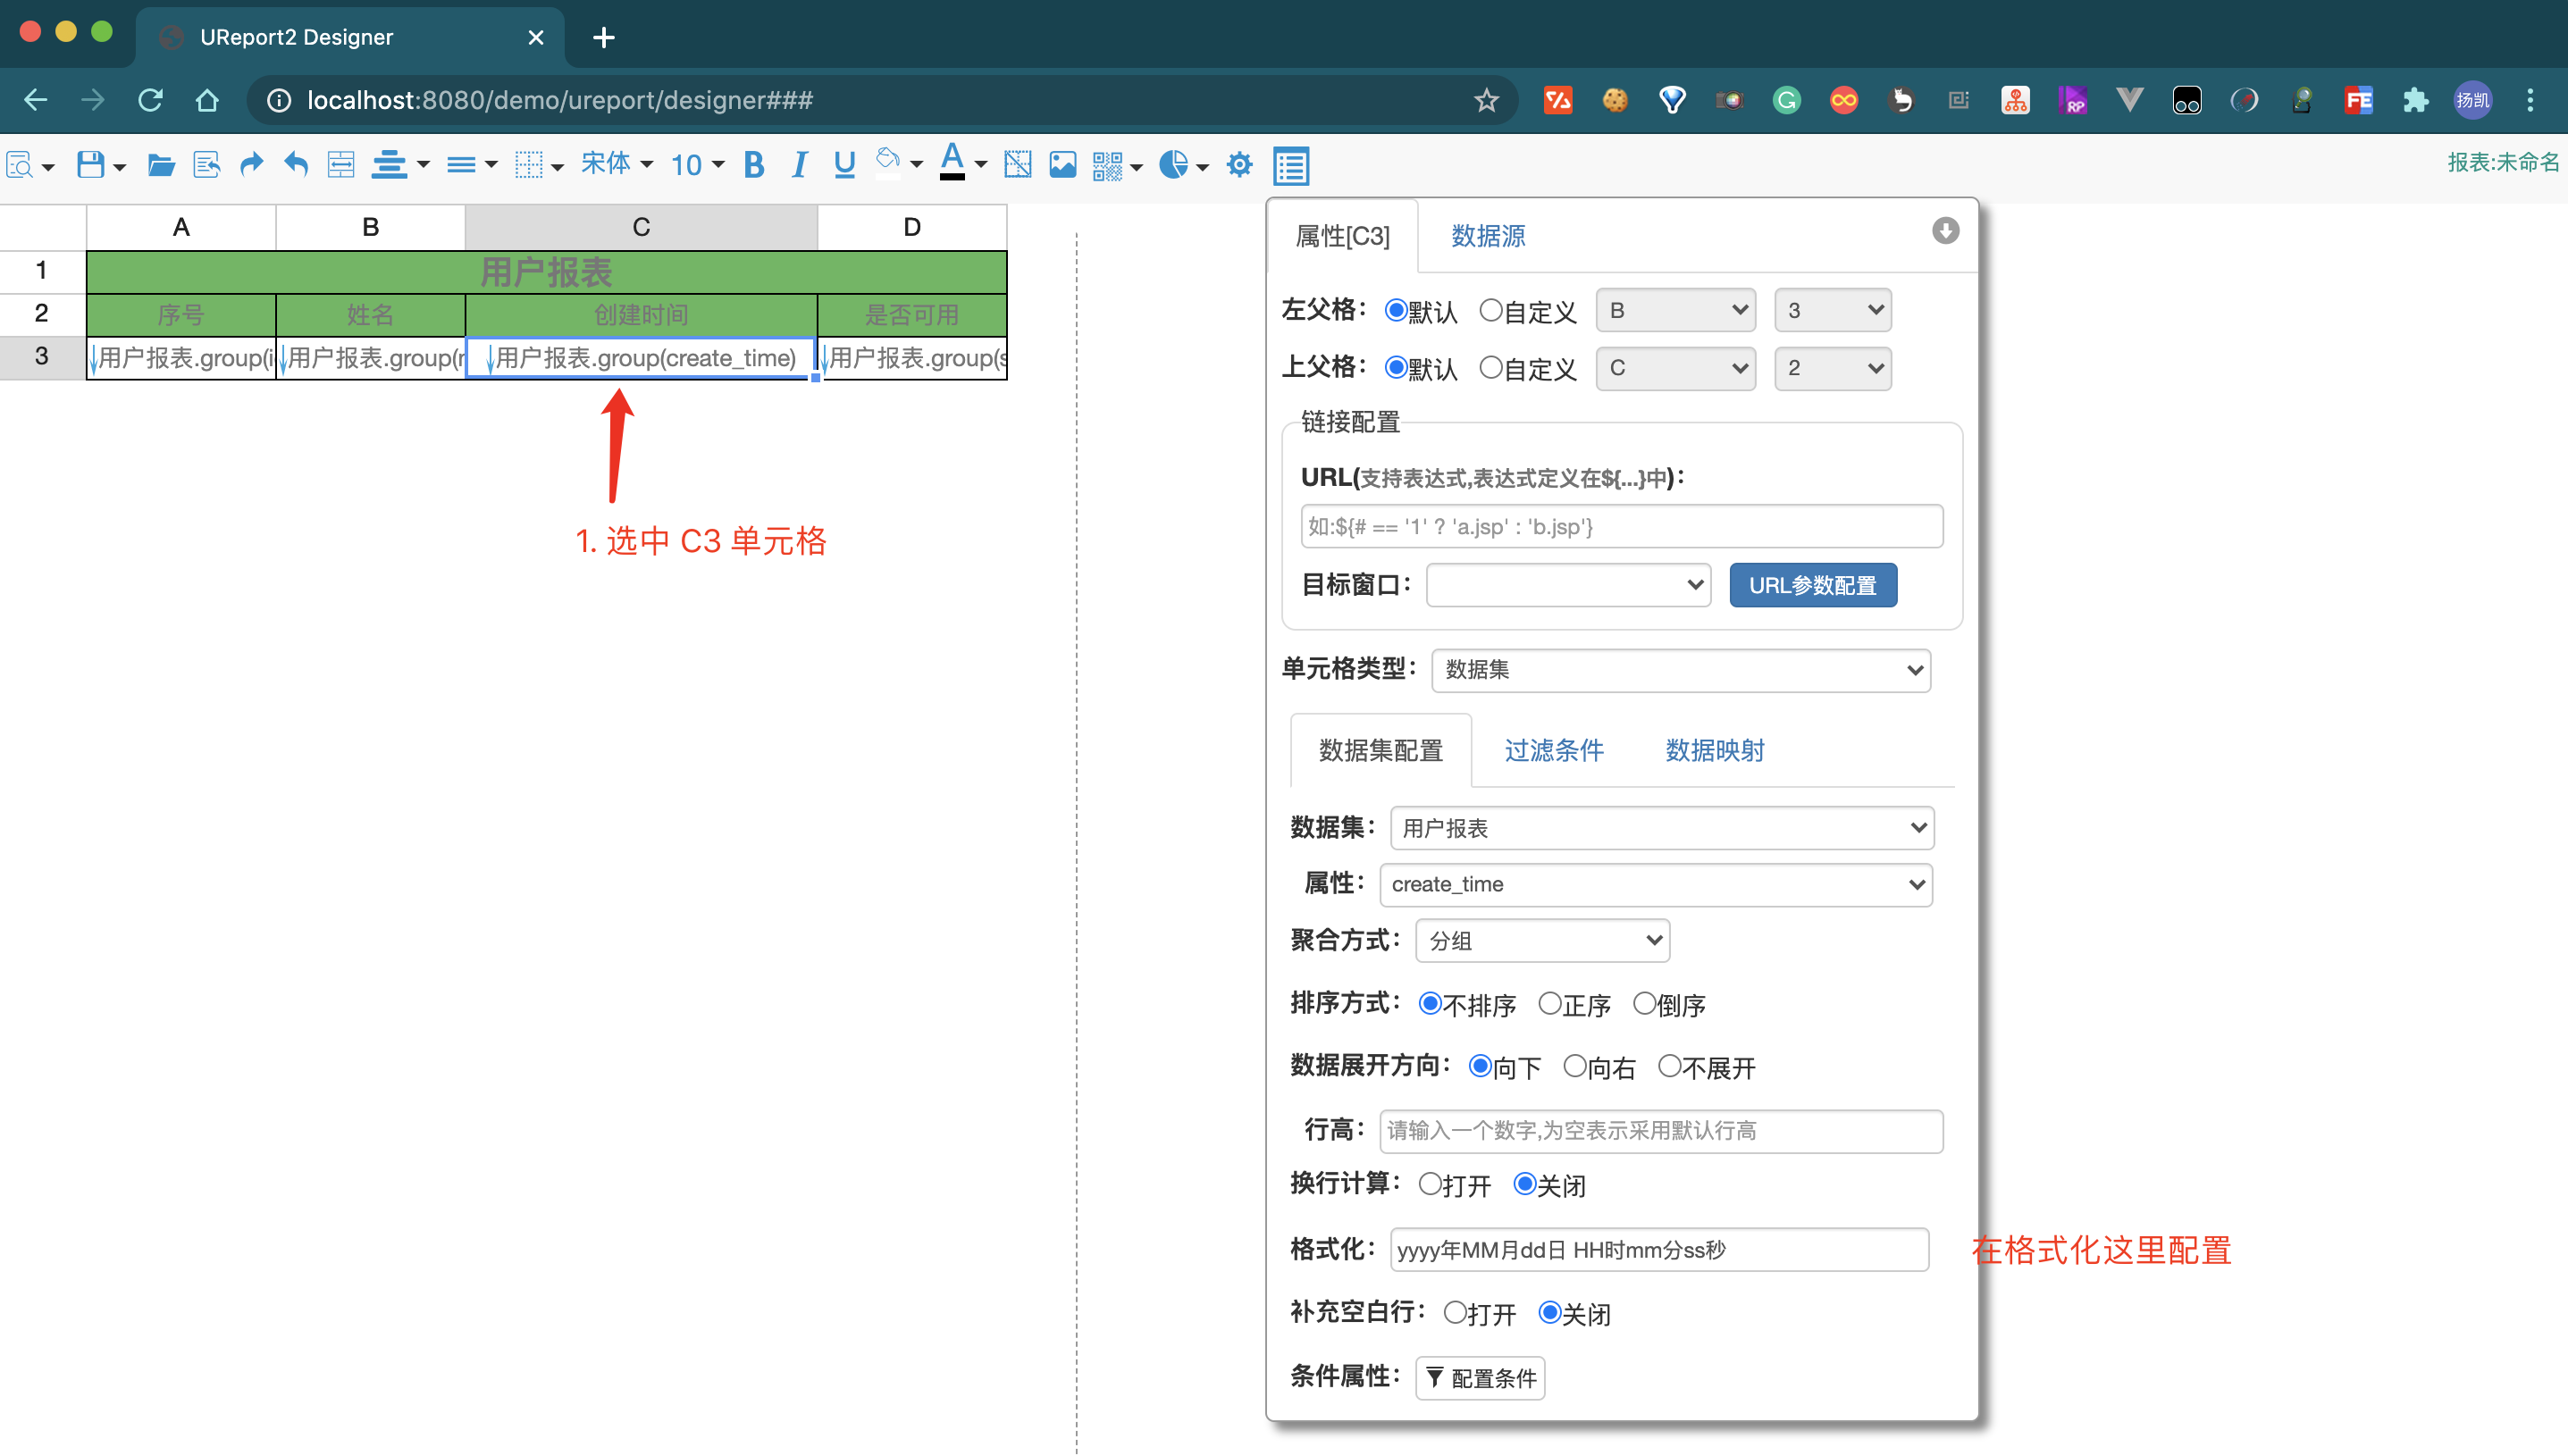
修改后,预览数据如下

##### 1.1.6.4. 保存报表设计文件
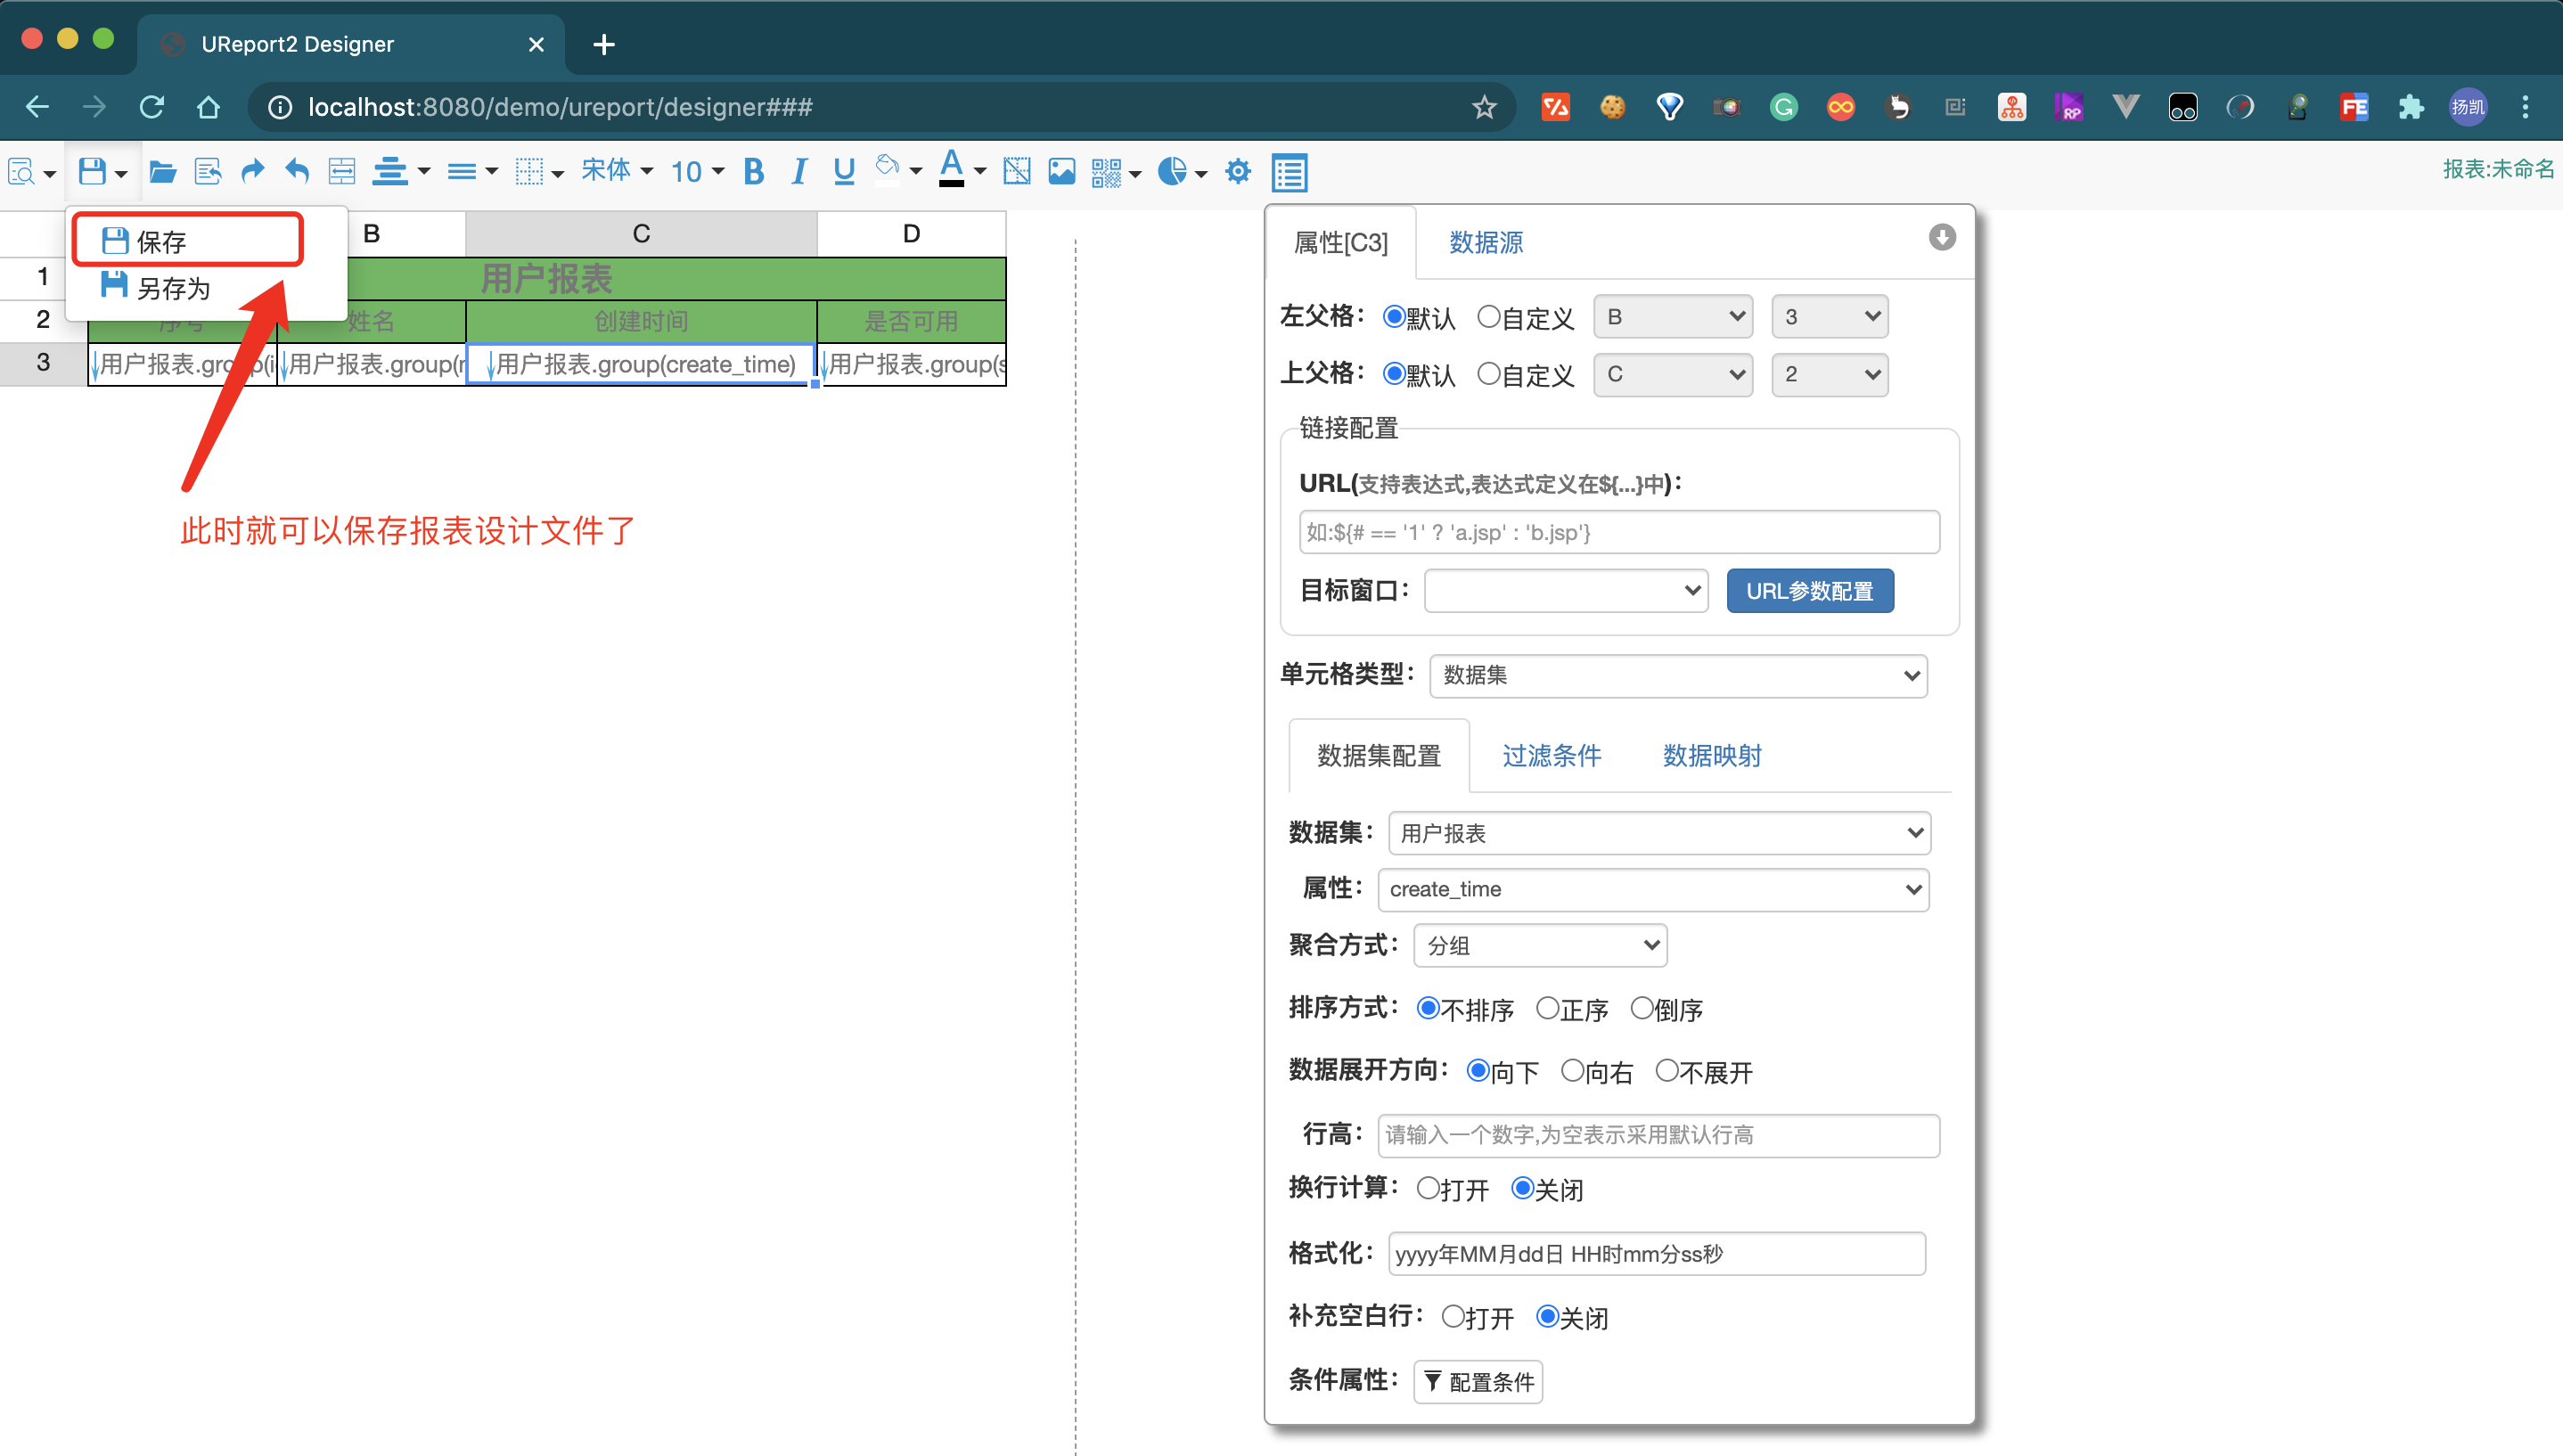
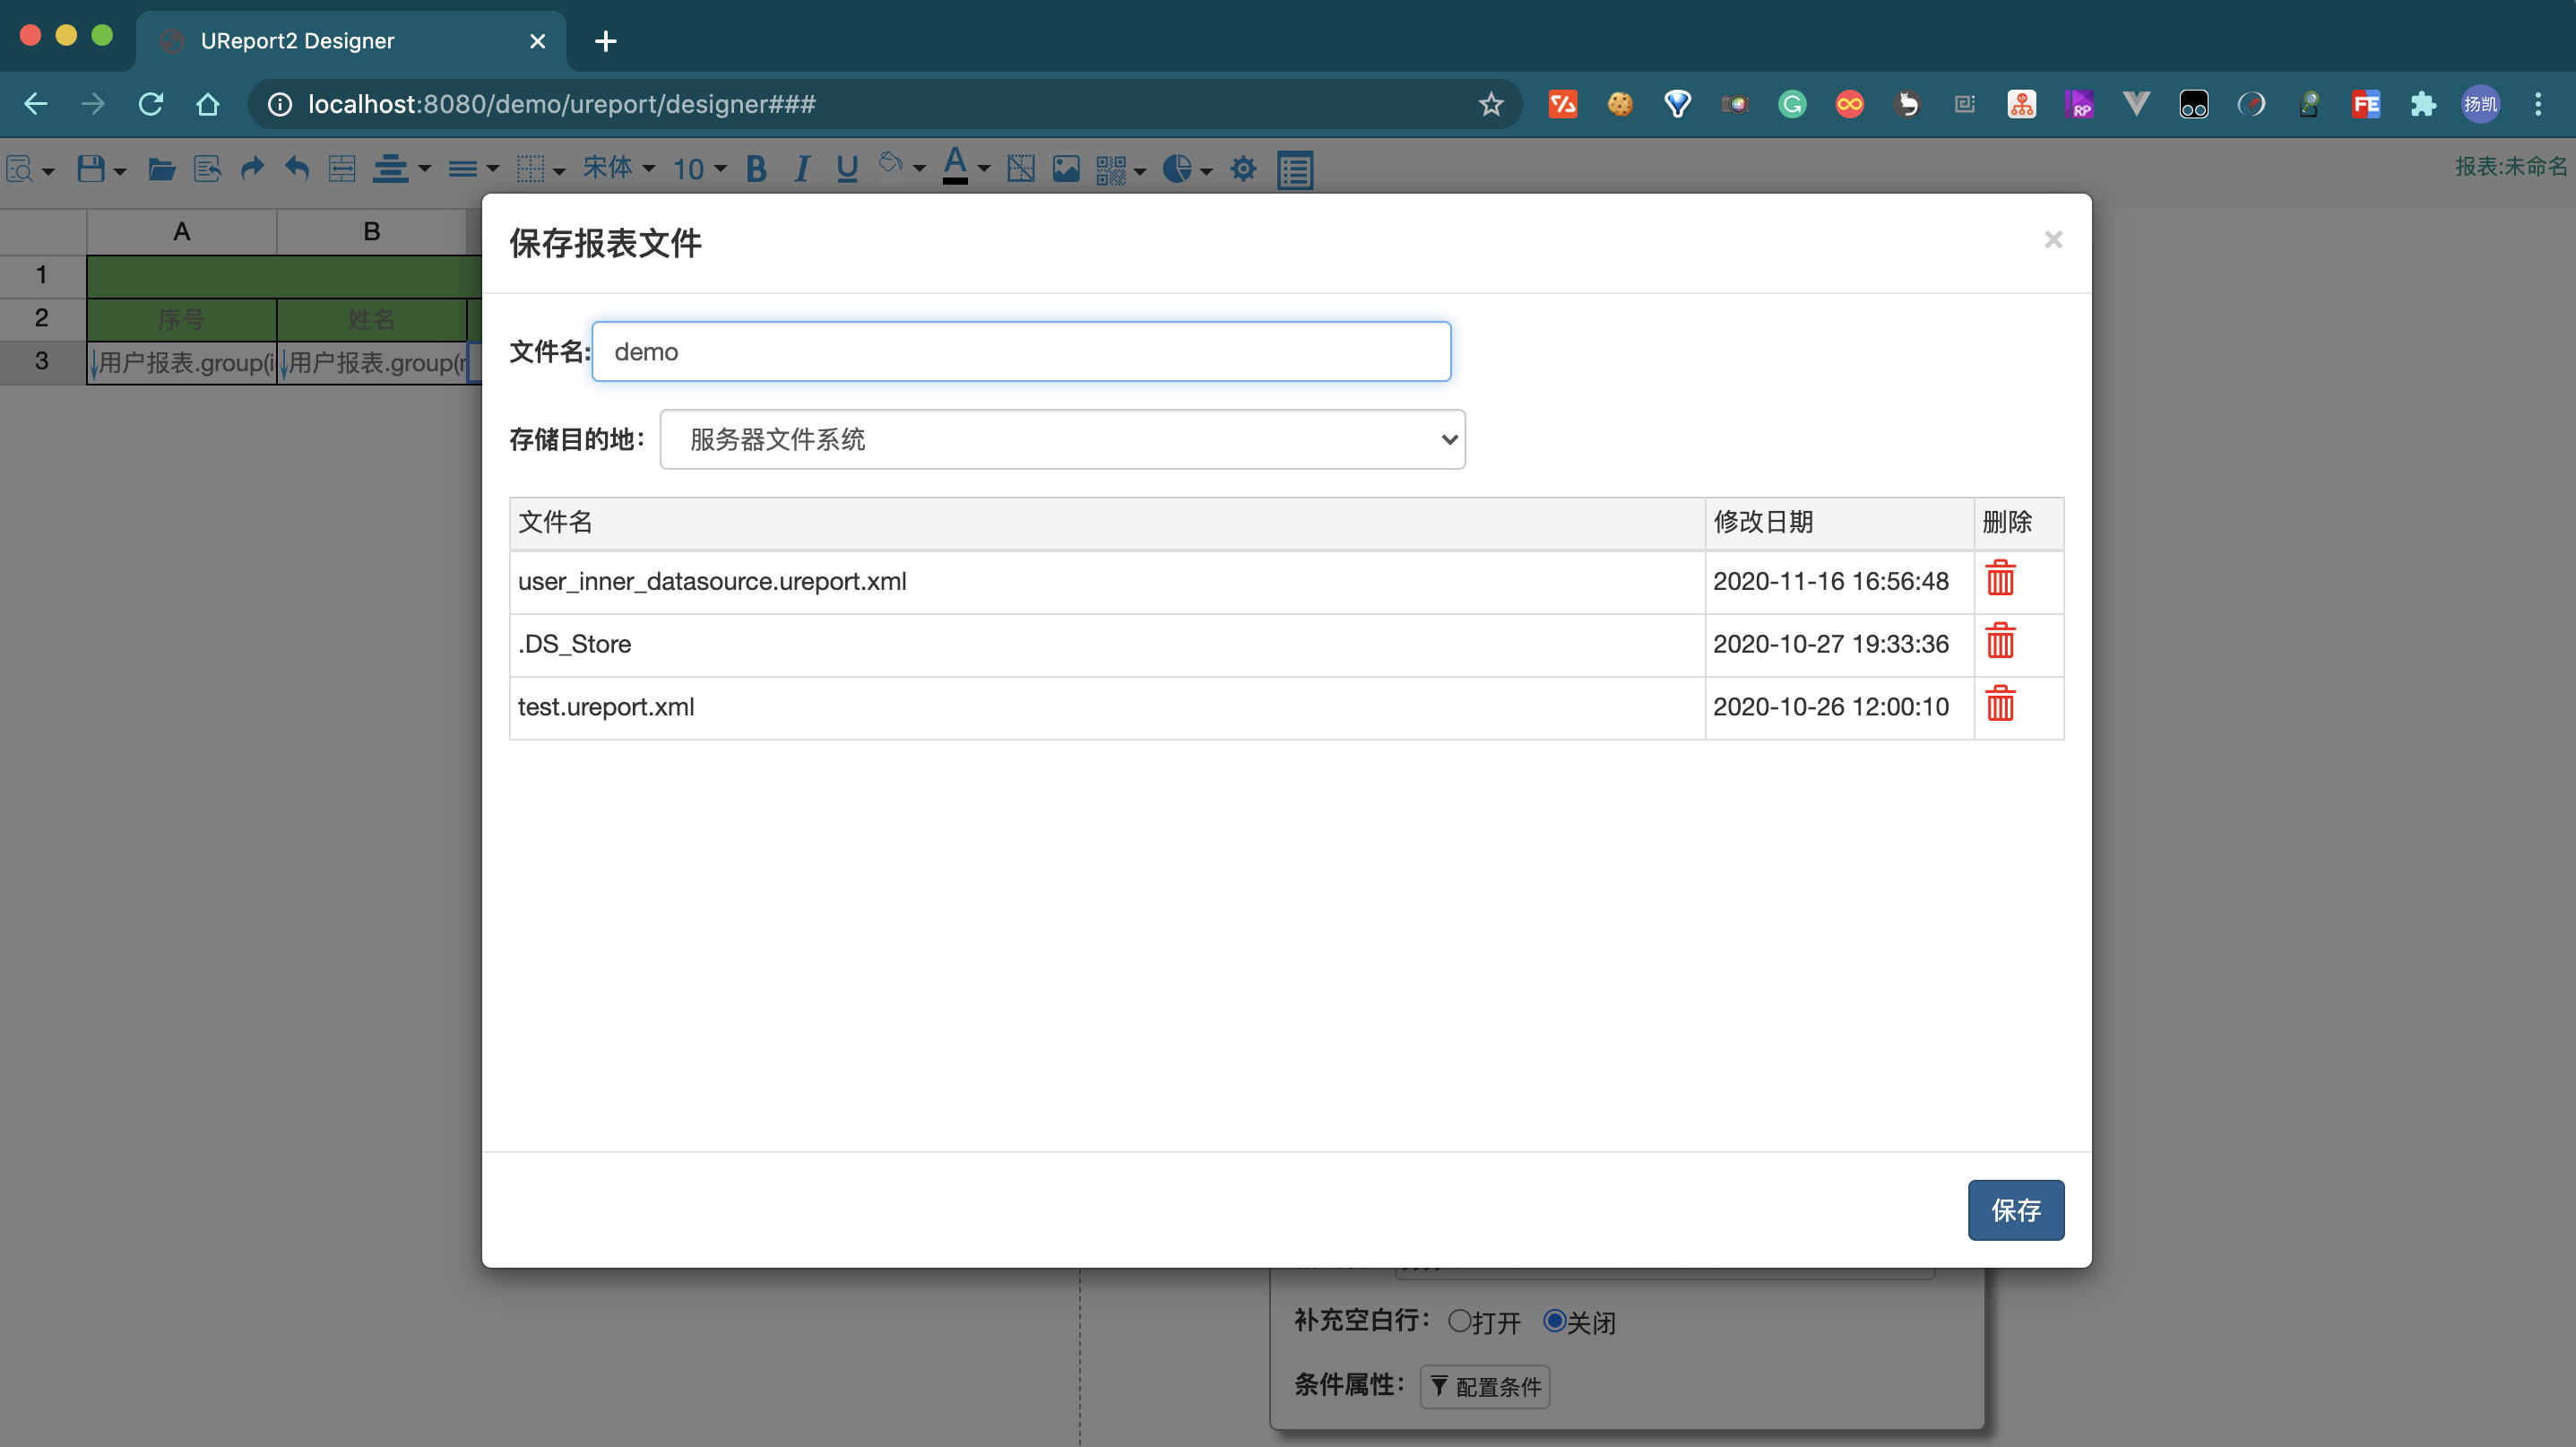
点击保存之后,你本地在 `application.yml` 文件中配置的地址就会出现一个 `demo.ureport.xml` 文件
下次可以直接通过 http://localhost:8080/demo/ureport/preview?_u=file:demo.ureport.xml 这个地址预览报表了
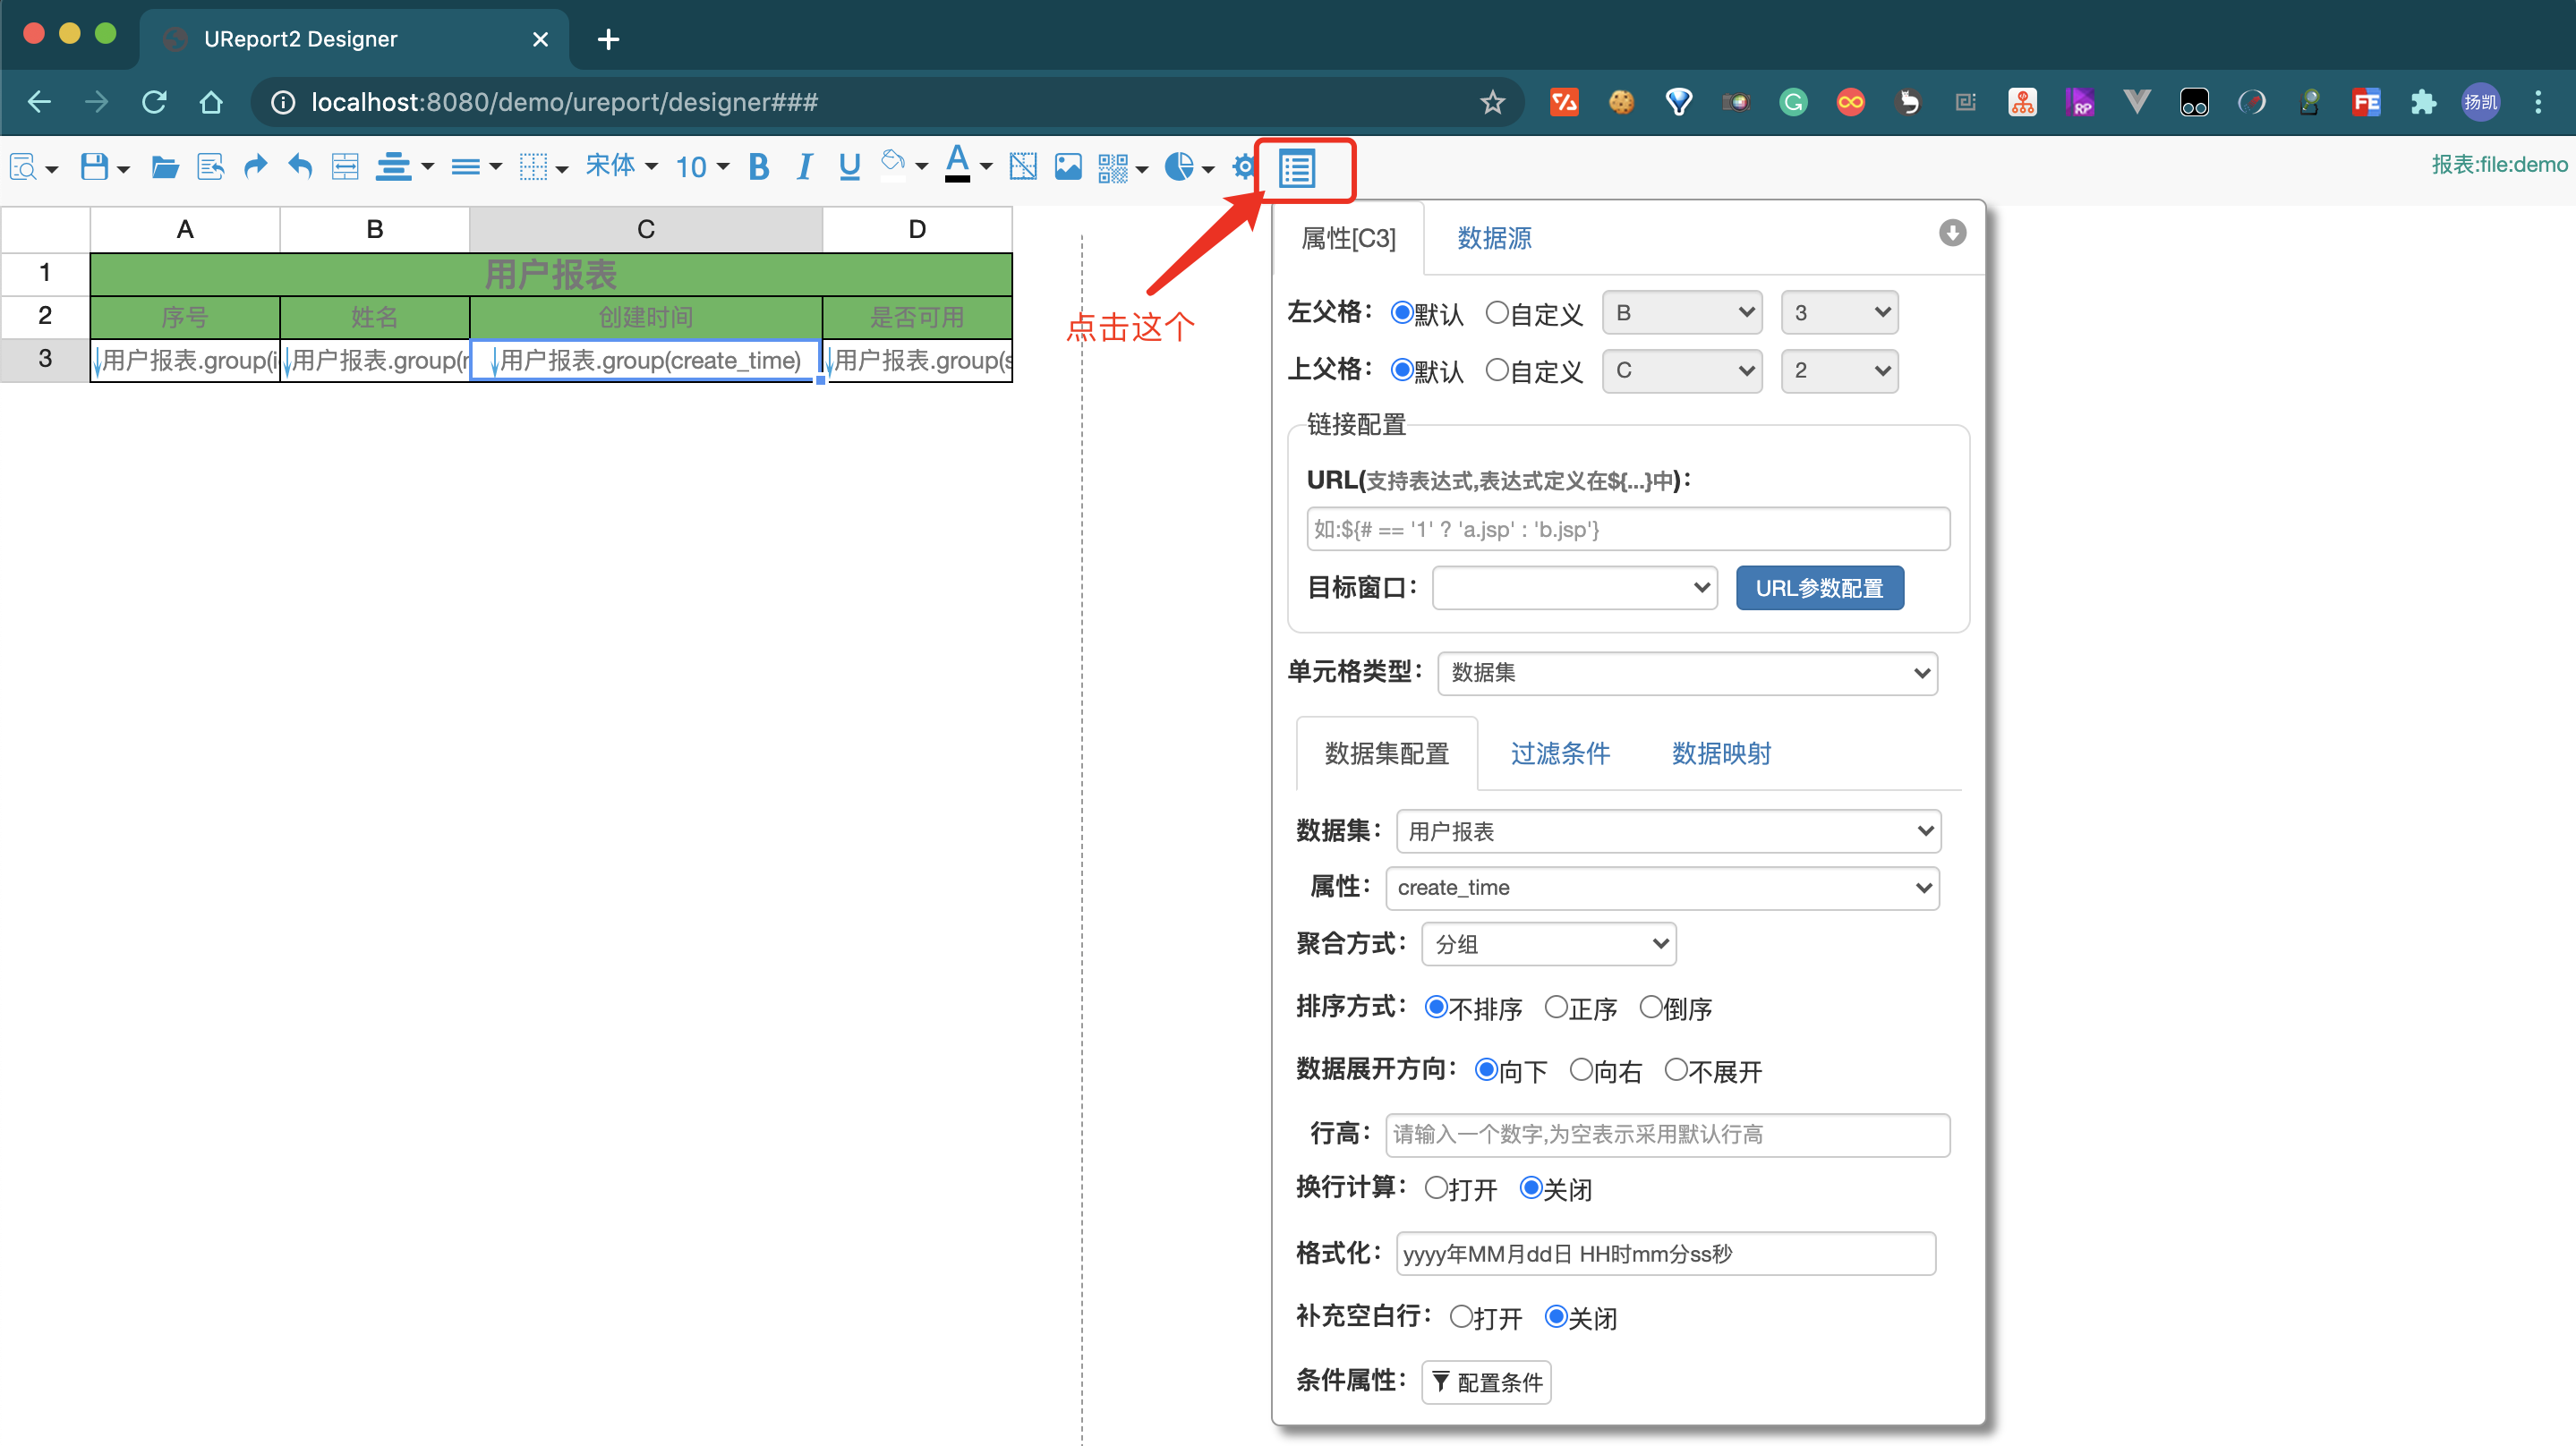
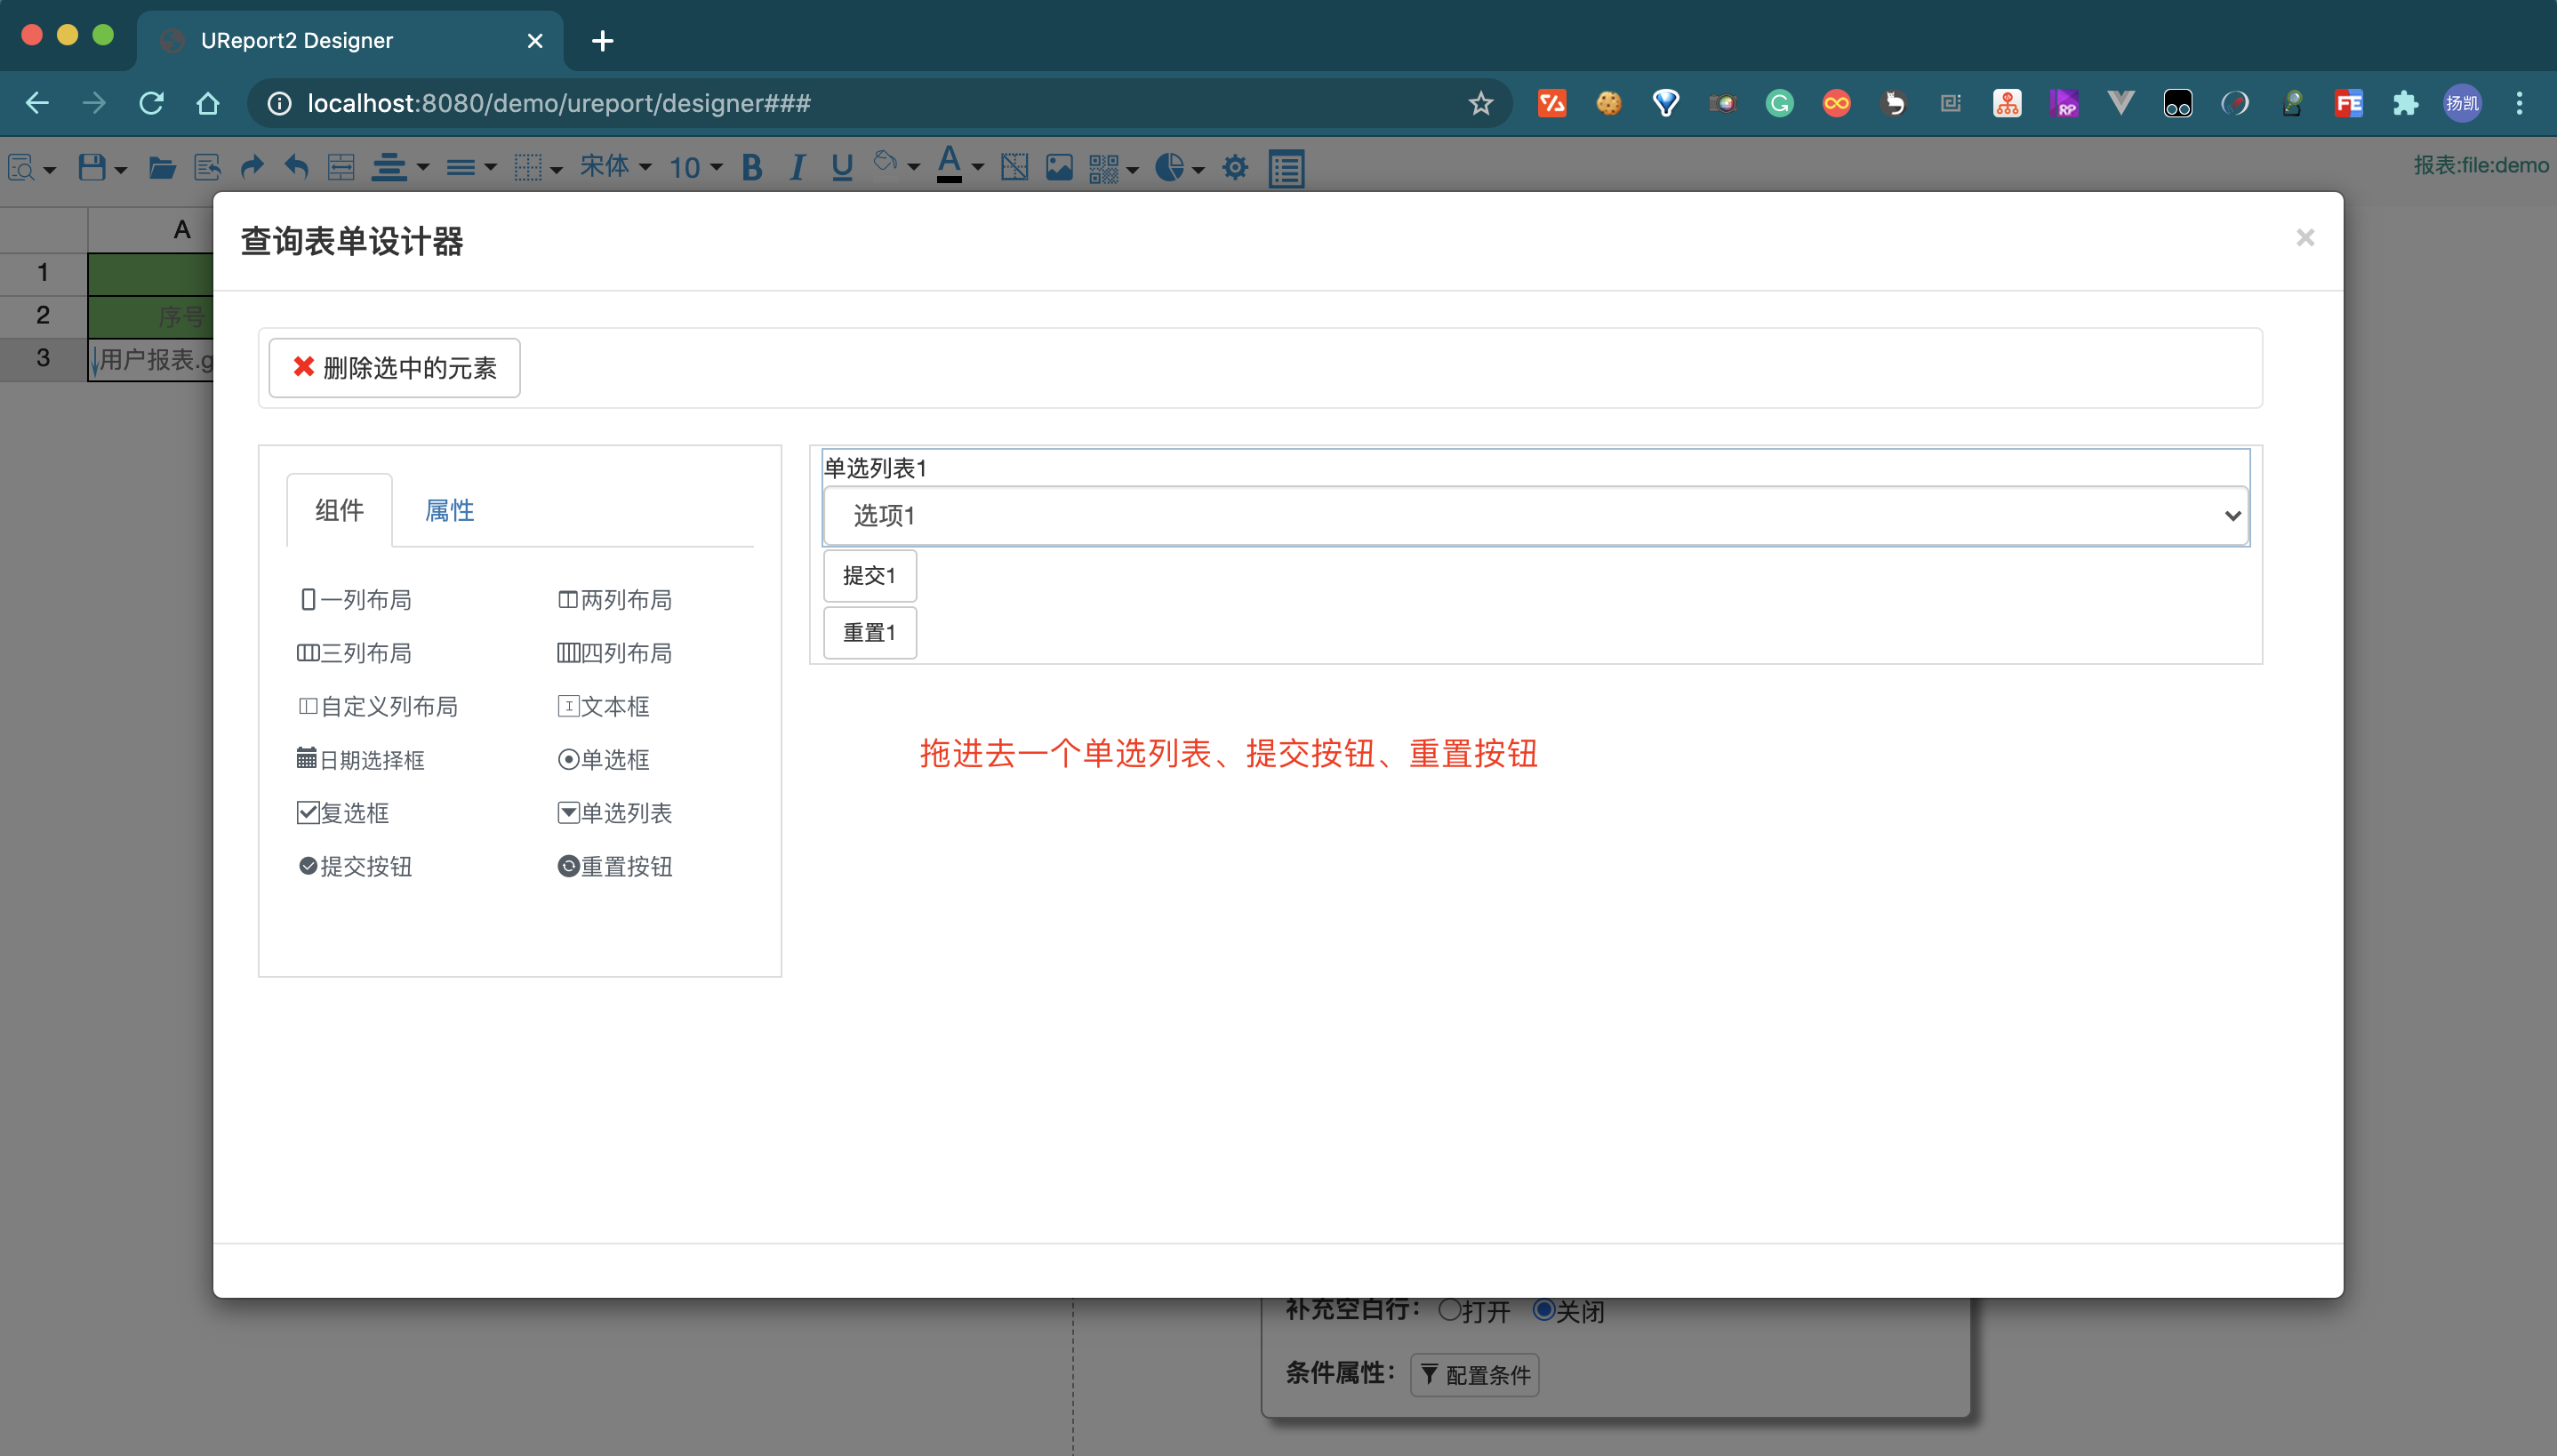
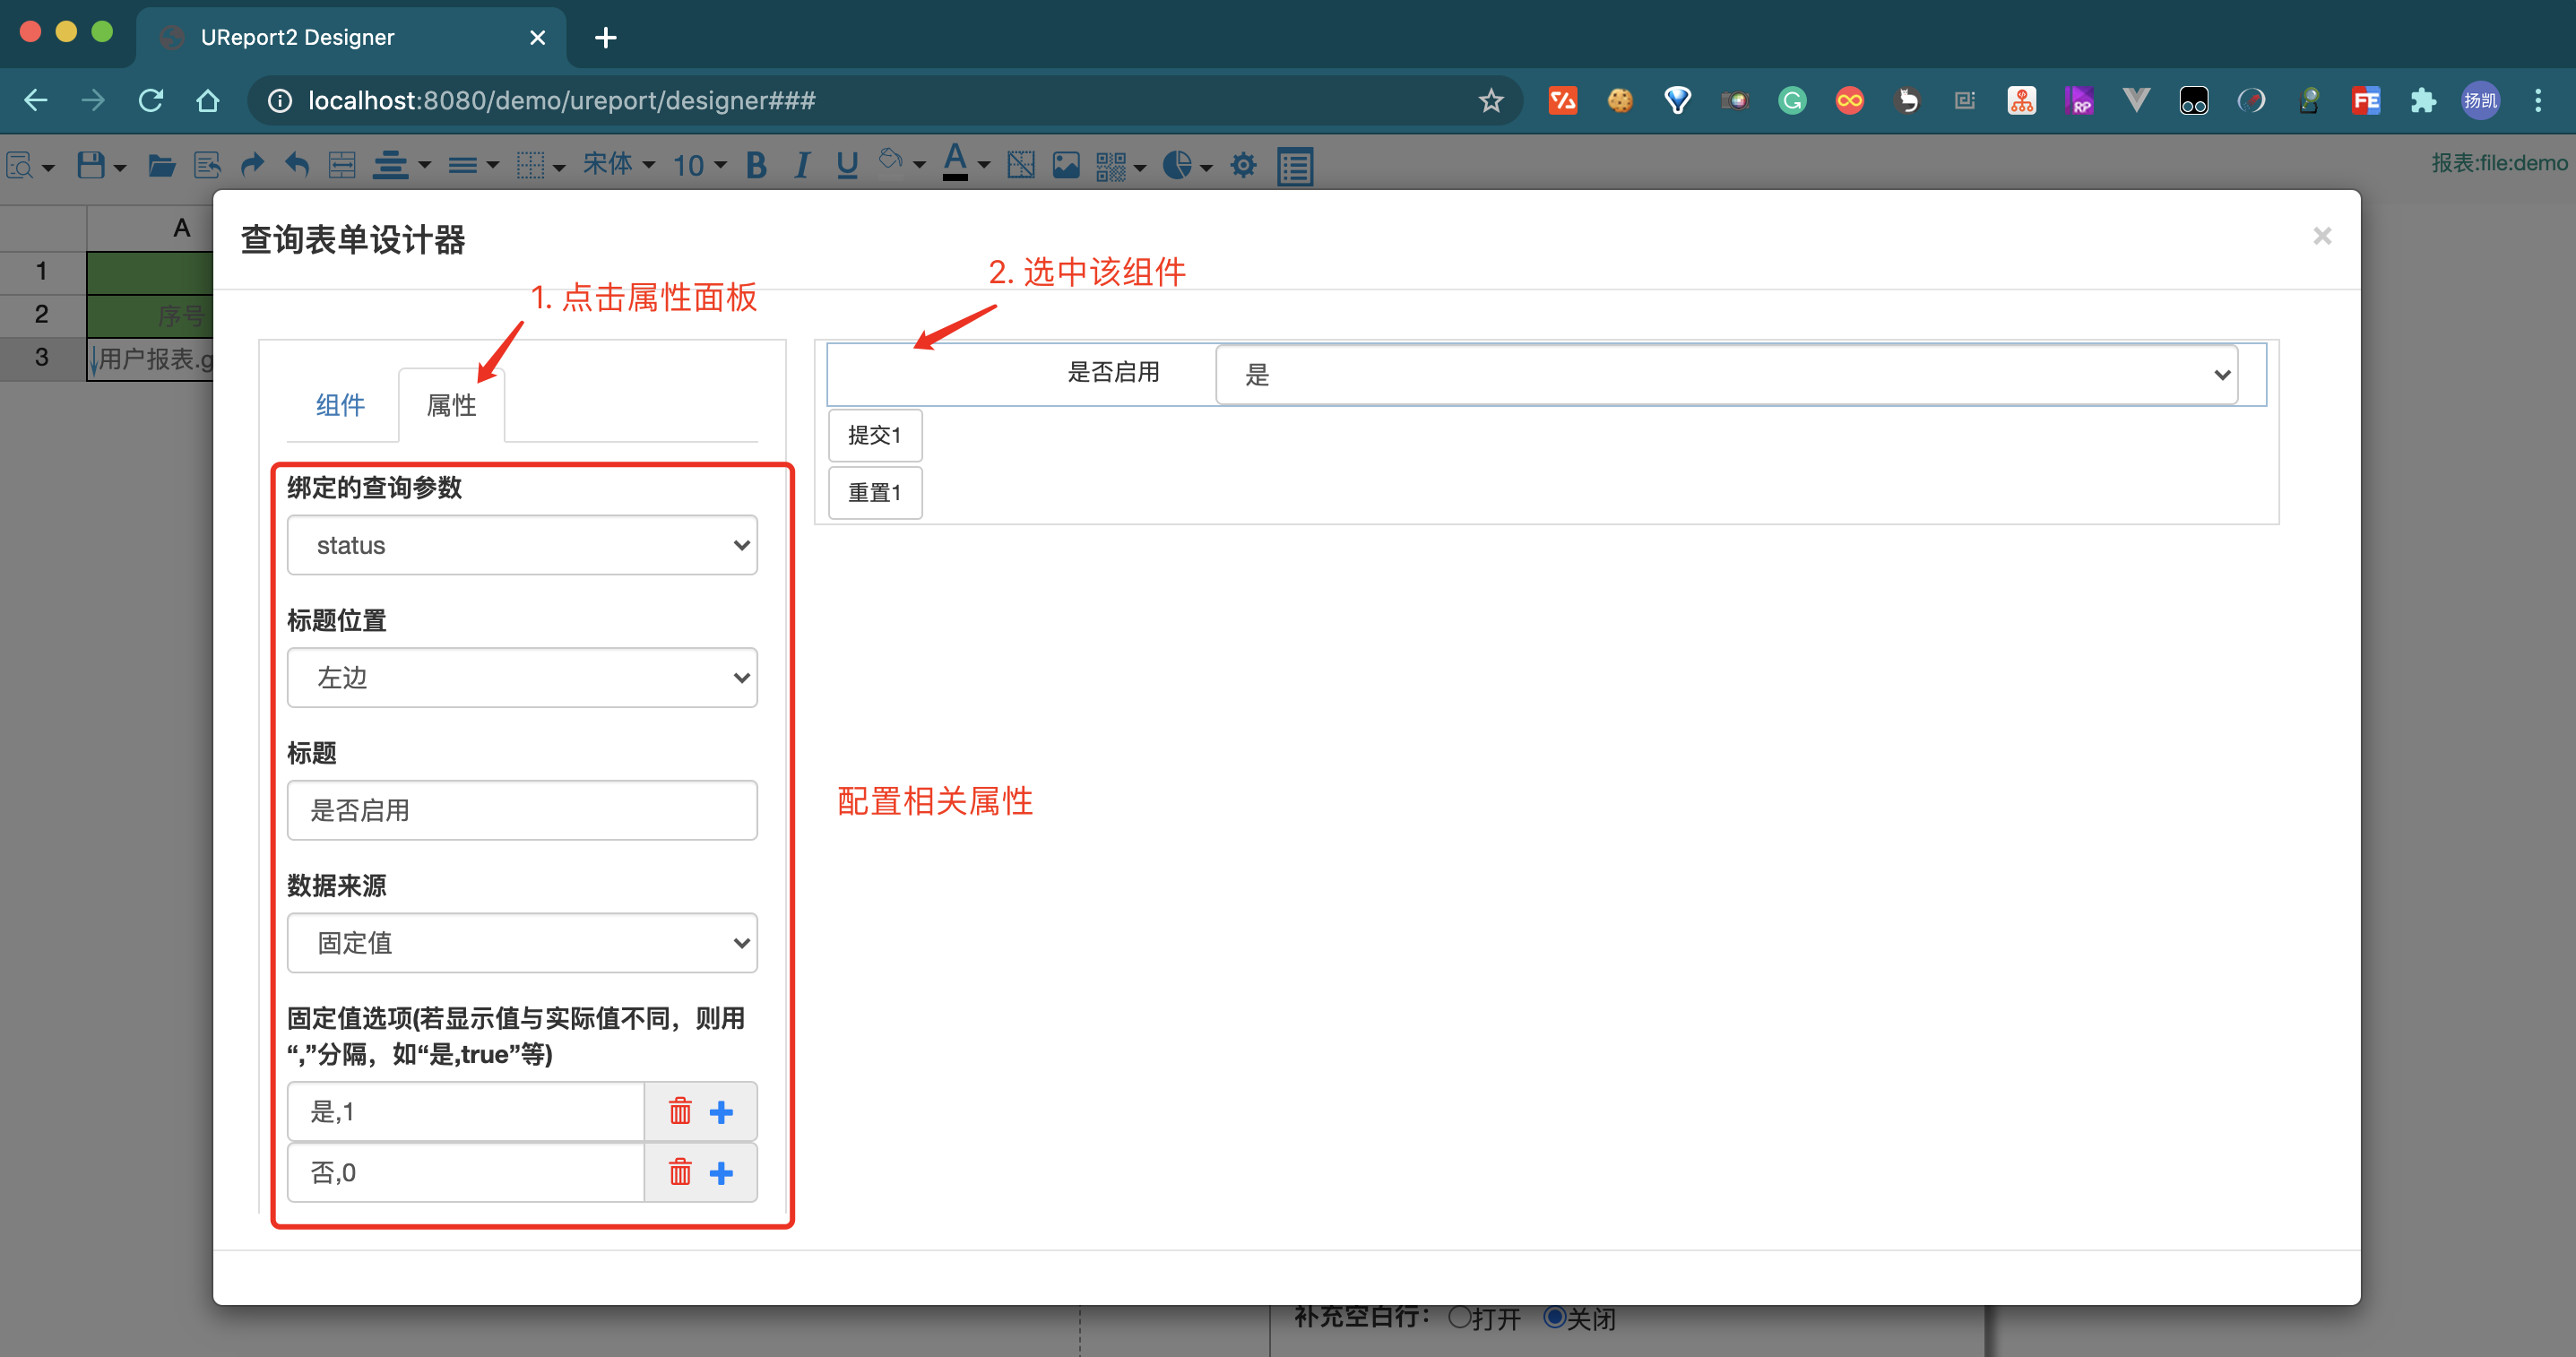
##### 1.1.6.5. 增加报表查询条件
还记得我们上面新增数据集的时候,加的条件吗?现在用起来
查询表单设计
配置查询参数
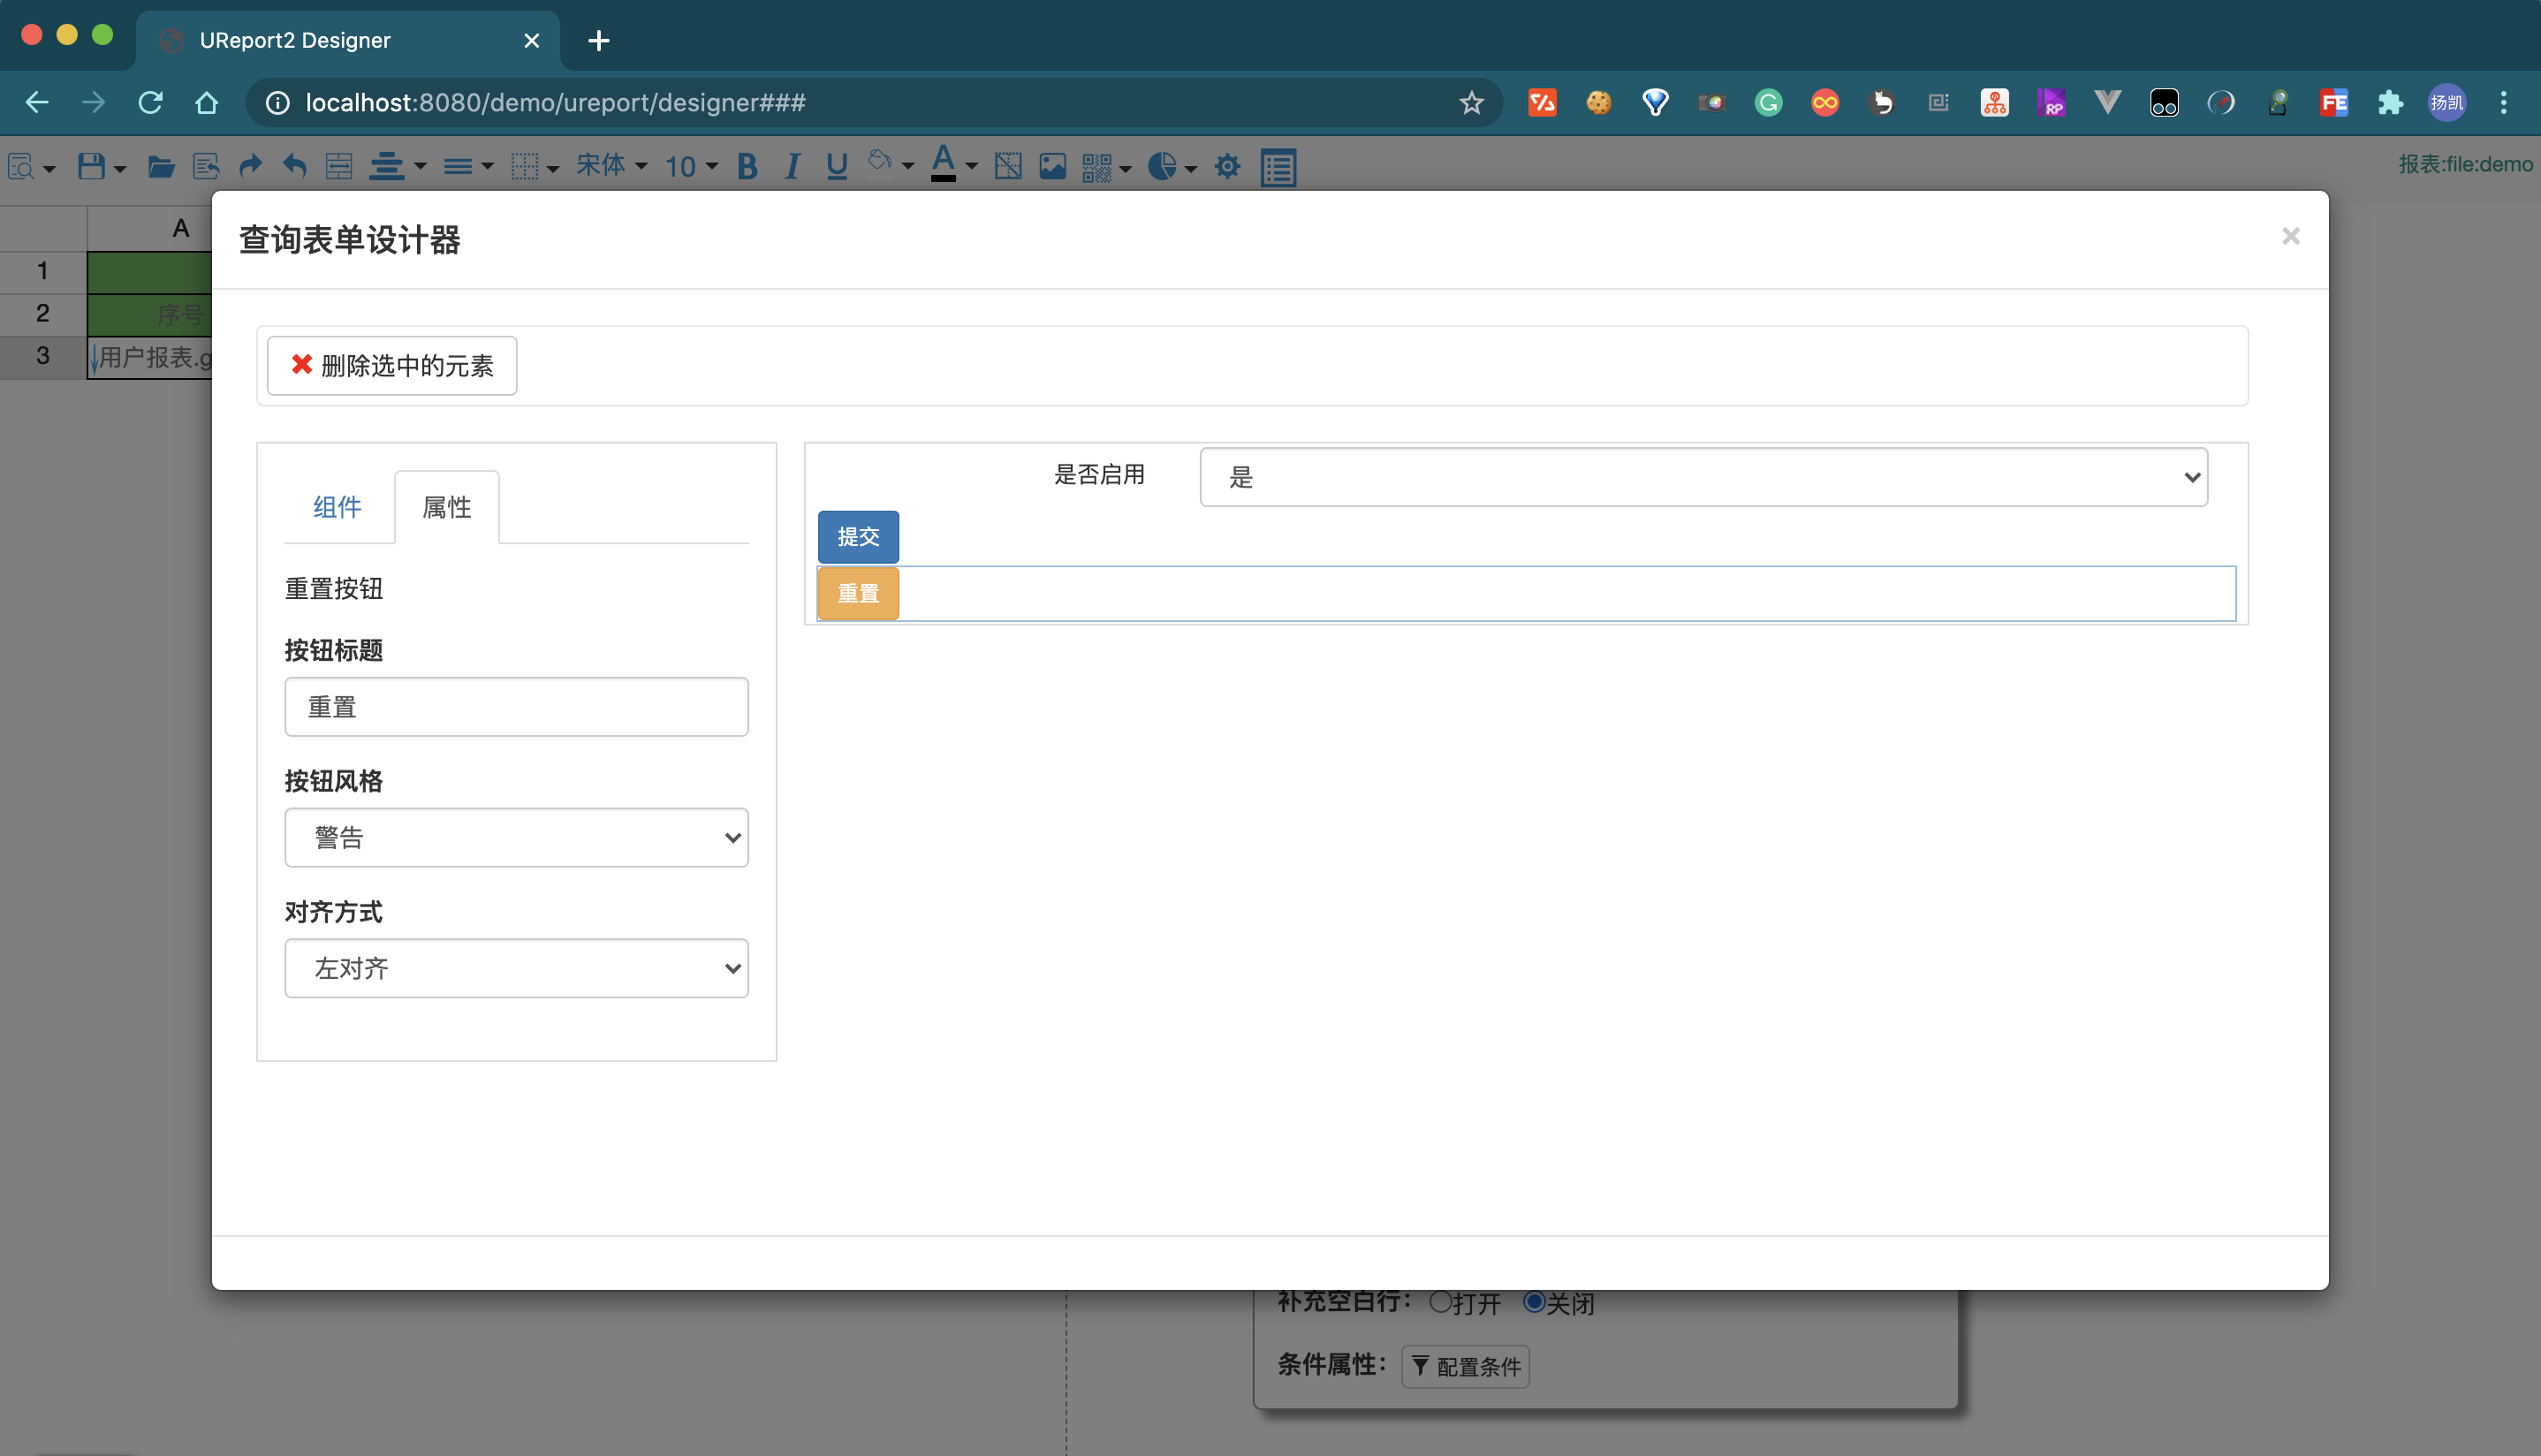
美化按钮
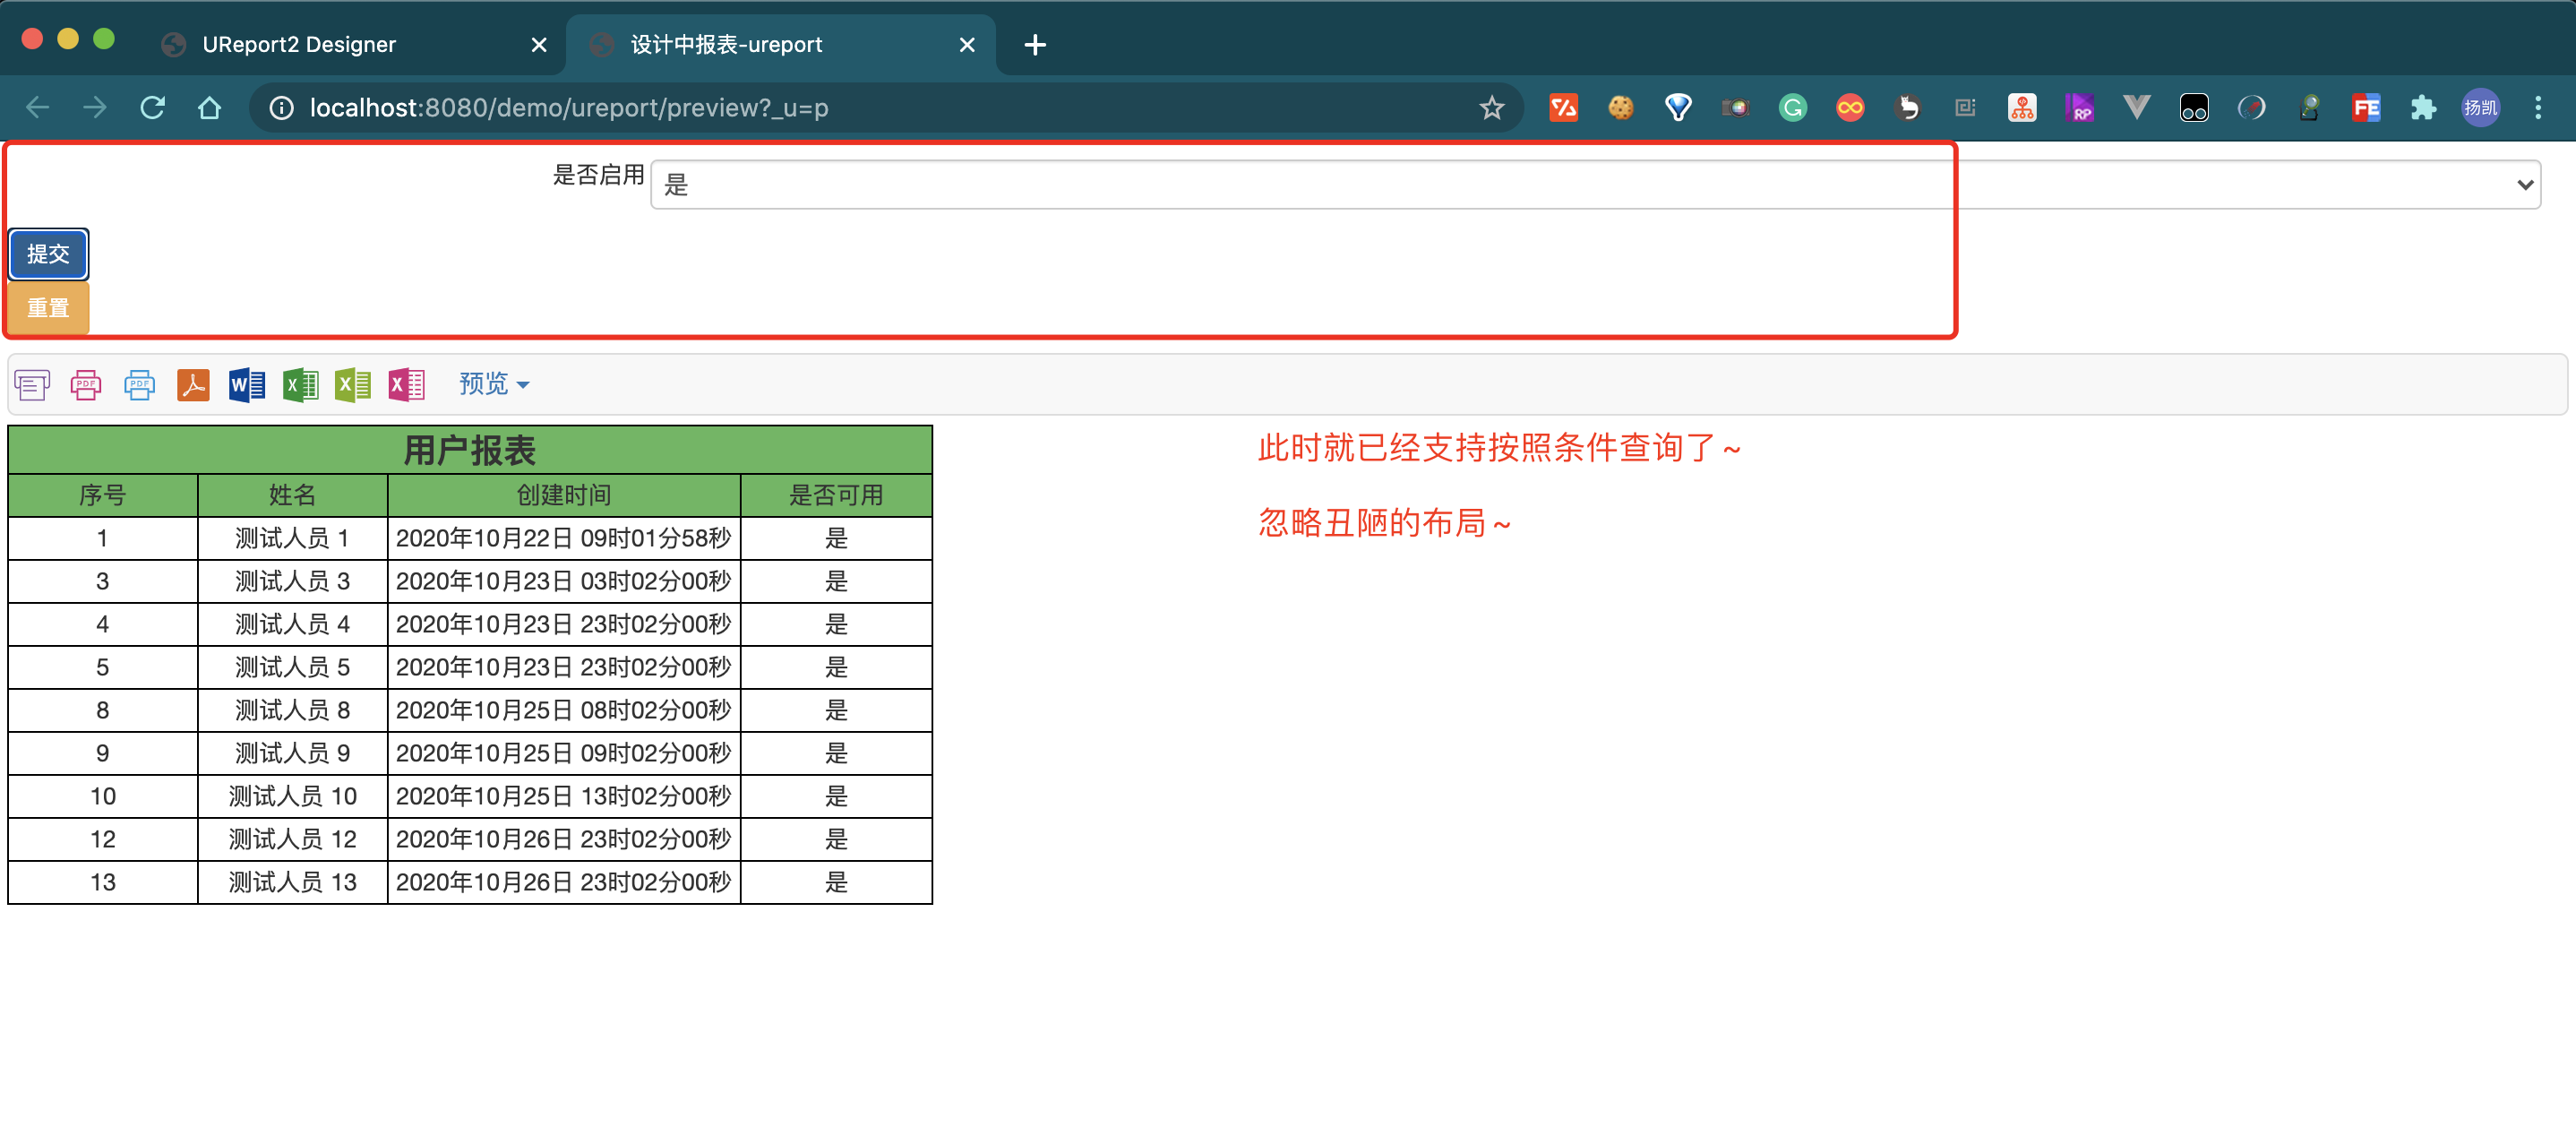
在预览一下~
### 1.2. 集群使用
如上文设计好的模板是保存在服务本机的,在集群环境中需要使用统一的文件系统存储。
#### 1.2.1. 新增依赖
```xml
com.pig4cloud.plugin
oss-spring-boot-starter
0.0.3
```
#### 1.2.2. 仅需配置云存储相关参数, 演示为minio
```yaml
oss:
access-key: lengleng
secret-key: lengleng
bucket-name: lengleng
endpoint: http://minio.pig4cloud.com
```
> 注意:这里使用的是冷冷提供的公共 minio,请勿乱用,也不保证数据的可靠性,建议小伙伴自建一个minio,或者使用阿里云 oss
## 2. 坑
Ureport2 最新版本是 `2.2.9`,挺久没更新了,存在一个坑:在报表设计页打开一个已存在的报表设计文件时,可能会出现无法预览的情况,参考 ISSUE:https://github.com/youseries/ureport/issues/393

解决办法:

条件表达式变成 `undefined`,这里需要注意的是,我们的 xml 文件是正常的,只不过是 ureport 解析的时候出错了。
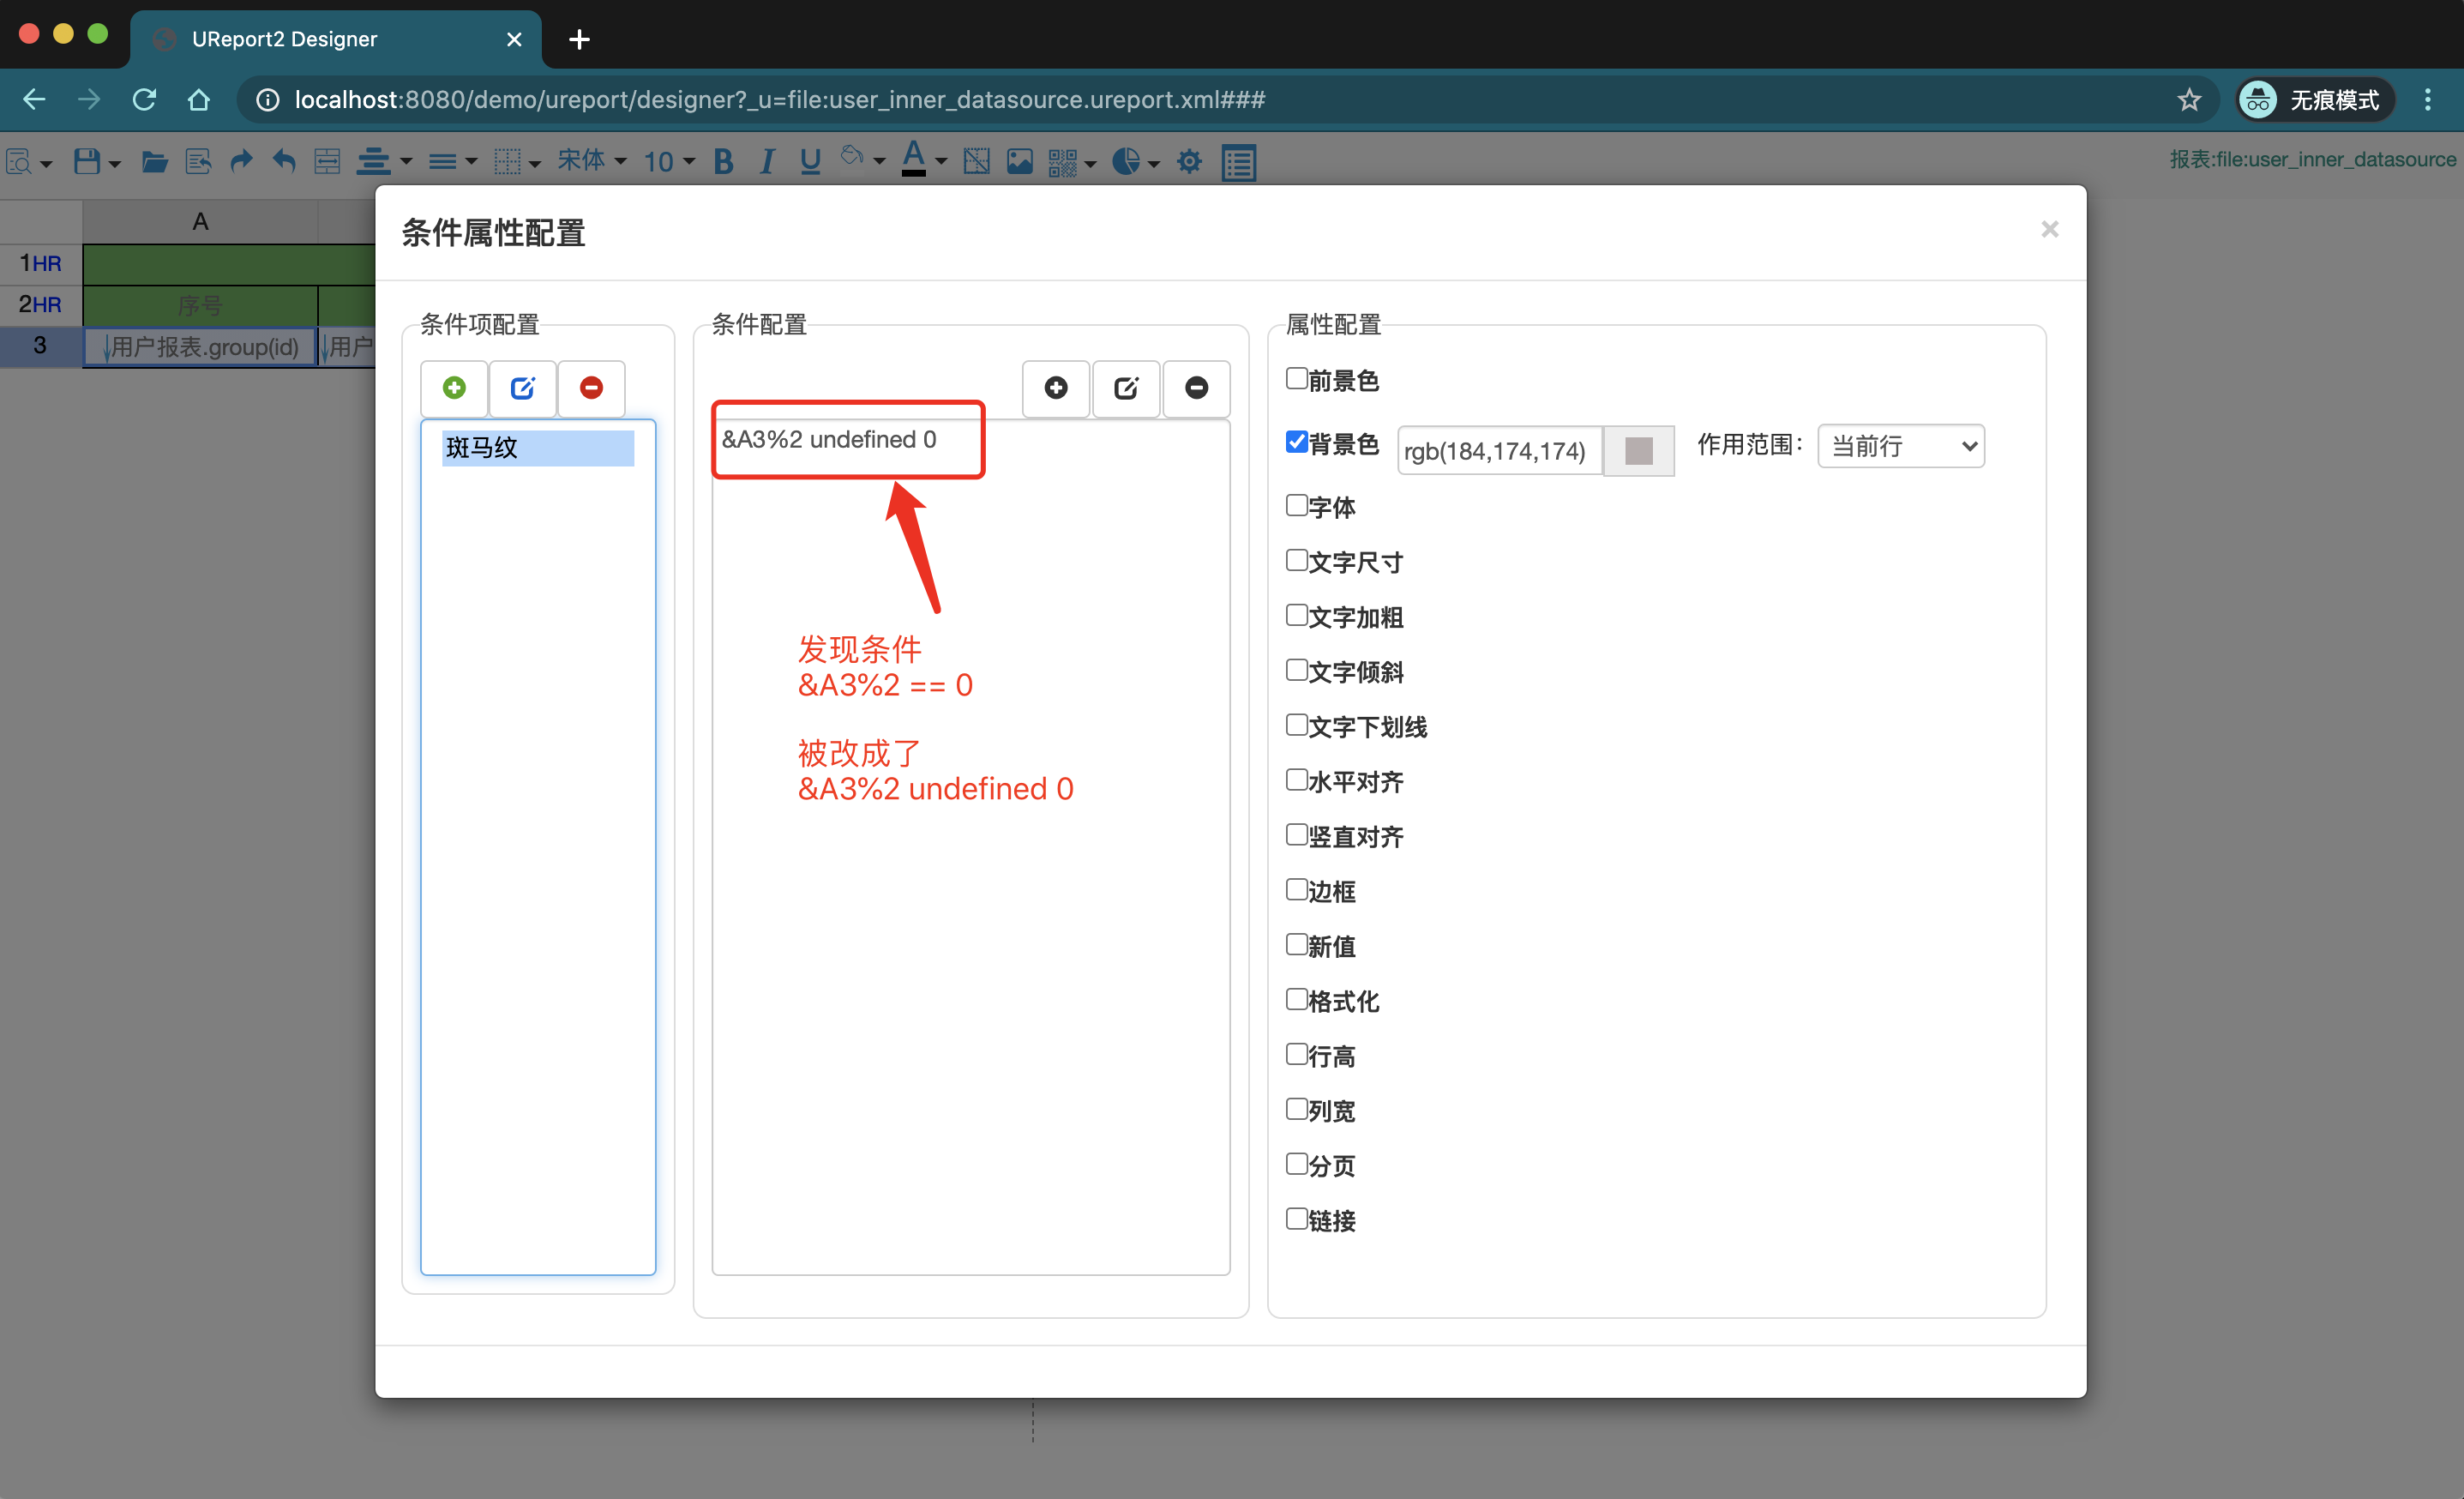
点击编辑,重新选择表达式即可解决

再次尝试预览
> 注意:该可能性出现在报表设计文件中使用了条件属性的情况下,修复方法就是打开文件之后,重新配置条件属性,此处是坑,小伙伴使用时注意下就好,最好的方法就是避免使用条件属性。
## 3. 感谢
再次感谢 [@冷冷](https://github.com/lltx) 提供的 starter 及 PR,因个人操作失误,PR 未被合并,抱歉~
## 4. 参考
- [ureport2 使用文档](https://www.w3cschool.cn/ureport)
- [ureport-spring-boot-starter](https://github.com/pig-mesh/ureport-spring-boot-starter) UReport2 的 spring boot 封装
- [oss-spring-boot-starter](https://github.com/pig-mesh/oss-spring-boot-starter) 兼容所有 S3 协议的分布式文件存储系统